TrustPulse makes it easy to customize when and where notifications will show for site visitors.
In this article you will learn how to use the TrustPulse Display Rules to control who sees the captured notifications and just the right time.
Before You Start
Here are some things to know before you begin:
- Learn how to get started with TrustPulse using these guides.
- Learn how to add, edit and delete a site on TrustPulse with this guide.
- Before getting started, you’ll need to either create a new campaign or edit an existing campaign. Check this guide for more details.
- Some of these features are available based on the campaign type you choose or the TrustPulse Plan you are on.
Modify Display Rules
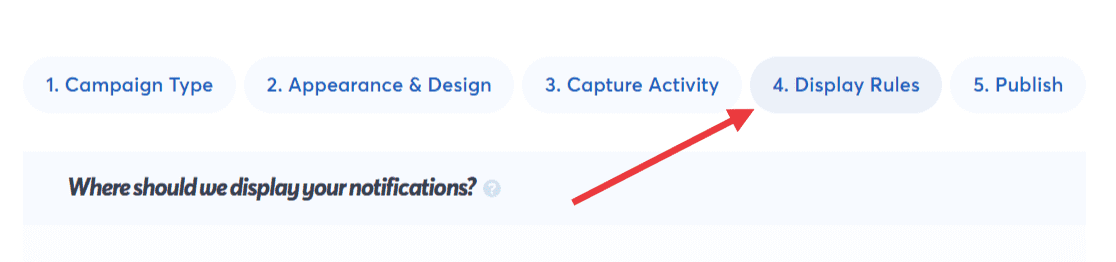
1. Navigate to the Display Rules Tab by clicking directly on 4. Display Rules.
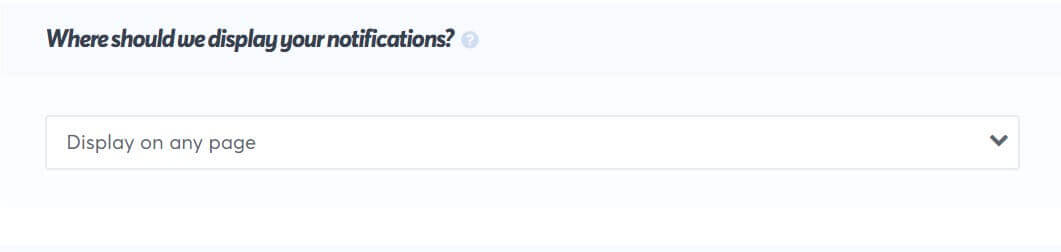
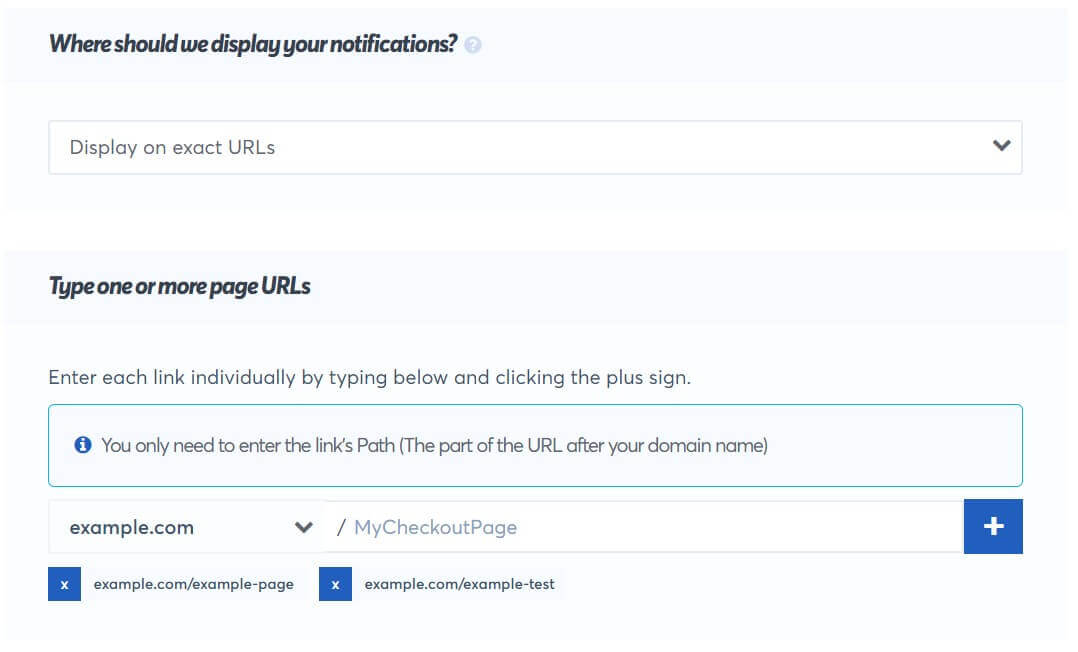
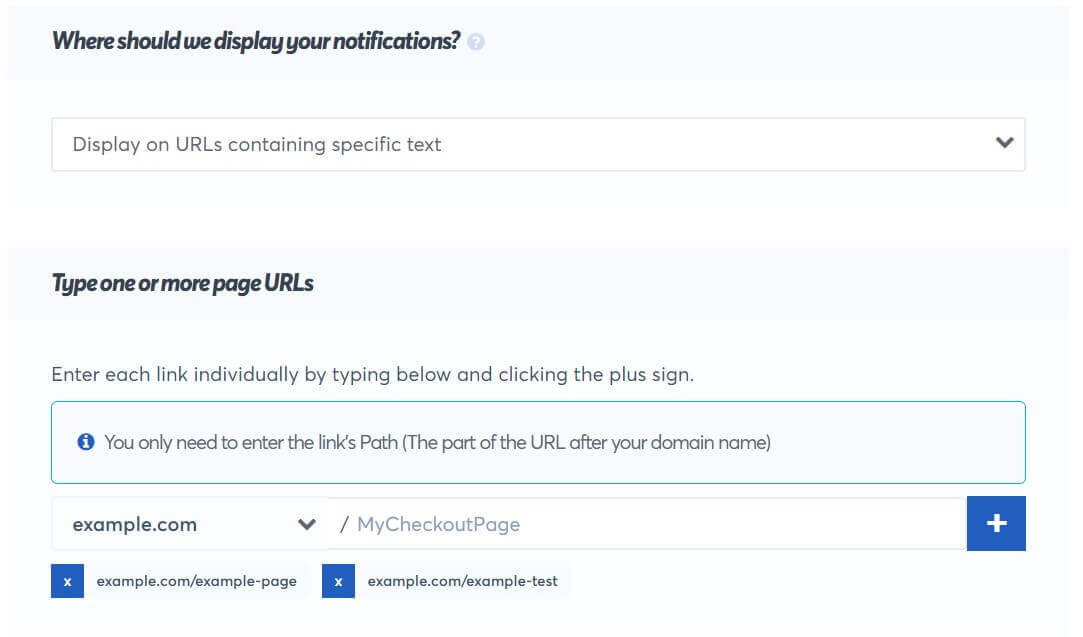
2. From the Where should we display notifications? option, you can choose the following:
a. Display on any page – This means that your TrustPulse Campaign notifications would be displayed on any page of your website where you have added the TrustPulse embed code.
b. Display on exact URLs – This means your TrustPulse campaign would show on the exact URLs stated in the Type one or more page URLs field that appears after selecting this option. Please note that URLs are case-sensitive.
c. Display on URLs containing specific text – This means your TrustPulse campaign would be displayed on pages that have a particular text in the address.
3. Next, you alter the Notification Settings to suit how, when, and where you want the notifications to appear.
a. Delay (in seconds) before showing first notification – This is the amount of time after your page has completely loaded to a user before the notification will appear. The default is 3 seconds.

b. Display Duration (in seconds) – This is the amount of time a single notification would be displayed. The default is set to 7 seconds.

c. Number of days to aggregate – The number you choose here would determine how far back you want TrustPulse to go to select notifications to display. NOTE: This option is not available for Recent Activity and Action Message Campaign Type.

d. Load Notifications on Mobile – This is toggled on by default. You need to be on a Plus plan or higher to toggle it off. It allows people who visit your site from mobile devices to see your notifications.

e. Loop Notifications – This means that the same visitor, if they stay on your site for a long period, would see all the notifications go from newest to oldest and start all over again in that order. This feature is toggled off by default, meaning your website visitors would see each generated notification once. You need to be on a Pro plan or higher to toggle it on.

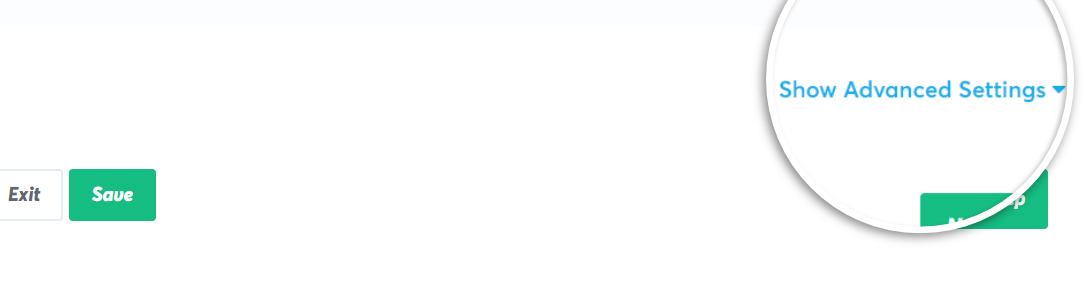
f. Next, click the Show Advanced Settings Toggle to open Advanced settings.
g. Permanently Hide when Closed – This means when a user clicks on the close notification button, they would not see the notifications display on subsequent page loads. This is toggled off by default.

h. Minimum Activity before displaying – This is the number of captures that must happen before any of these notifications will show. It also applies to On-Fire or Analytics types to prevent showing a single count below a specific number. The default figure is zero which means that once the first notification is generated, it should show to site users immediately.

i. Order Priority – This allows you to define a priority system for your different notifications that are captured and show from multiple campaigns. The notifications are grouped and shown by priority from lowest to highest. By default Recent Activity campaigns have a priority of 10 while the others are lower so they can show before the stream of activity notifications.

The display settings of your TrustPulse campaign are now set. You can go ahead to publish or save the changes that have been made.
If you haven’t gotten started with social proof then supercharge your website with TrustPulse today!