Have you recently purchased TrustPulse but you aren’t sure how to get started? Have you already created a campaign, but now you need to make some edits?
This guide will show you how to create or edit a campaign in TrustPulse.
Create a Campaign
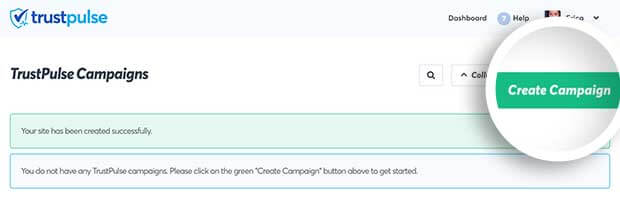
To create a new campaign in TrustPulse, go to your Dashboard screen and select the Create Campaign button.
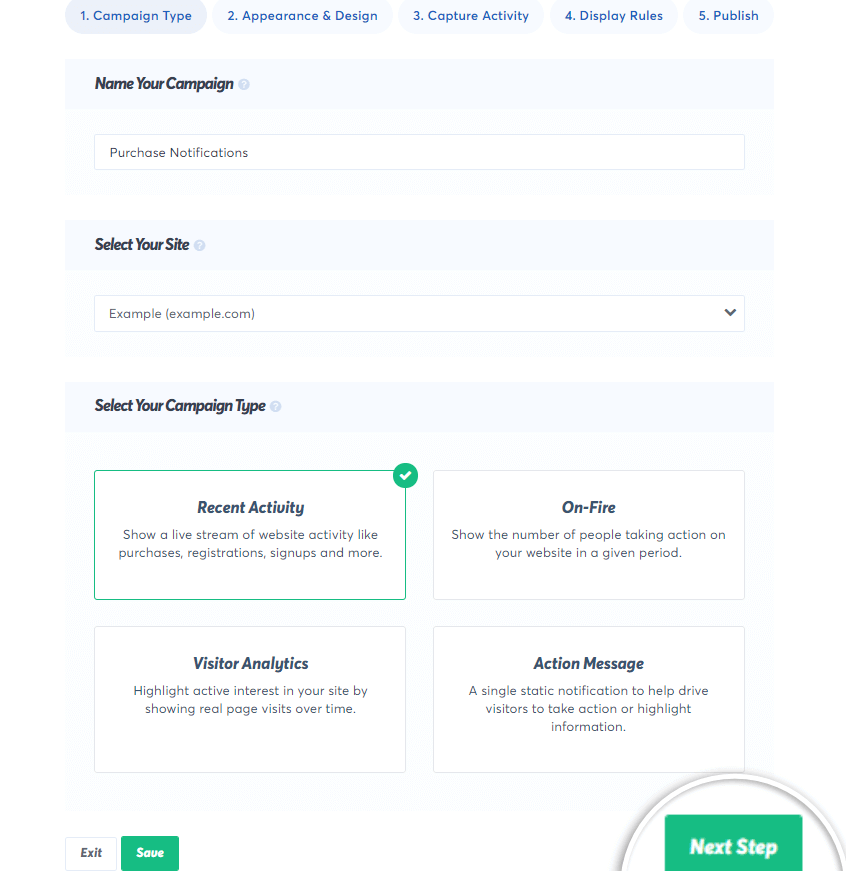
Step 1 – Campaign Type
On the next screen you’ll begin configuring your campaign by entering a campaign name, selecting the site this campaign should appear on and a campaign type.
When you’re satisfied with these settings select the Next button. Don’t worry, you can always come back and edit these later.
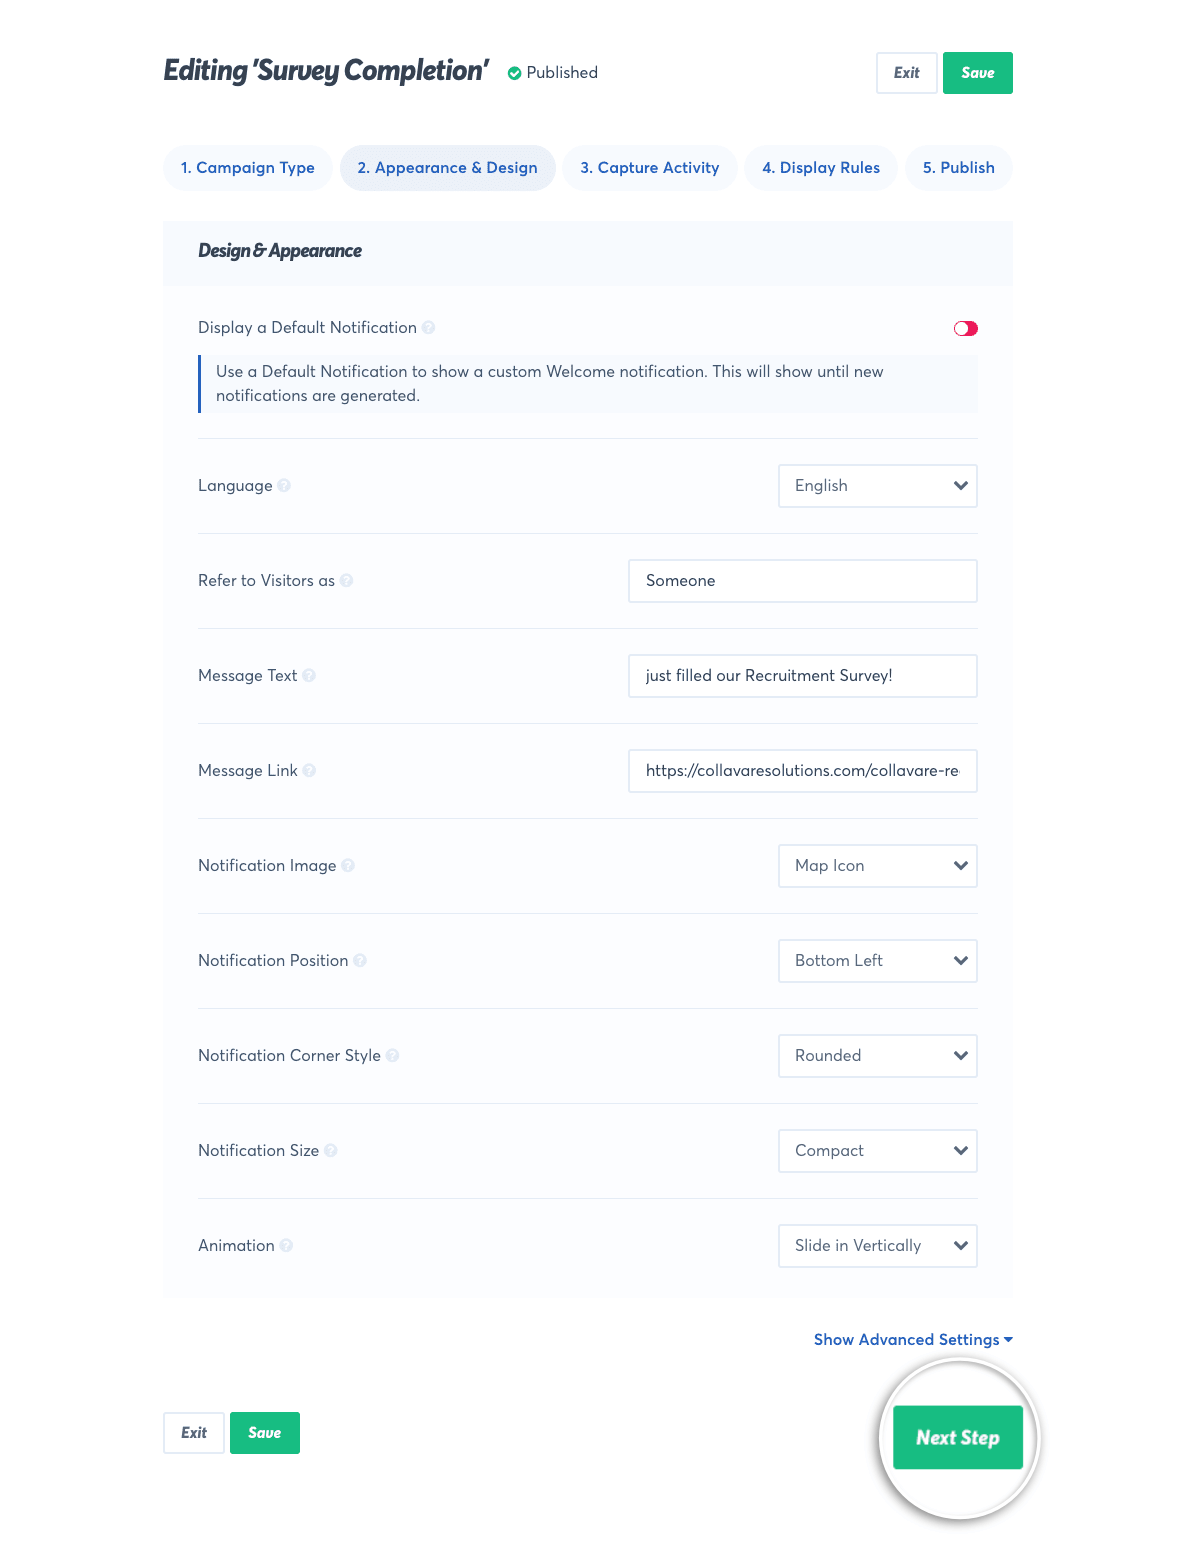
Step 2 – Appearance & Design
The next step in creating your campaign is configuring the Appearance & Design.
On this screen you’ll be able to choose what messaging you want to use in your campaign as well as the location, size and animation of the widget.
When you’re satisfied with these settings, select the Next button to continue creating your campaign.
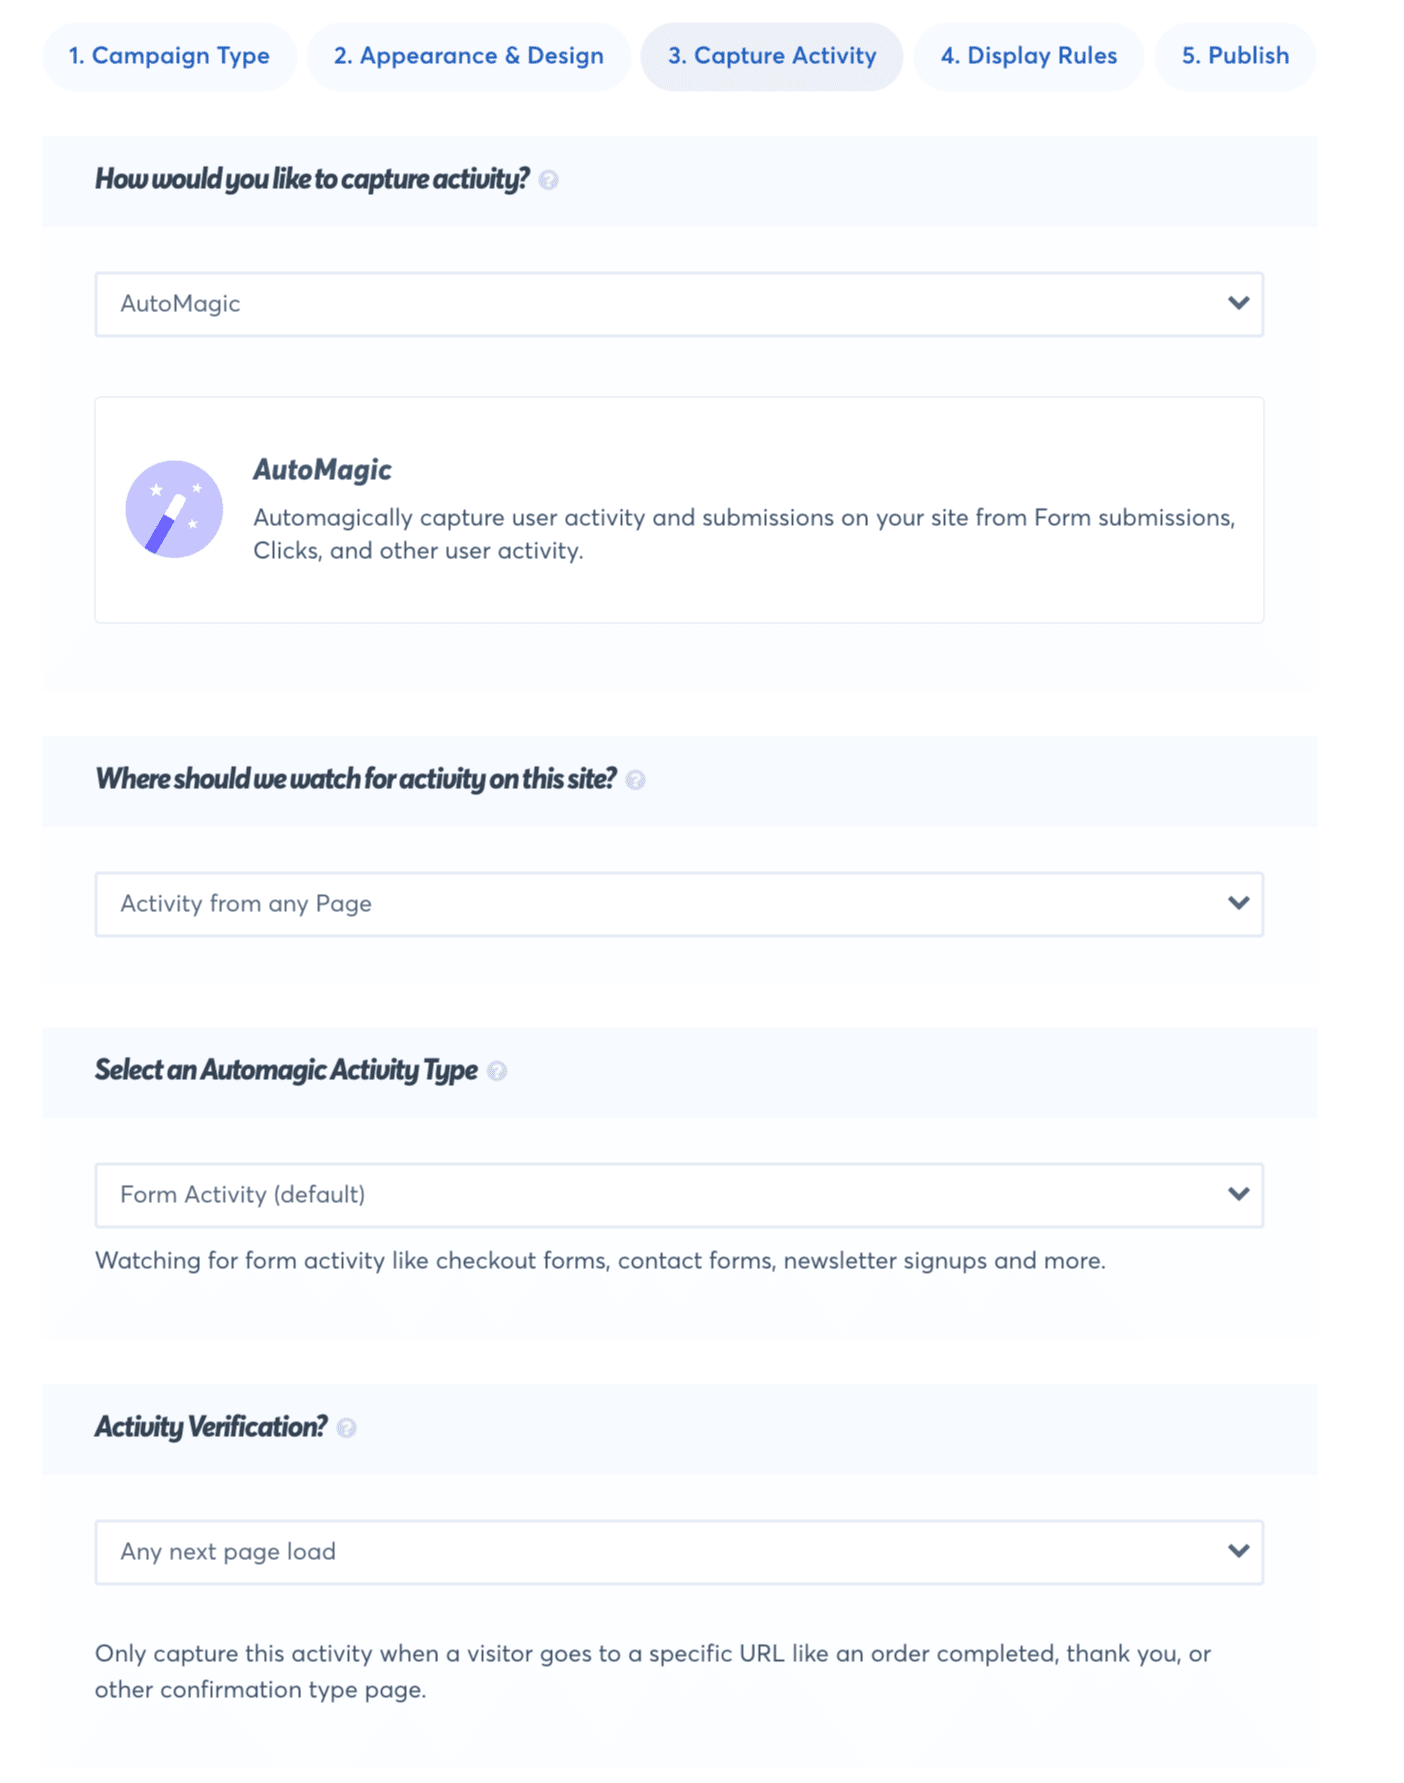
Step 3 – Capture Rules
In the third step, you’ll choose how you want to capture data. There are three options, AutoMagic, Zapier, or WooCommerce. The WooCommerce option is available on our TrustPulse Pro plan or higher.
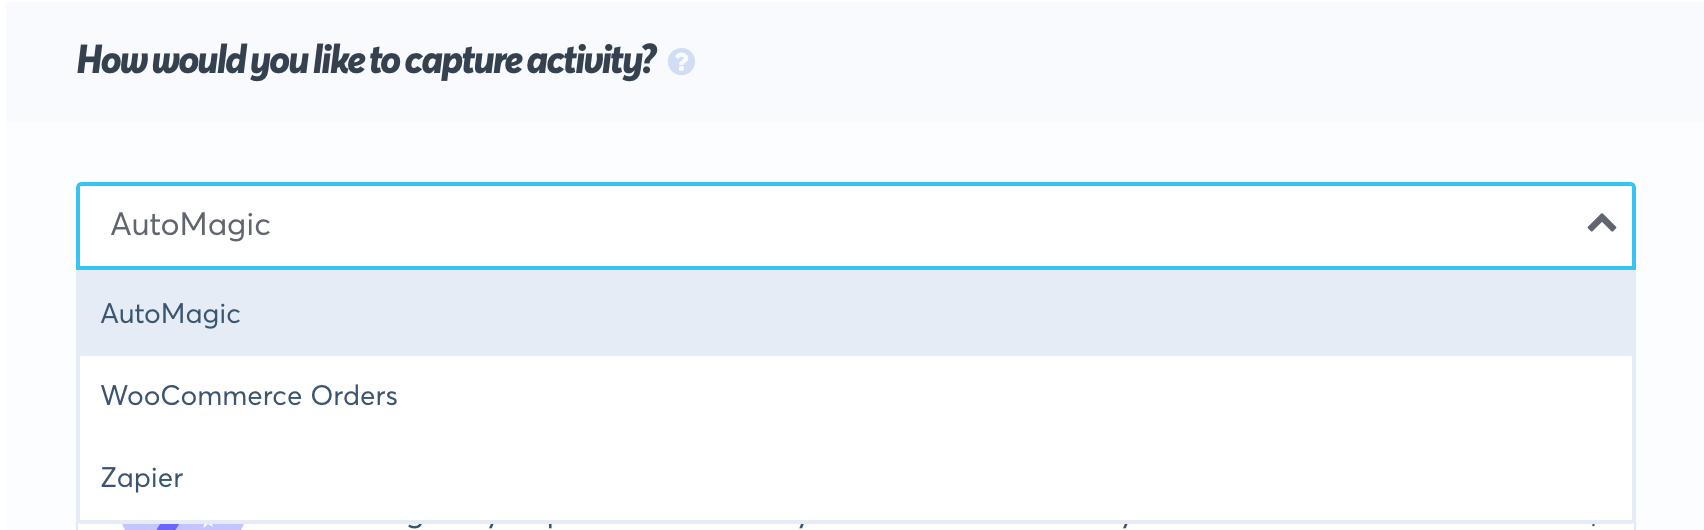
To start we’ll choose AutoMagic. See our guide here to get started with Zapier instead. Here is our guide to get started with WooCommerce as well.
Once AutoMagic is selected you’ll be able to choose the website activity you want your campaign watch for.
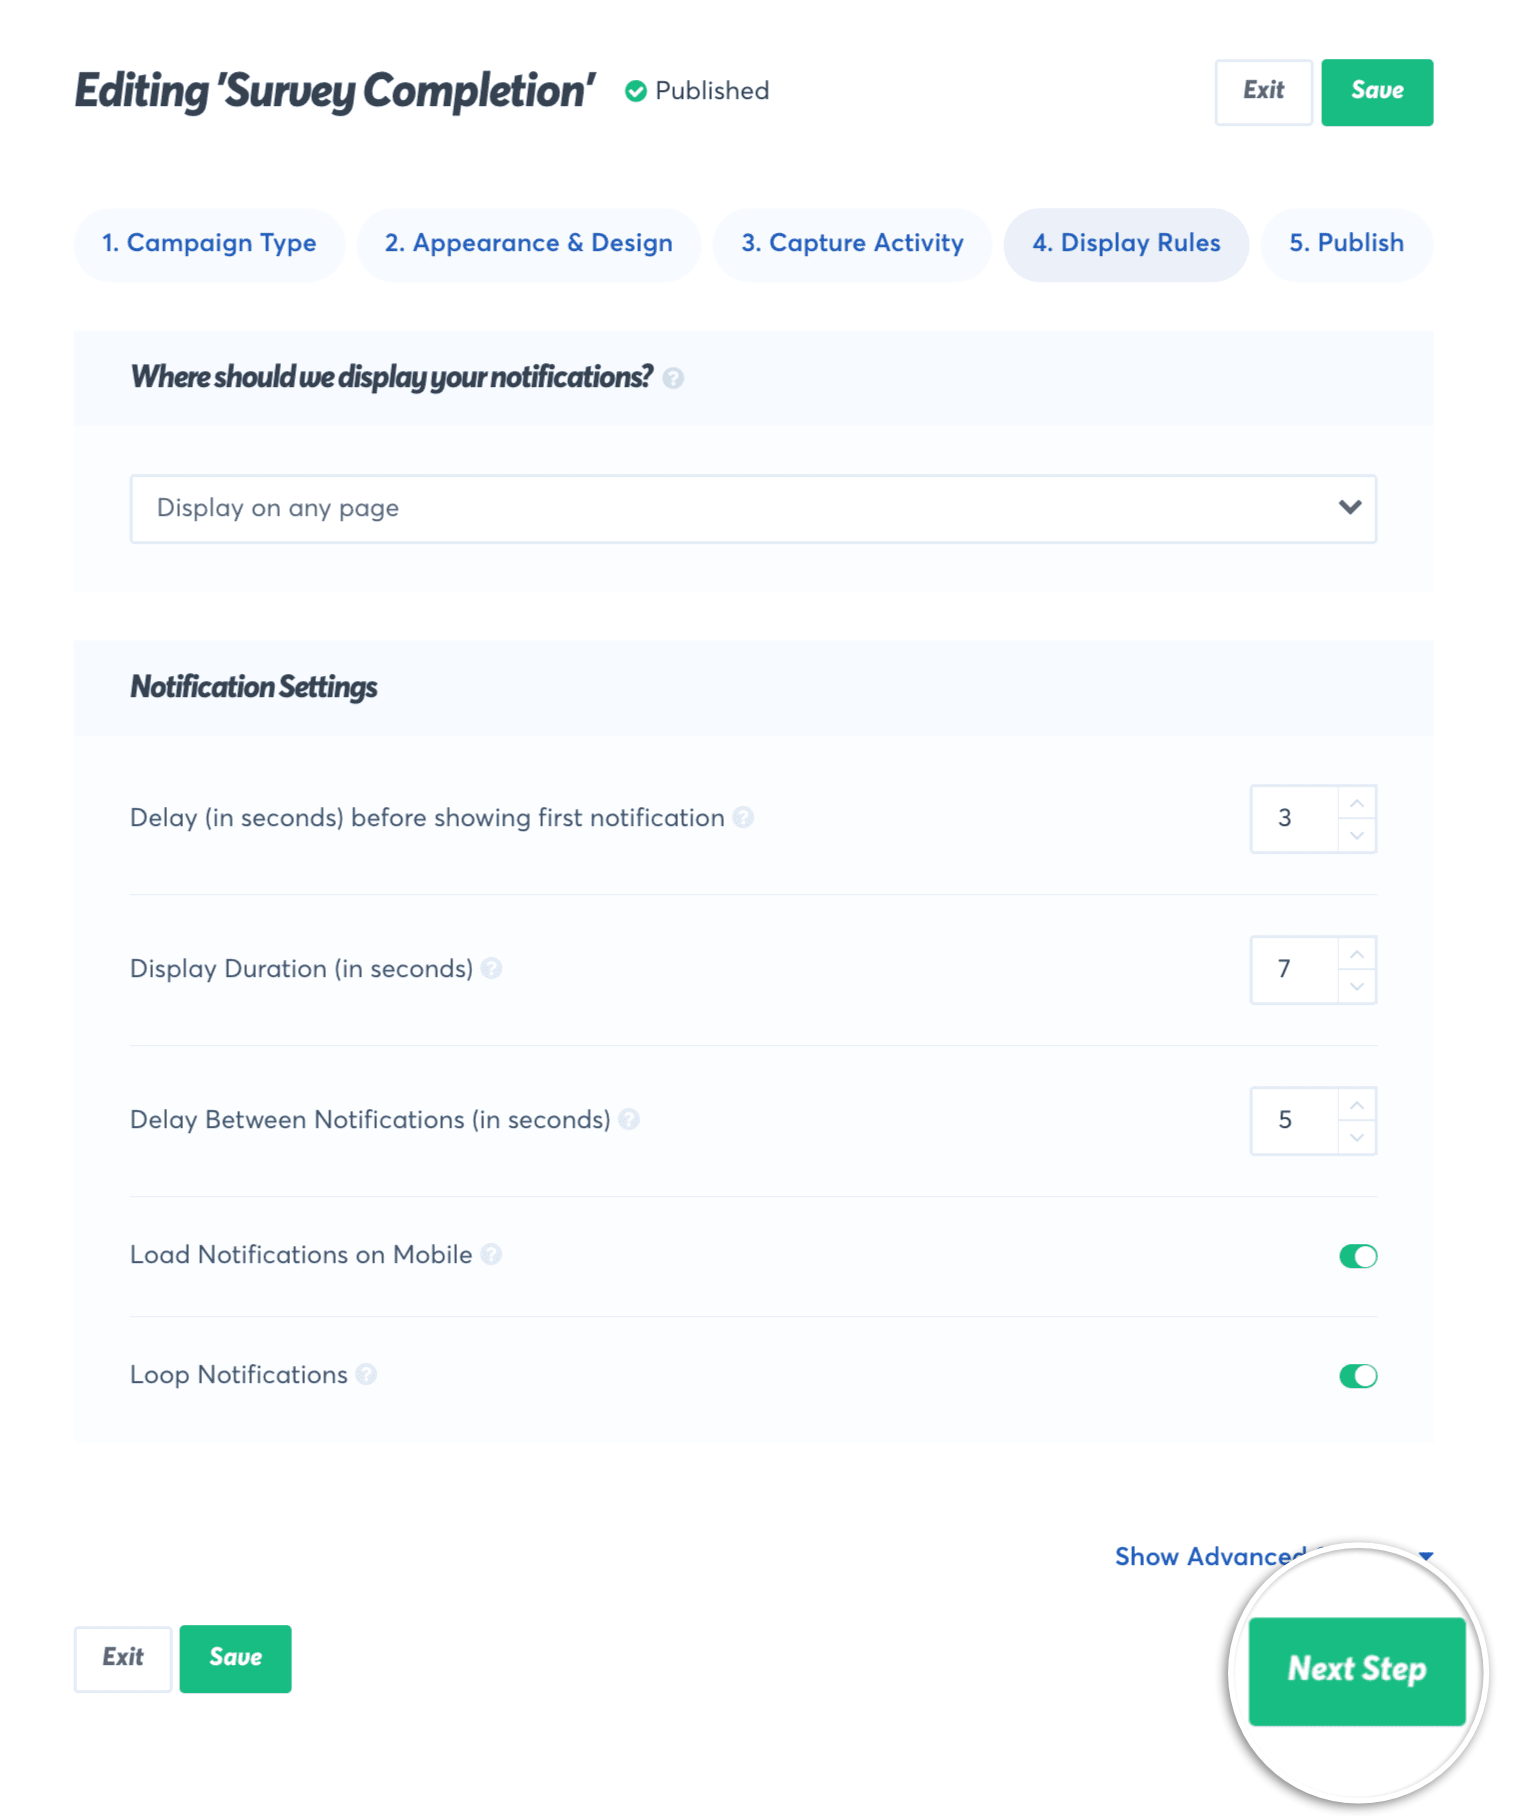
Step 4 – Display Rules
In this step you’ll choose where and how your campaign’s notifications will appear on your website.
You can configure specific pages of your site using display rules. Also, you’ll find options to configure:
- Delay (in seconds) before showing first notification;
- Display Duration;
- Delay Between Notifications;
- Load Notifications on Mobile;
- Loop Notifications
When you’re finished setting these options select the Next button to continue creating your campaign.
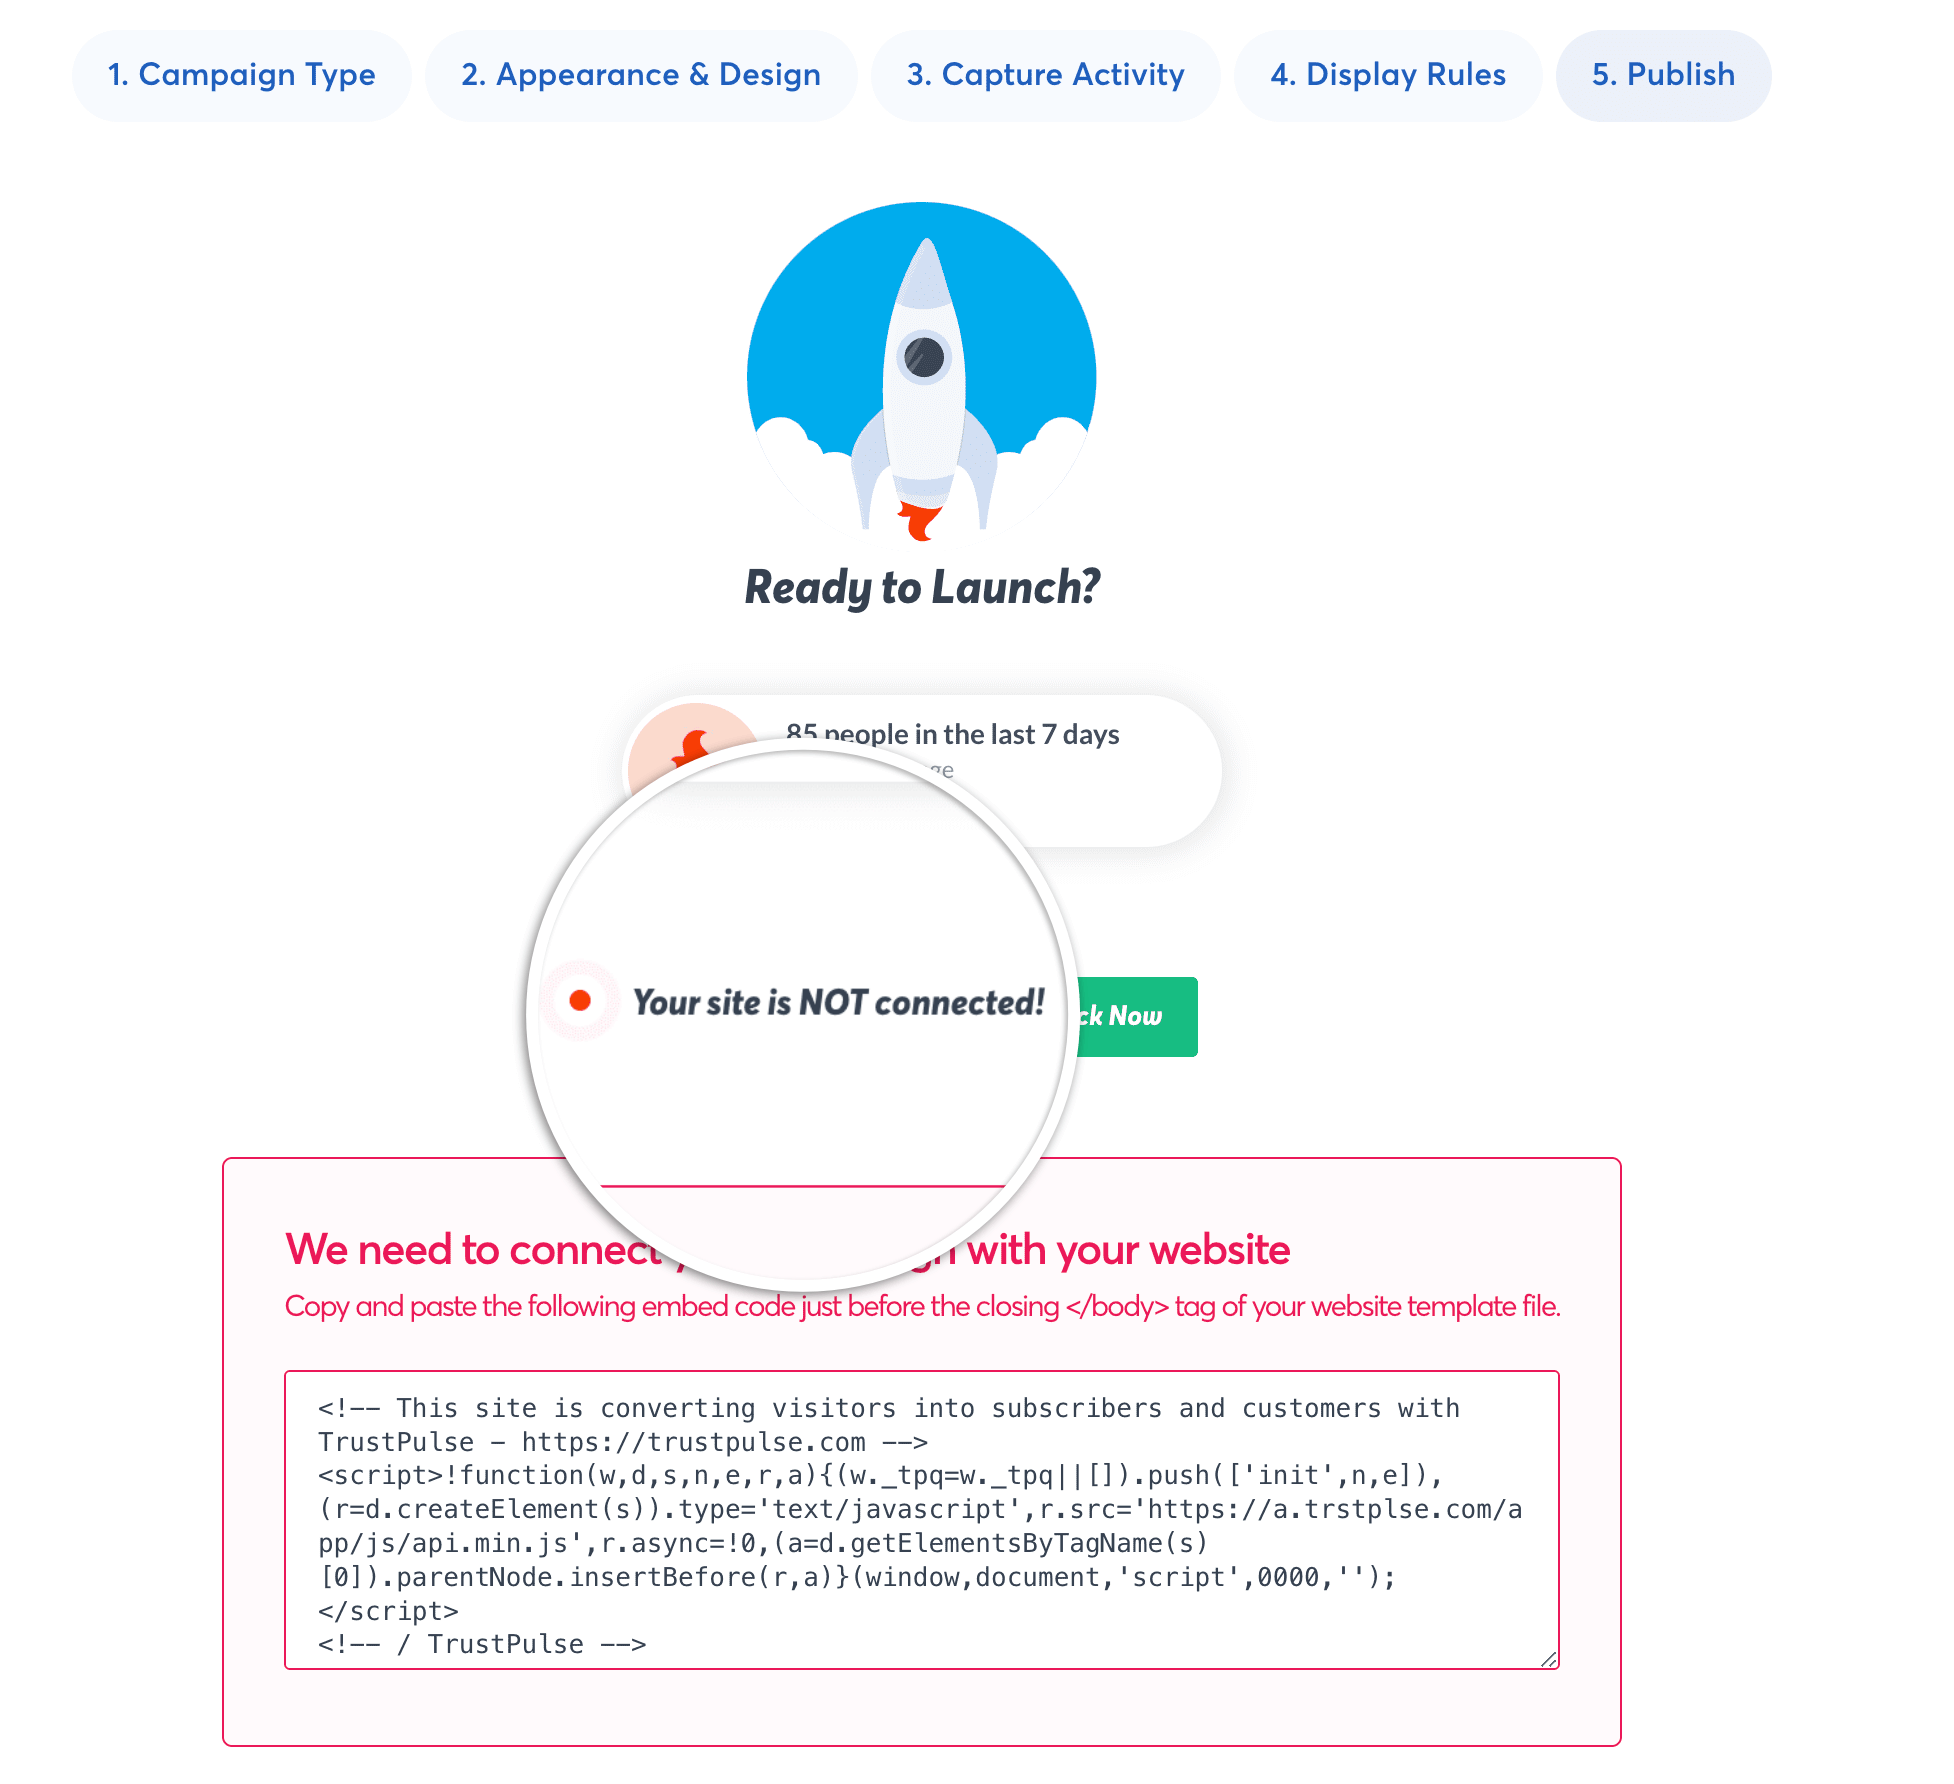
Step 5 – Publish
It’s time to Publish your campaign!
On the final screen of creating your campaign you’ll see a preview of the campaign you’ve created.
Below the preview will be a notification showing if your campaign is successfully embedded on your site yet.
If this notification shows red you’ll also see the embed code below to copy and add to your site. Need help embedding your campaign? Check out our guides to get started adding TrustPulse to your specific platform!
If this notification shows green then your TrustPulse embed code has already been successfully added to your site and TrustPulse can detect it is working.
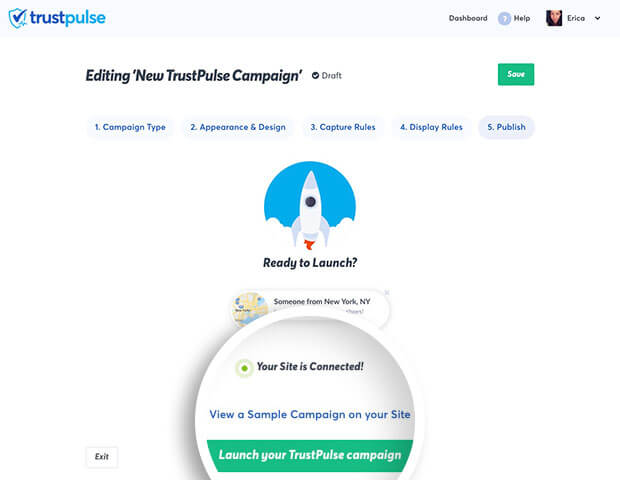
Once you’ve successfully launched your campaign the Publish screen will reflect that the campaign is live!
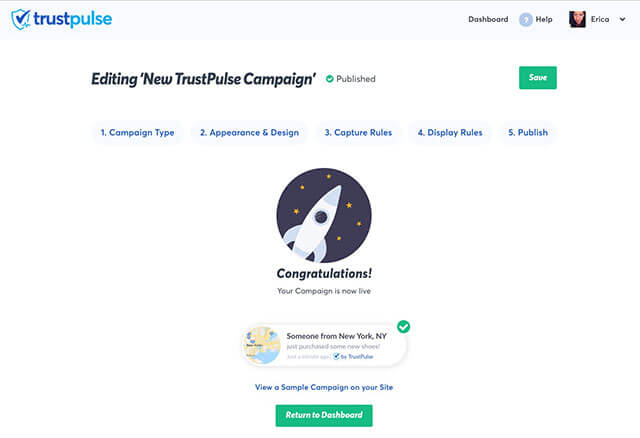
Congratulations, you’ve successfully created your TrustPulse campaign and published it to your website!
Edit a Campaign
To edit an existing campaign in TrustPulse, go to your Dashboard screen and select the name or the edit icon of the campaign you’d like to edit.
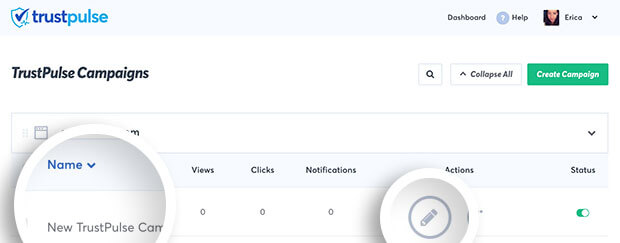
This will open the campaign editor where you can modify any settings for your campaign.
You can navigate through each setting screen chronologically by selecting the Next button at the bottom of each screen. Or you can navigate to any specific screen by selecting that tab at the top.

If you’re serious about supercharging your website with social proof then get started with TrustPulse today!