Are you looking for a quick, easy way to skyrocket your GiveWP donations?
Then you should use social proof notifications.
With GiveWP social proof notification, you can show off verified real-time activity like donations on your website. And this makes it a great tool for building trust and boosting contributions.
In this tutorial, we’ll walk you through the easiest way to create social proof notifications that drive more donations.
Why Add Social Proof Notifications to GiveWP
Before we get into the tutorial, let’s look at why you should add social proof notifications to GiveWP.
And we’ll start with the good news.
Online fundraising is growing fast across the world. By collecting donations online, you get to engage a wider network of people who support your mission. A great WordPress plugin like GiveWP makes the online fundraising process a breeze.
But the challenge is building credibility and trust. Because even if people want to donate, they might be hesitant. How can you convince them you’re a legitimate organization?
And here is where marketing techniques like social proof and FOMO can make a difference.
Social proof is a proven human behavior concept. It’s the idea that we turn to the people around us for help making decisions when we’re not sure what to do.
Now, like social proof, FOMO, is rooted in basic psychology. FOMO, the fear of missing out, is based on the fact that we don’t like losing out on a great deal or a rewarding experience.
FOMO is the reason people have a strong urge to buy the latest iPhone when they see everyone else getting it.
Showing recent donations on your fundraising website is based on these powerful triggers. It’s a persuasive form of social proof because your site visitors see other people are visiting your site and making donations.

When you use social proof with donations, you need to be strategic, though. We know social influence is powerful. This means donors will also look to other people to judge the appropriate amount to give, according to a study on fundraising.
Now, we’ll show you how to create social proof notifications that encourage people to act.
How to Add Social Proof Notifications on GiveWP
In this tutorial, we’ll be using TrustPulse, the best social proof plugin for WordPress and GiveWP.
With TrustPulse, you can:
- Build attractive notifications easily
- Create a sense of urgency with FOMO notifications
- Integrate easily with GiveWP and WordPress
It’s so effective our customers increase conversions by 15%.
What’s more, is that TrustPulse takes just 5 minutes to set up. That’s from creating your account to going live on your website.
Get started with TrustPulse today. Your trial is 100% risk-free with our 14-day money-back guarantee.
Let’s begin!
Step 1: Choose Your Social Proof Notification Type
Once you’re logged in, click Create Campaign from your dashboard.

On the next screen, you’ll need to name your campaign.
The name of your campaign is for your use only and it helps you to keep track of your notifications in your TrustPulse account.
You’ll also need to connect your notifications to your WordPress website. We’ll connect TrustPulse to your site a bit later in this tutorial.
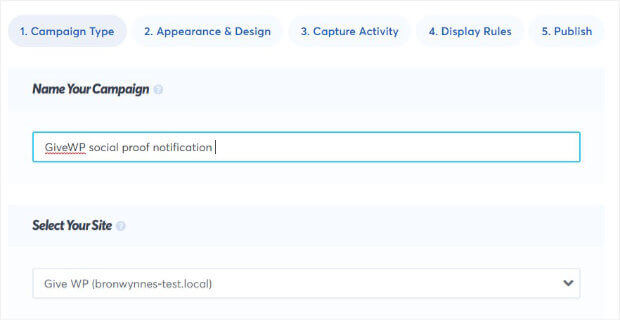
Now, it’s time to choose your social proof notification type.
You can select Recent Activity or On-Fire.
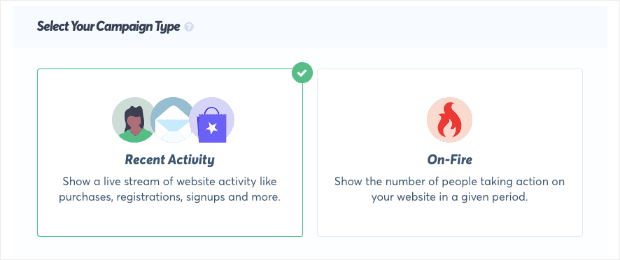
Recent Activity shows a live stream of donations as they happen. So, the moment someone donates on your website, a new notification will be triggered, like this one:

On-Fire campaigns bring together the contributions of groups of people over a specific period of time. Use these messages to show how many people donated in the past week or hour. This is a good way to encourage potential donors to take action.

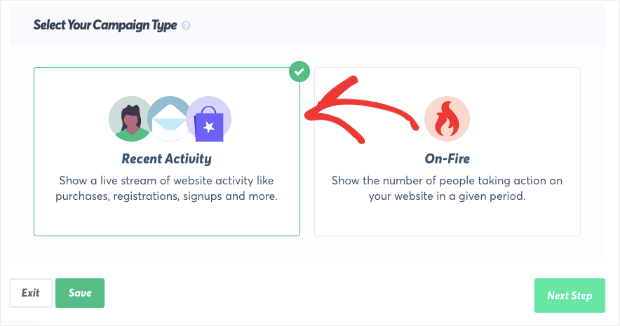
Today, we’ll use Recent Activity. Now, each donation will be shown on your website as it happens.
Click Next Step to design your social proof notification.
Step 2: Design Your Social Proof Notification
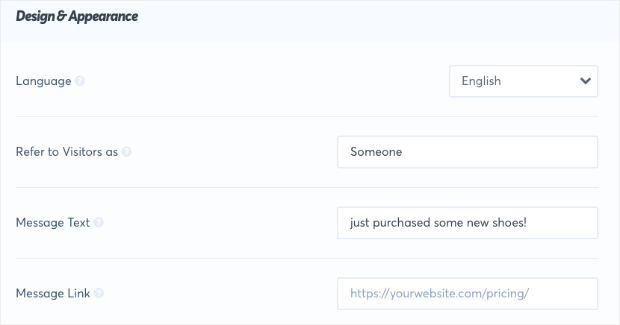
In the Design & Appearance tab, you can easily customize the color, size, text, and more.
As a result, you can match your social proof notification with your brand and appeal to your target audience.
Now, the default notification looks good enough to use straight out of the box.
But you can tailor your social proof popup by adding text to the field box or choosing from a dropdown menu.
You can preview the changes in real-time at the bottom of the browser window.
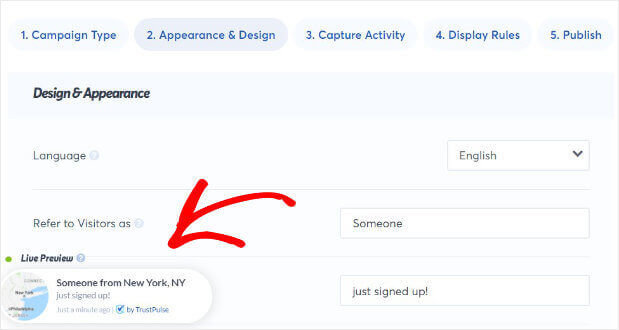
Let’s take a closer look at some of the parts of the notification you might want to edit.
- Language: the language your message should be displayed in
- Message text: this is the conversion you want to highlight
- Message link: the page you’ll be sending your visitor to when they click the notification
That covers the content of your notification.
Next, let’s take a look at the style editing options.
From your editor, you can customize the position and size of the notification. And, you can choose to change the notification corner style from round to sharp.
There’s even the option to control the way the notification appears on the screen.
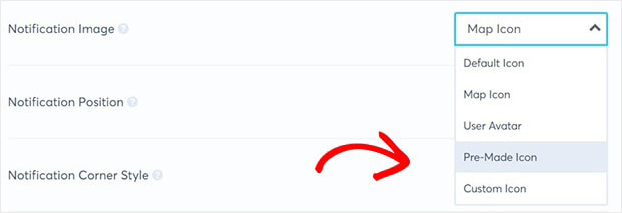
To help you build an eye-catching notification, you can edit the notification image. Or, leave the default map icon in place to show the location of your donor. This is the kind of detail that underlines that real people are supporting your cause.
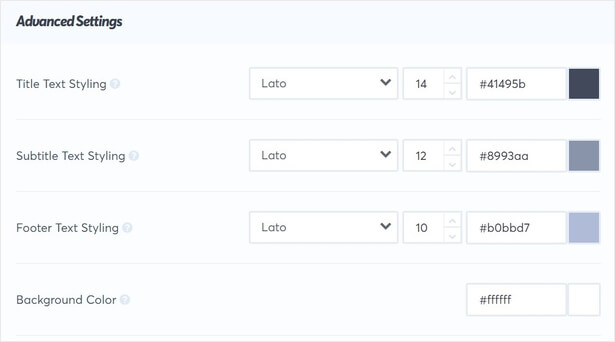
From the Advanced Settings section, you can change the font, color, and background.
Select Next Step when you’re happy with your design.

Step 3: Capture Activity for Your GiveWP Notification
Now, let’s jump onto capture your GiveWP donations.
TrustPulse offers two options to capture activity:
- AutoMagic: capture donations automatically across your website
- Zapier: capture donor activity from sources off your site
For this tutorial, we’ll go with AutoMagic. That’s because we’ve embedded our GiveWP donation form into our WordPress site.
We can get specific about the submissions we want to track in the section, Where should we watch for activity on this site?
From here, you can tell TrustPulse to capture activity from all pages or certain URLs.
So, you could show activity from a specific donation page or, track donations from multiple pages on your website.
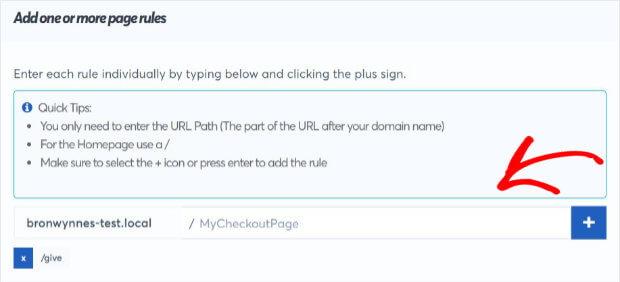
Today, we’ll go with Form Activity from exact URLs.
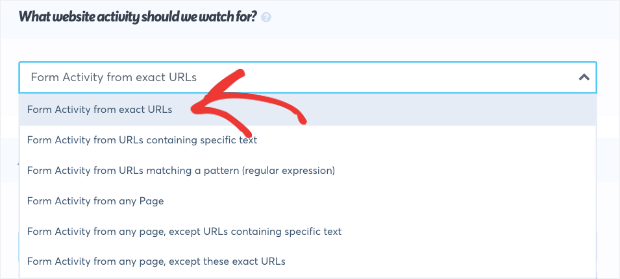
To track donations, we’ll add the name of the GiveWP form.
All you need to do is add /give and click +.
Once you’re done, click Next Step.

Step 4: Display Your Social Proof Notification
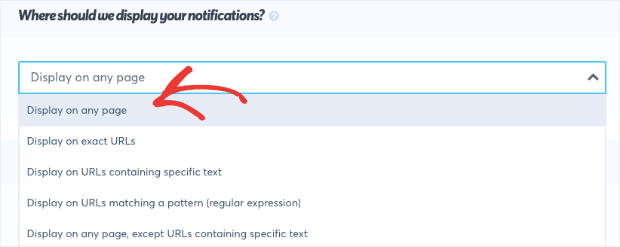
You can now set up your display rules.
This will control when and where your social proof notification appears. For example, you can show your notification on every page or only certain pages.
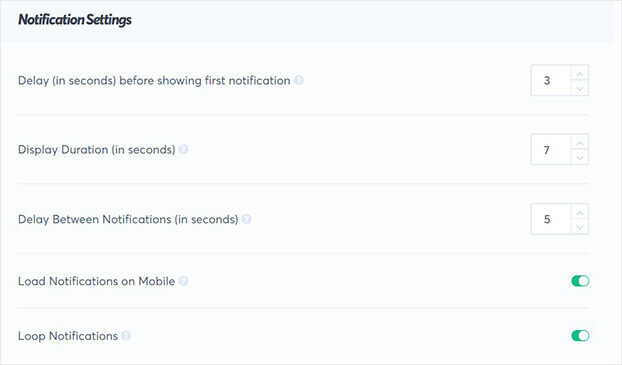
You can also customize your notification settings.
So, you can control when the notification first appears and whether to load on mobile.
Click Next Step once you’re done.

Step 5: Publish Your GiveWP Notification
From the publish screen, you can review your social proof notification.
When you’re ready, it’s time to connect your WordPress site.
It’s easy to integrate TrustPulse to WordPress and only takes a few minutes.
All you have to do is install and activate the plugin.
Here’s a short, simple guide on how to integrate TrustPulse with WordPress.
Click Launch your TrustPulse campaign once your site is connected.
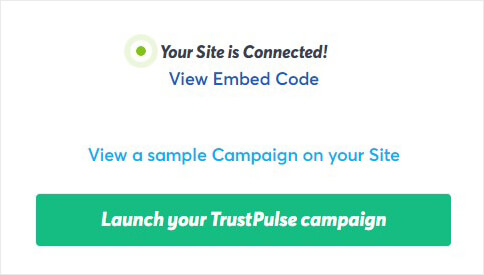
And that’s it! You’ll show recent donations in GiveWP on your website.
We hope you enjoyed this article.
For more resources on growing your organization with FOMO and social proof, check out these articles:
- FOMO Marketing: Everything You Need to Know About Fear of Missing Out
- 29 Proven Ways to Use Social Proof to Increase Your Conversions (Updated)
- Social Proof Statistics: 42 Reasons Your Business Needs Social Proof
Want to use social proof notifications to increase GiveWP donations? Sign up for TrustPulse today.
