Do you want to use the power of social proof to increase your subscribers?
Social proof is a stamp of approval online.
When your site visitors see others signing up for your newsletter, they’re more likely to check it out for themselves.
Now, if you’re using Gravity Forms, you can create FOMO notifications to display social proof across your website.
And the good new is it’s simple enough to set up in five minutes.
In this tutorial, we’ll show you how to easily add a FOMO notification to your site to boost your subscribers instantly.
What is a FOMO Notification?
A FOMO notification is a small popup that’s displayed on your site, and it’s designed to convert a casual site visitor into a subscriber or customer.
Of course, the nature of that conversion depends on your business goals.
But, here are a few examples of the actions you could encourage on your site:
- Make a purchase
- Watch your webinar
- Sign up to your newsletter
- Join your membership site
So, how do FOMO notifications get site visitors to take that next step?
There’s a science behind why these alerts are so powerful.
FOMO, the Fear of Missing Out, is a psychological concept that suggests humans don’t like feeling excluded from an interesting or fun activity.
FOMO marketing builds on this concept to increase interest in your brand and its services.
And FOMO is most effective when you combine it with social proof.
Take a look at this example from the OptinMonster site:
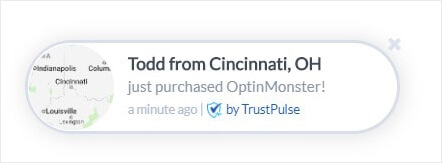
Here’s why this tactic works so well to increase signups:
- Awareness: it doesn’t matter on which page they land, your site visitor can see your notification, so they get to hear about your newsletter
- Trust: other people are signing up for your content, so there may be some value
Creating a FOMO notification is simple too.
No design or coding skills required.
In this tutorial, we’ll create this FOMO notification in under five minutes:
So, how could you enable this FOMO notification with Gravity Forms?
Let’s have a look at what Gravity Forms is and how we can use it to enable social proof notifications.
What is Gravity Forms?
Gravity Forms is a WordPress form builder plugin.
There are plenty of forms you can create with Gravity Forms, like:
- Surveys
- Registration forms
- Ecommerce forms
Forms come with reCaptcha, so you don’t need to worry about spam signups.
Setting up these forms is simple with a visual editor and existing form fields. No coding is needed to create forms.
Another way to use Gravity Forms is to let people sign up for your newsletter.
And when you connect the form with Trustpulse, your site visitors will see real-time notifications about new subscribers.
Below, we’ll walk through exactly how to set up FOMO notifications with Gravity Forms and Trustpulse.
How to Add FOMO notifications to Your Site
Today, we’ll create a FOMO notification with TrustPulse.
TrustPulse is the best tool for adding high-converting social proof notifications to your site.
Sites that use TrustPulse increase their conversions by 15%!
Why does it work so well?
- Easy to use: set up in under five minutes
- No coding required: easily automate targeted notifications
- Attractive campaigns: create eye-catching notifications
- Effortless integrations: works with any app and website provider
Below, we’ll create a FOMO notification linked to our Gravity Form in five simple steps.
Step 1: Create a FOMO Notification Campaign
First, log into your TrustPulse account.
From your dashboard, click Create Campaign.

Now, you’ll land on the Campaign Type tab.
From here, you’ll name your campaign and assign it to your website.
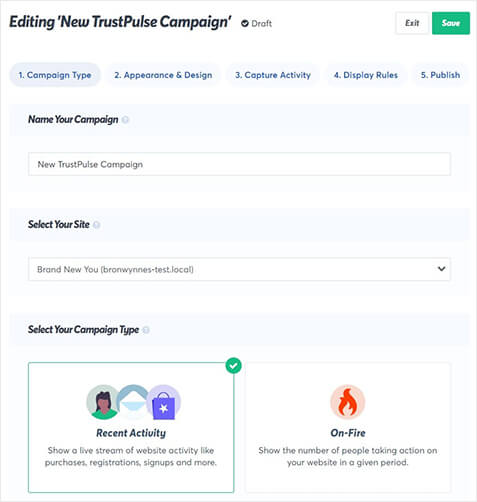
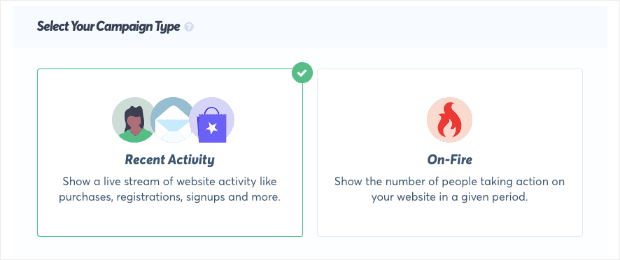
Then, you’ll see you have two options under Select Your Campaign Type:
- Recent Activity
- On-Fire
The campaign type determines the kind of activity you’ll display to your site visitor:
- Recent Activity: shows a live stream of website activity, like purchases and signups
- On-Fire: shows the number of people taking action on your site over a specific period, like the number of purchases during a flash sale
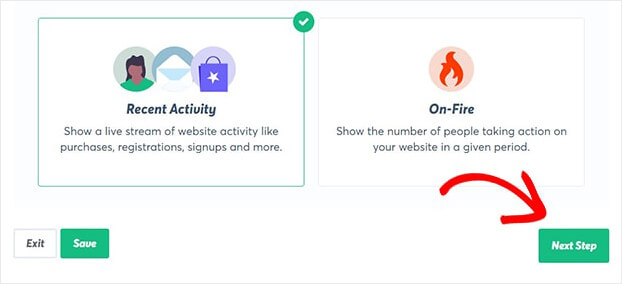
For this tutorial, we’ll select Recent Activity because we want to display each signup in real-time.
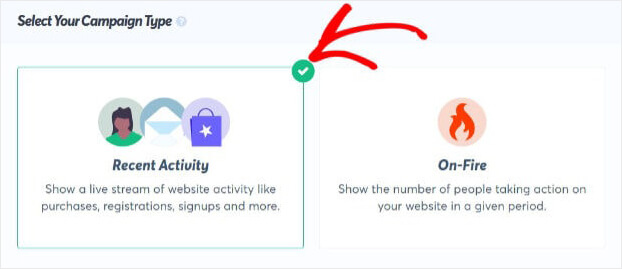
Next, go ahead and click Next Step.
Step 2: Design Your Gravity Forms’ FOMO Notification
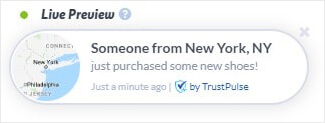
Now, it’s time to design your FOMO notification.
TrustPulse makes it easy to put together attractive notifications.
You can adjust everything about the template or, if you’d like, leave it exactly as is.
Every time you make a change, you can view your new notification in live preview at the bottom of your screen:
Editing your FOMO notification is easy because there are only two methods:
- Add your text to a field box
- Choose from a drop-down
That’s all it takes to change any of these settings:
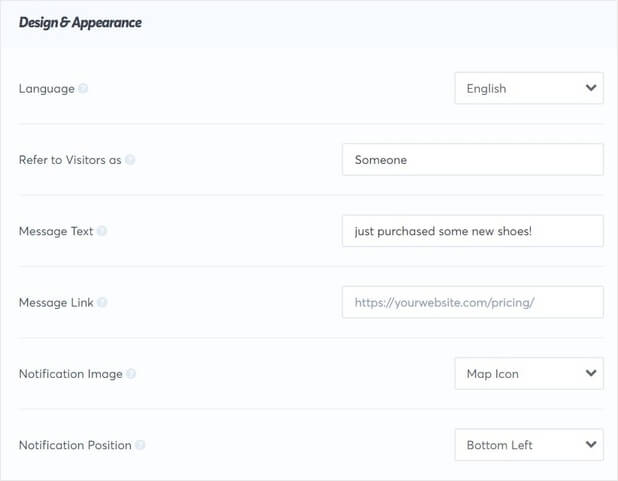
You might consider paying attention to these fields:
- Message link: the page someone will land on once they click your notification
- Message text: the words that will appear in your notification
- Refers to visitors as: used when we can’t determine the visitor’s name
Below, we’ll go through the exact steps we took to create this FOMO notification.

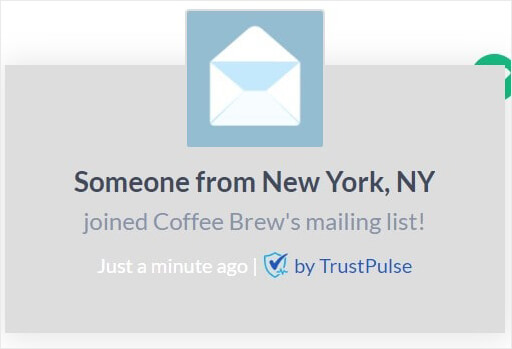
First, let’s change our message text.
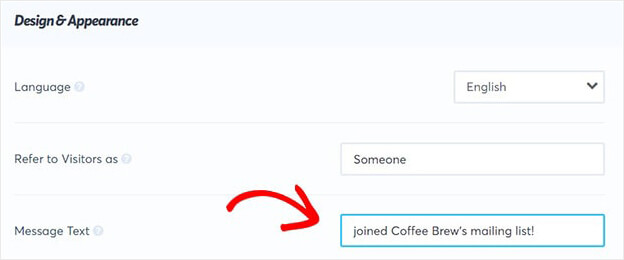
Now it’s time to choose an image.
You can:
- Upload your own icon
- Choose from built-in avatars
For this tutorial, we’ll select from the pre-made icons.

We’ll go for the envelope icon because it’s great for promoting our mailing list.
![]()
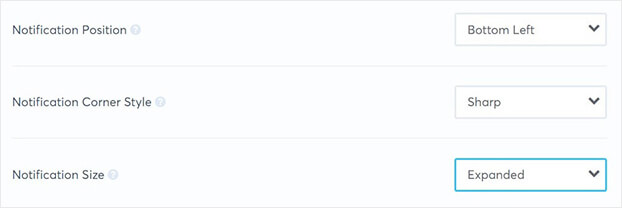
The rest of the settings let you configure the position and style of the notification.
We’ll leave the Notification Position in the left and change the Notification Corner Style to Sharp.
Additionally, we’ll increase the size of the notification.
For Animation, you can choose from options like:
- Slide in Vertically
- Fade in
- Slide in Horizontally
Finally, we’ll head over to Advanced Settings to adjust the colors and fonts in our notification.
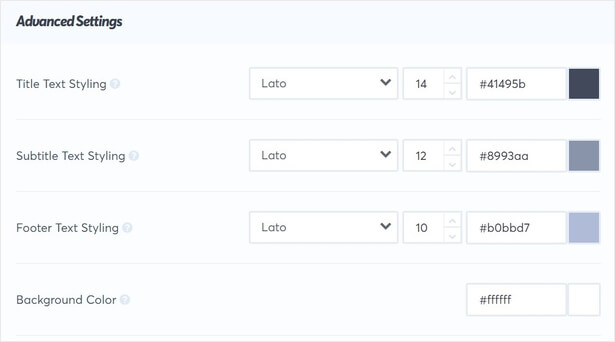
Here’s what we have now:
Once you’re happy with your design, it’s time to configure our notification.
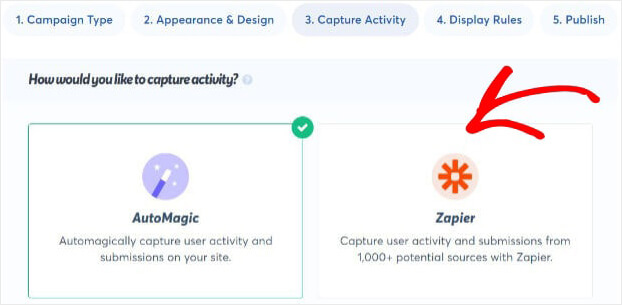
Step 3: Capture Activity for Your FOMO Notification
Next, we’ll set up our notification so a real-time alert appears when someone subscribes to our newsletter.
TrustPulse gives you two ways to capture site activity:
- Automagic
- Zapier
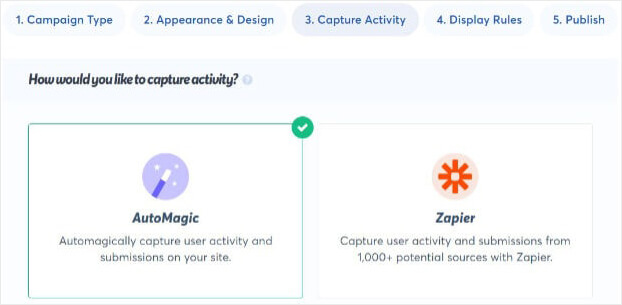
Automagic automatically captures site activity.
Zapier, on the other hand, captures any activity off your site.
Zapier connects different applications and triggers actions automatically.
In our tutorial, we’ll do two things:
- Connect Gravity Forms and TrustPulse
- Trigger a new FOMO notification when someone completes a Gravity Form on our WordPress site
And you don’t need to write any code to automate those actions.
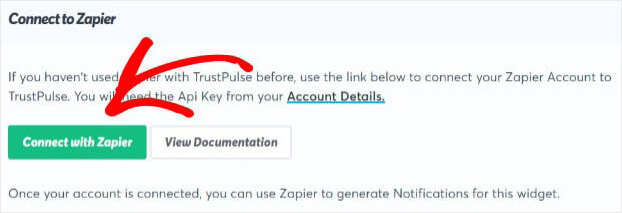
All we need to do is log into Zapier and follow the prompts. Sign up for a Zapier account here.
Before we begin, make sure you have the Zapier add-on for Gravity Forms.
In your Capture Activity screen, click Zapier.
Now, select Connect with Zapier.
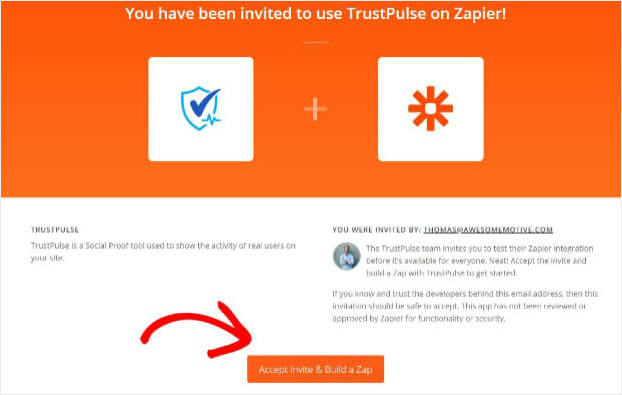
On the next screen, click Accept Invitation & Build Zap.
Once you’re in your dashboard, select Make a Zap.
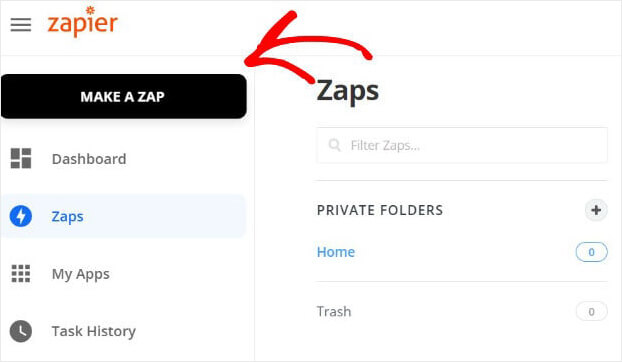
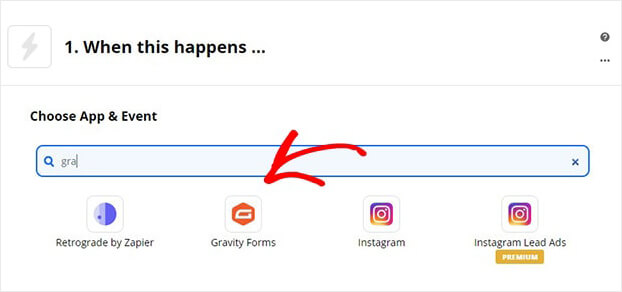
Search for the Gravity Forms app.
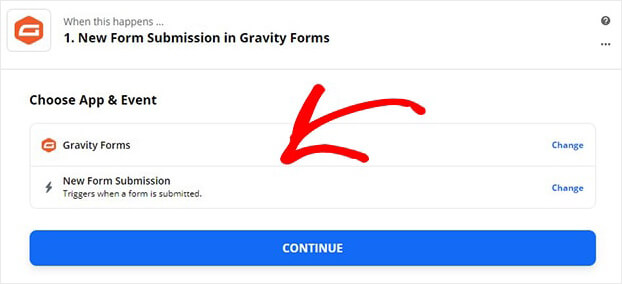
On the next screen, choose the event or trigger. This is the action that will make your notification appear.
For this tutorial, we’ll select New Form Submission. Click Continue.
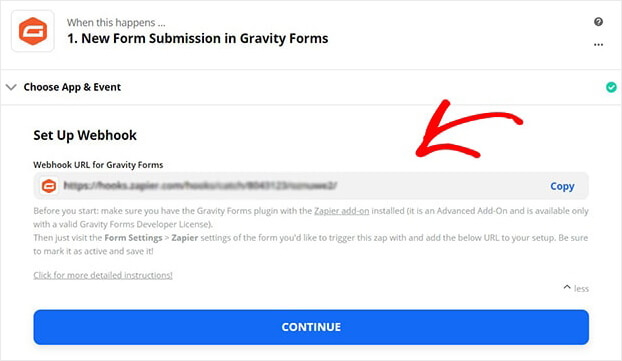
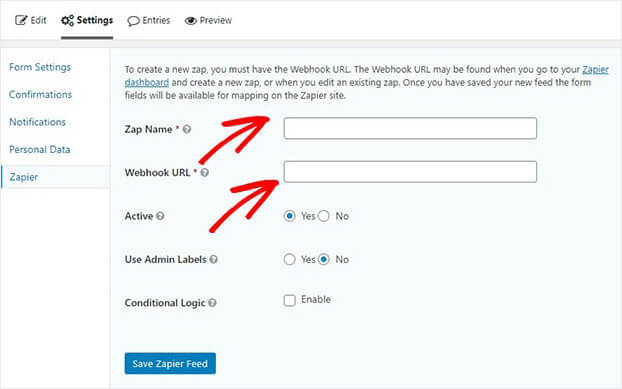
Now, copy the URL labelled Webhook URL for Gravity Forms. You’ll need to add this URL to a field in your Gravity Forms plugin in WordPress. So, copy the URL.
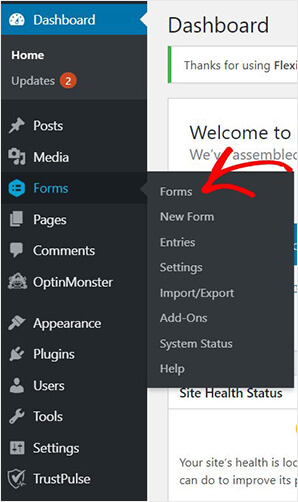
Head over to your WordPress admin area. From your dashboard, click Forms>Forms
Find and select the form that your visitors need to complete to generate the notification. In this tutorial, that’s your signup form.
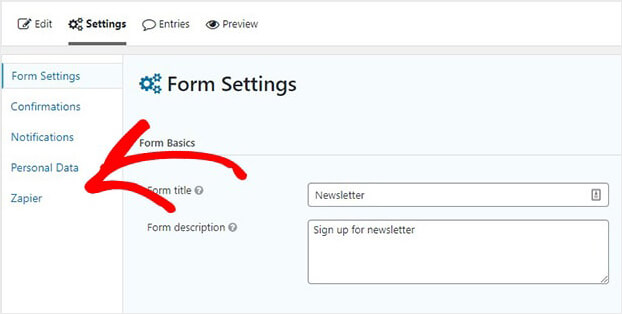
So, we’ll click on Newsletter>Settings>Form Settings.
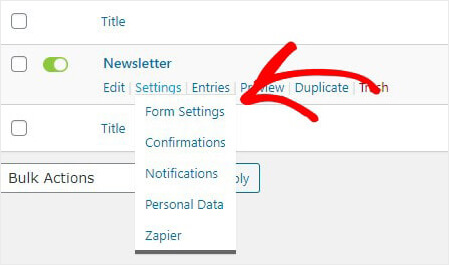
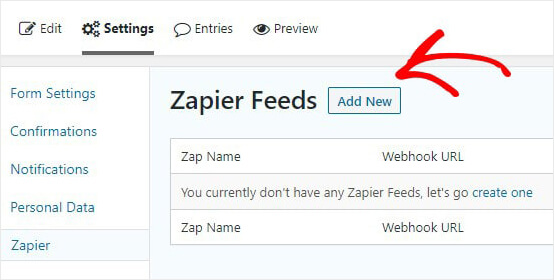
From the Form Settings screen, click Zapier.
Next, select Add New.
You’ll need to give your Zap a name and paste the Webhook URL.
Once you’ve completed the fields, click Save Zapier Feed.
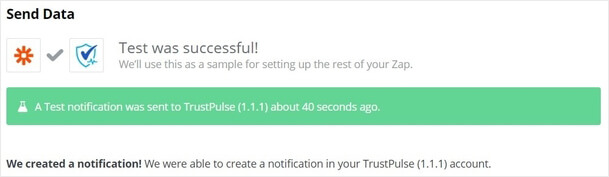
Now, you can head back to Zapier and test your trigger.
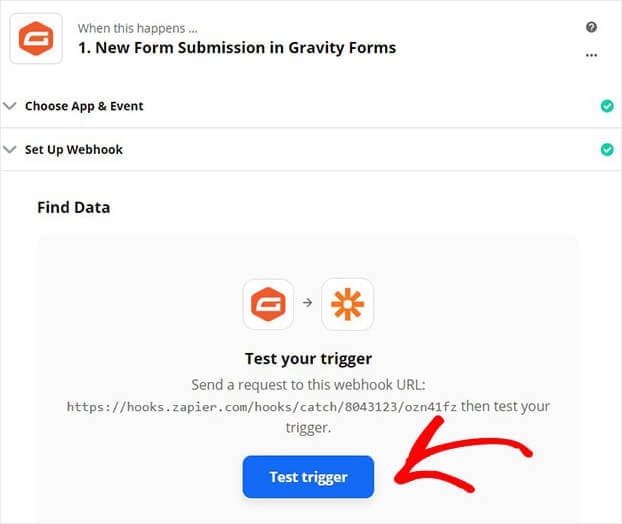
Click Continue once your test works.
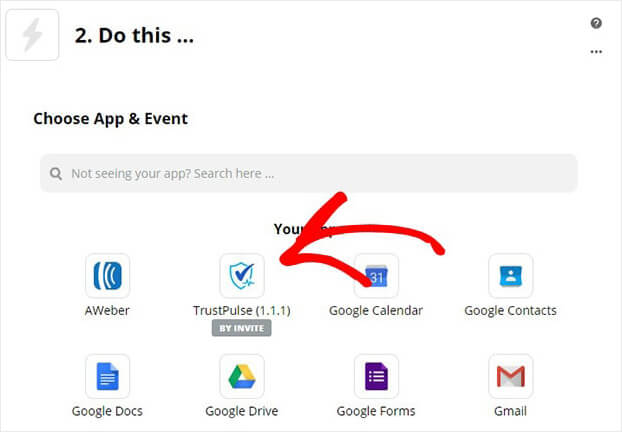
Now, follow the prompts to connect Gravity Forms with TrustPulse.
Choose TrustPulse.
On the next screen, you’ll tell Zapier what action TrustPulse needs to take when a new subscriber completes your Gravity from. In this tutorial, we want to make a notification appear.
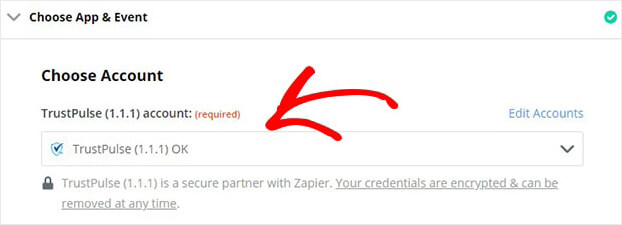
Click Create Notification.

Next, choose your account from the drop-down menu.
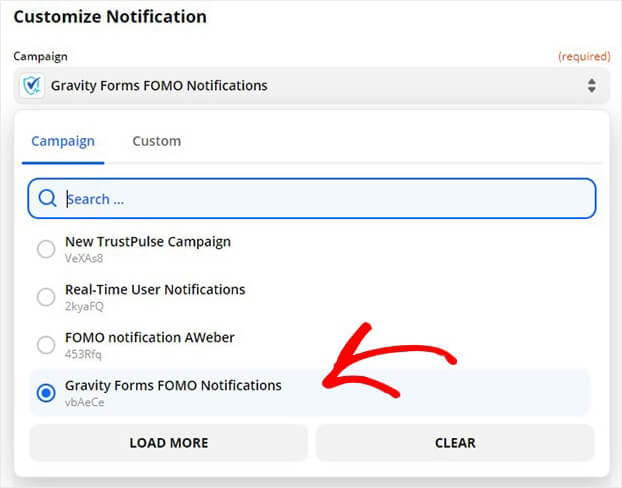
Now, add the campaign you created in Step 1.
Now, add the email associated with your TrustPulse account.
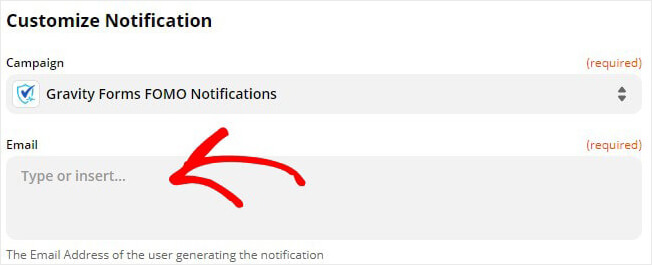
Click Continue.
All that’s left is to test your Zap.
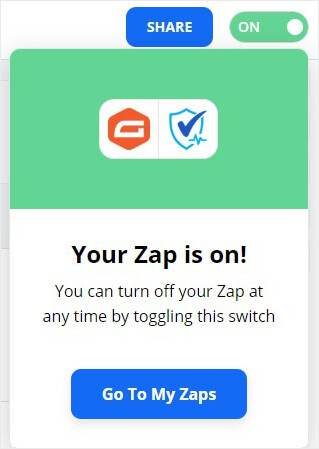
Once everything is set up, head over to the top toolbar and switch on your Zap.
Now, head back into TrustPulse to display and publish your FOMO notification.
Step 4: Display Your Gravity Forms’ FOMO Notification
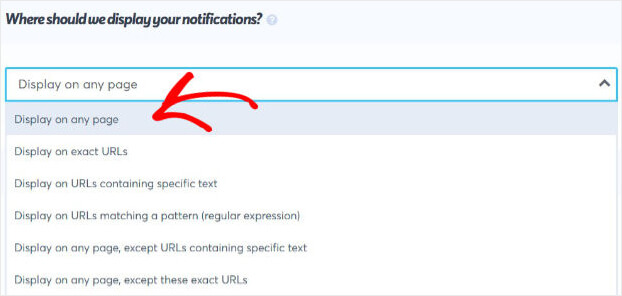
Once your FOMO notification is set up, it’s time to decide where and when you’d like to display your alert.
TrustPulse offers multiple ways to display your FOMO notification, like:
- Specific pages
- Any page
- On any page, except specific URLs
For today’s tutorial, we’ll go with the default setting to display on any page:
You’ll also be able to decide how long your notification must be displayed.
And so much more.
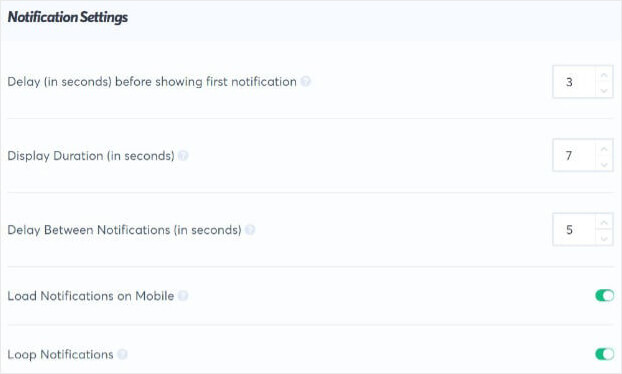
The default notifications work well, but you’re free to change anything. Once you’re done, click Next Step.
Step 5: Publish Your Gravity Forms’ FOMO Notification
At this stage, you’re ready to publish your campaign.
Before it goes live, you can preview your FOMO notification.
When you’re ready, click Launch Your TrustPulse Campaign.
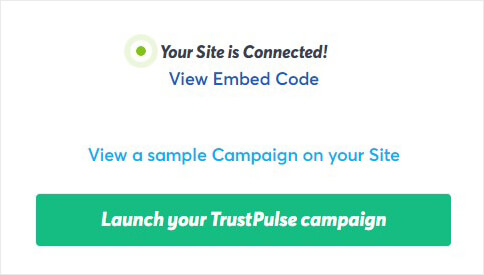
Now, your site visitors will see your mailing list grow in real-time.
Check these articles if you’re looking for more examples of FOMO notifications and social proof:
- Social Proof: What It Is & How to Get Started [+ Proven Examples]
- FOMO Marketing: Everything You Need to Know About Fear of Missing Out
