Do you want to show social proof notifications in your Blogger blog to build your credibility online?
By using social proof notifications, you can instantly boost your engagement and conversions.
These small, but powerful, alerts show your site visitors that people just like them are signing up for your email list or buying your services.
It’s a quick, easy way to get people to take action on your site.
That’s why just about every company uses some type of social proof on their website.
Today, you’ll learn exactly how to set up your own social proof notification in less than 5 minutes.
What are Social Proof Notifications?
Before we get into the details, let’s quickly look at what exactly social proof notification is and why you’d want to add one to your Blogger blog.
Social proof notifications are small messages that appear when someone takes action on your site.
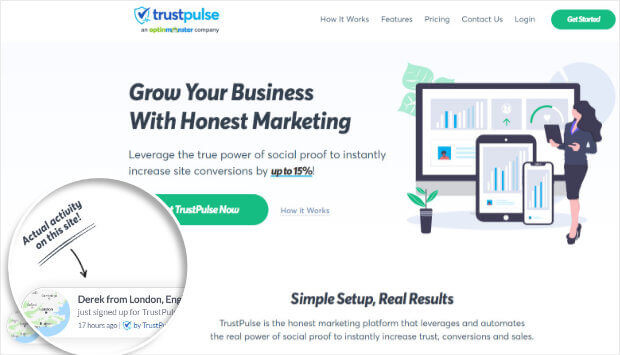
For example, if you want to motivate people to join your mailing list, you can display a message each time you get a new subscriber.
These notifications are triggered in order to add social proof, our tendency to follow the actions of others. We look to the people around us for clues when we’re not sure what to do.
It’s why we browse online reviews before we make a purchase. And why the office chair with the 5-star rating usually beats out the cheaper model that has 3.5 stars.
So, does social proof actually work?
Why don’t you have a look at some of these social proof statistics and decide for yourself:
- 40% of people have purchased a product online after seeing it’s used by an influencer on social media
- 88% of consumers trust user reviews as much as they trust personal recommendations
This is why brands like Amazon and Pepsi use social proof, like product reviews and celebrity endorsements, to increase trust.
So, now that we’re clear on what a social proof notification is, how does any of this apply to your Blogger blog?
Social proof shows your blog visitors that people just like them are signing up for your list or commenting on your posts. They add credibility to your online presence and might be just what your visitor needs to sign up for your email newsletter.
These third-party, unbiased recommendations carry more weight than your own claims about how awesome your newsletter is.
Showing these notifications has helped businesses just like yours increase their conversions by up to 15%. That’s a big difference for a notification you can build in only a few minutes.
Now, let’s take a look at how easy it is to add social proof notifications to your Blogger site.
Let’s begin.
Add Social Proof Notifications to Blogger
TrustPulse is the best social proof software for Blogger, because it’s the easiest way to add real social proof notifications.
With TrustPulse, you can easily implement social proof across your website:
- Easy setup with no code needed
- Fully customizable notifications so you can edit the style, size, and position of your notification
- Syncs easily with Blogger
Today, you’ll build your social proof notification in five minutes flat. That’s from creating your notification to it going live on your site.
Step 1: Select the Notification Type
First, you need to log into your TrustPulse account.
Click Create Campaign from your dashboard.

On the next screen, you’ll need to do two things:
- Name your campaign
- Make sure it’s assigned to the right Blogger blog
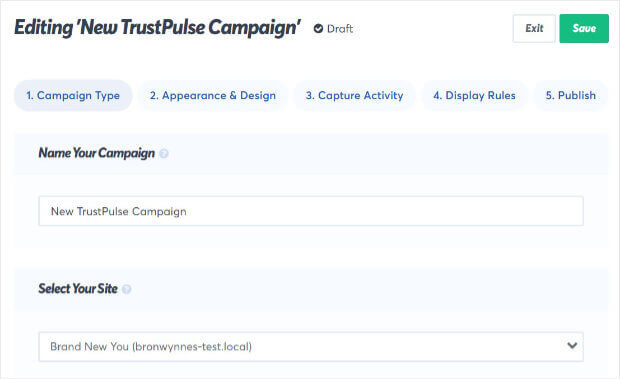
After that, you’ll pick your notification type.
Here you have two options:
- Recent Activity
- On-Fire
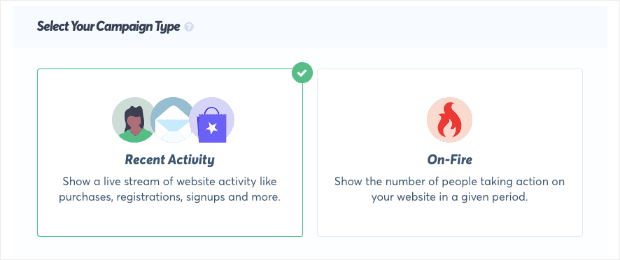
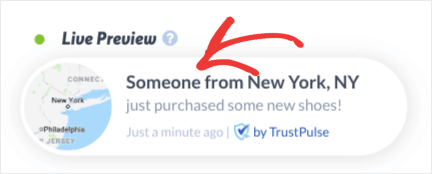
Recent Activity shows real-time stream of activity. So, each time someone completes the action you want to highlight, they trigger a new notification.
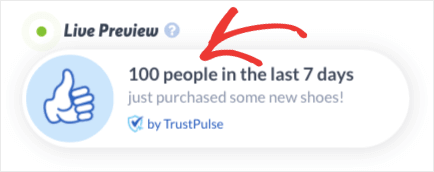
On-Fire campaigns track the activity of groups of people over a specific time period. Whenever you expect a large number of people to take action at the same time, you should use On-Fire campaigns. Flash sales or limited time pre-orders would be ideal for On-Fire campaigns.
Today, we’ll go with Recent Activity because we want to display a social proof notification each time someone joins our mailing list.
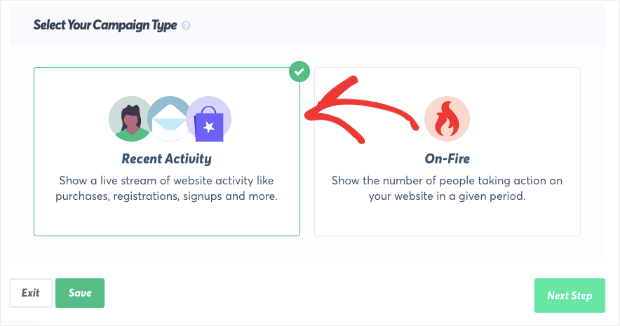
Once you’re done, click Next Step at the bottom of the screen.

Now, it’s time to design your social proof notification.
Step 2: Design a Social Proof Notification for Blogger
You can easily change the copy and design of your social proof notification to match your website.
On the Design and Appearance tab, you’ll be able to modify:
- Language
- Message Text
- Notification Image
And more. This means your notification will reflect your brand.
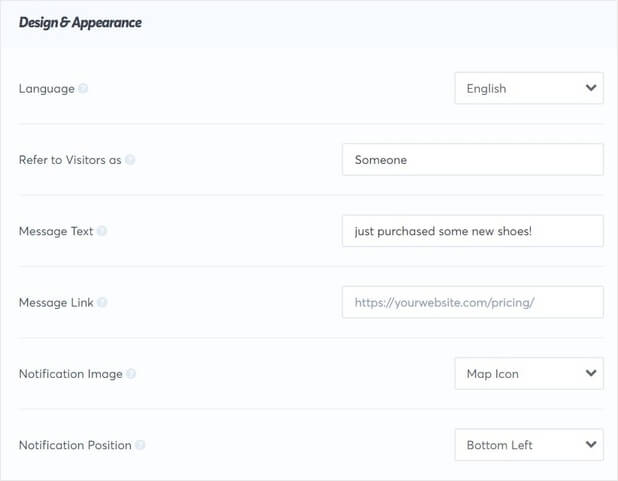
Best of all, if you want to change any of these settings, you can specify them in the fields available.
There are a few fields you might want to pay special attention to:
- Message link: the page you’ll be sending your visitor when they click the notification
- Refer to visitors as: the term to describe your visitor when their name isn’t available
TrustPulse lets you preview the changes in real-time as you customize your notifications.
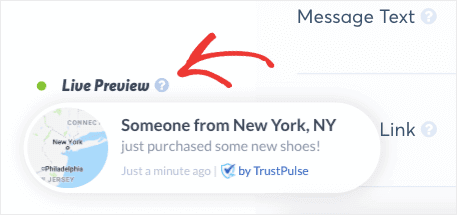
By default the notification is:
- Compact
- Rounded edges
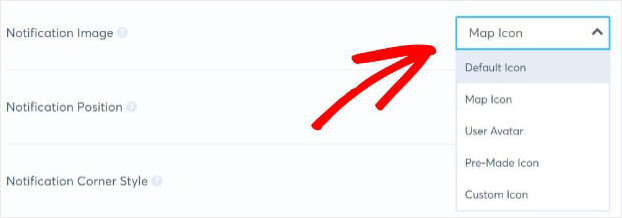
The image is a map icon, but you’ll be able to choose from built-in icons or upload one of your own.
You can also adjust the colors of the font and background under Advanced Settings.
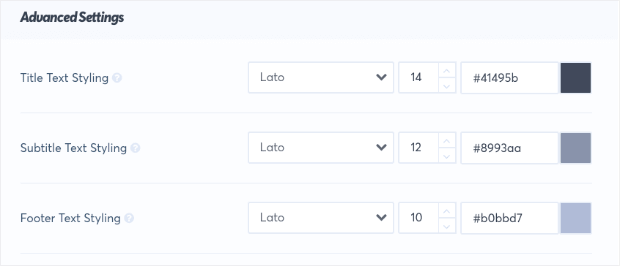
We made these edits in two minutes:
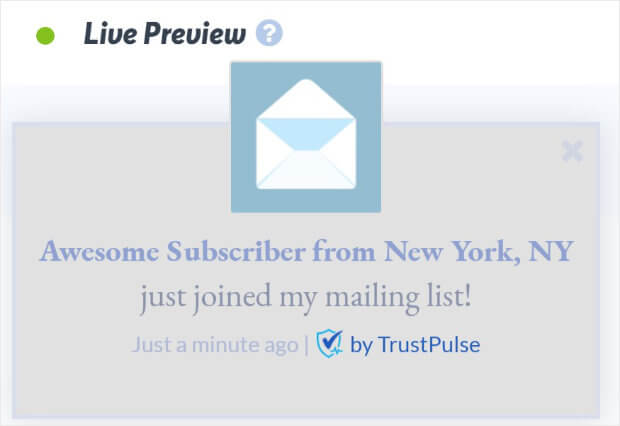
You can preview exactly how it will appear on screen.
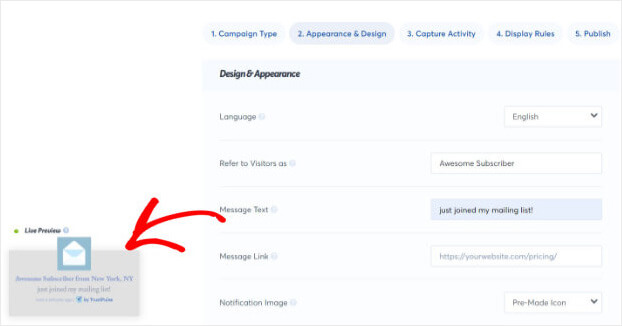
Once you’re satisfied with the look of your notification, click Next Step.

Now we’re ready to capture our social proof notification activity.
Step 3: Capture Activities From Your Blogger Blog
In this step, you’ll need to decide which activity you want to capture.
This means which action will trigger the notification.
TrustPulse gives you two ways to track activity:
- AutoMagic
- Zapier
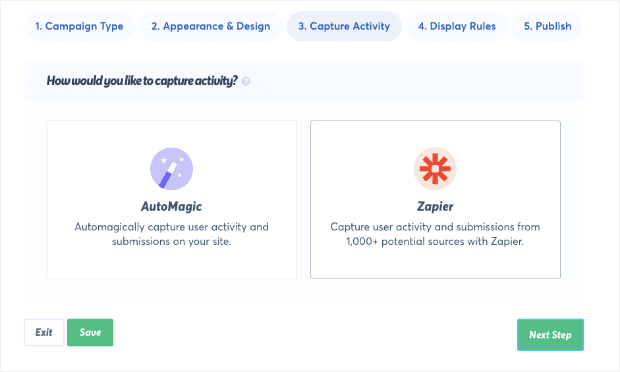
AutoMagic lets you capture activity that happens on your site. So, AutoMagic can record any actions on your site, like completing a registration page or making a purchase.
Zapier can track activities from 1,000 sources. For example, if someone leaves a recommendation on Facebook, you can easily display that on your Blogger site.
Today, we will go with AutoMagic.
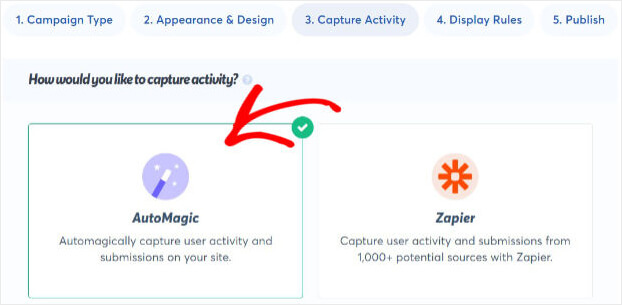
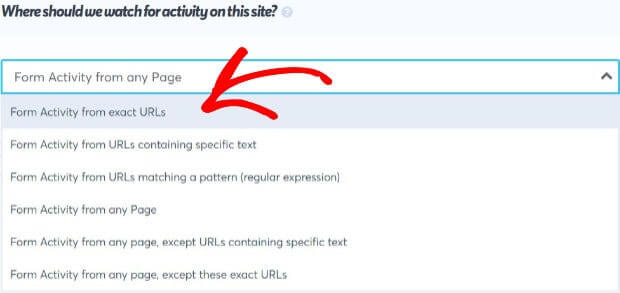
Scroll down till the section labeled Where should we watch for activity from this site.
This tells TrustPulse where the activity will be taking place on your site.
From the dropdown, select Form activity from exact URLs.
Below that section, you will see the section Add one or more page rules.
Now you can add the URL. For this tutorial, we will pick our sign up page.
Click the + sign.
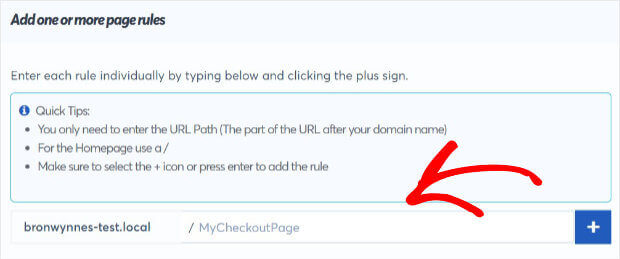
Now, your notification will be triggered whenever someone signs up for your mailing list.
Click Next Step.
We’re ready to decide where to display our social proof notification.

Step 4: Display Social Proof Notifications on Your Blog
You’ll need to decide where and when you want to display your notification.
Head over to Where should we display your notifications?
By default, the notification will display on every page.
For this tutorial, we’ll leave those default settings in place. But, you can get very specific about where your notification should appear.
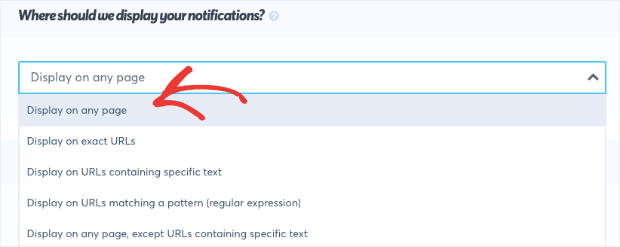
Then, you can adjust the Notifications Settings.
Here, you can control:
- How long your notification will appear on your site visitor’s screen
- Whether you want the notifications to load on mobile
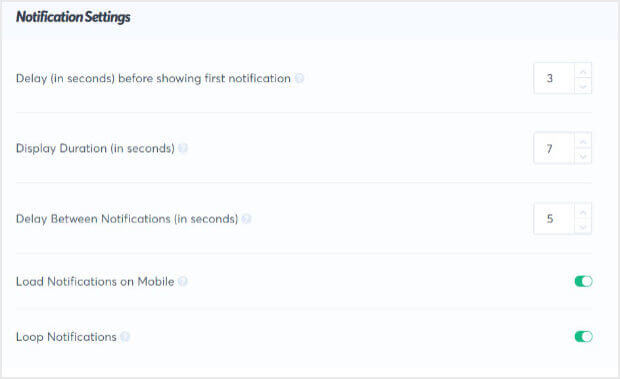
The last step is to publish your social proof notification.
Click Next Step.

Step 5: Publish Social Proof Notification on Blogger
You will now be on the publish screen.
And you’ll see your site isn’t connected yet.
Don’t worry. Connecting TrustPulse to Blogger is super simple.

Copy the embed code at the bottom of the screen.
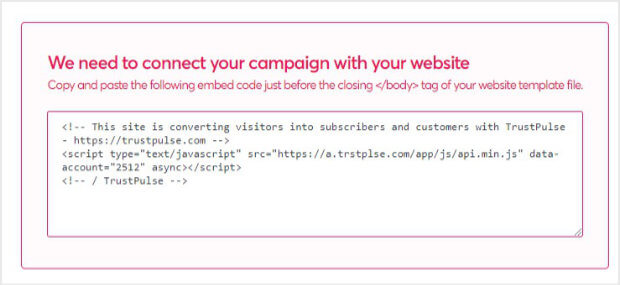
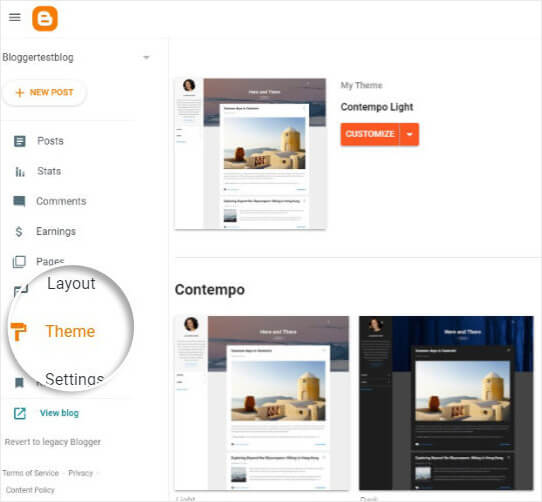
Head over to your Blogger account.
Click Theme.
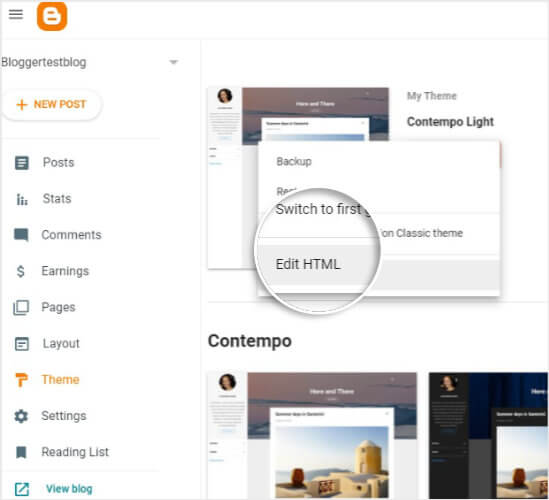
Go ahead and select Edit HTML.
And add your embed code.
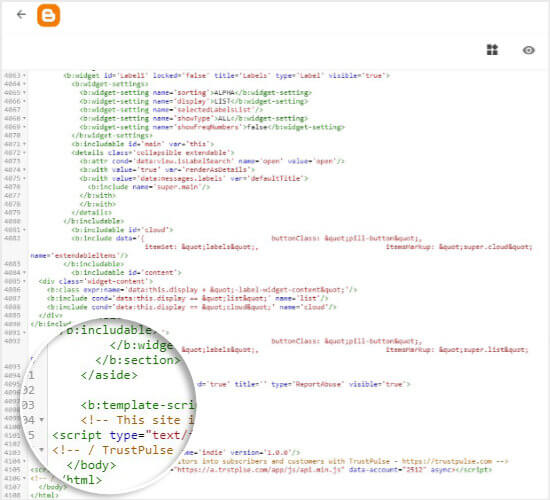
Click Save at the top of your screen.

Head back to TrustPulse to check your code is embedded.

That’s all there is to it.
Now, you’ll be able to increase conversions on your site easily.
Need more resources for boosting trust on your website?
Check out this article: 9 Tips on How to Get Customers to Trust Your Website
Want to improve your online presence and grow your site? Sign up for TrustPulse today.
