Do you want to create Jimdo social proof notifications to boost engagement and sales on your site?
When you add these messages to your site, you can show people that your leads and customers are enjoying your content and products.
In this tutorial, you will learn a quick and easy way to display social proof notifications on your Jimdo site so you can grow your conversions.
Why Add Social Proof Notifications to Jimdo
Social proof notifications are small messages that display recent activity on your website.
Because they’ve become so popular, chances are you’ve seen them before:

More and more websites have started using social proof notifications to build instant credibility online.
These social proof popups foster trust in your brand by showing others are valuing your content and products.
It’s easy to set up so you can encourage any type of conversion, like:
- Purchases
- Email signups
- Comments
- Demo registrations
These tiny alerts are rooted in an ancient human behavior concept. Psychologists call it social proof or informational social influence. It’s our natural tendency to copy the people around us, especially when we’re not sure what to do.
Think back to the last time you bought something online. Did you check the reviews? And did those reviews influence your buying decision?
Social proof statistics show the average customer reads 10 reviews. And verified reviews can increase the chances of someone purchasing a product by 15%.
In sum, people trust other people’s opinions about your brand.
How to Create Social Proof Notifications for Jimdo
Today, we’ll use TrustPulse to create social proof notifications for Jimdo.
Implementing social proof notifications is quick and simple with TrustPulse.
With TrustPulse, you’ll be able to create attractive notifications easily thanks to the intuitive campaign editor. And in less than 5 five minutes, your social proof notifications can go live on your Jimdo site.
The best thing is TrustPulse social proof notifications have been proven to increase conversions by up to 15%.
Don’t have an account yet? Get TrustPulse here. There’s zero risks to you because all plans come with a 14-day money-back guarantee.
Let’s dive right into it!
Step 1: Choose Your Social Proof Notification Type
First, log into your TrustPulse account.
From your dashboard, choose Create Campaign.

Next, name your campaign and assign it to your Jimdo site.
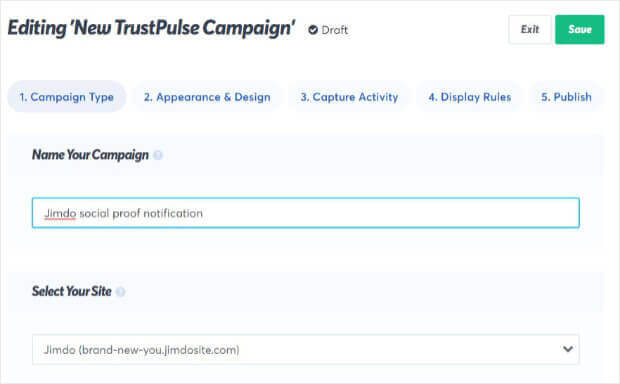
Now, you’ll need to choose your notification type.
Here are your options:
- Recent Activity: shows real-time activity on your site the moment it happens. So, as soon as you get a new subscriber or sale, a new notification will appear on your site.
- On-fire: combines the actions of groups of people over a specific time period. This is perfect when you expect large numbers of people to take action on your site over a short period of time.
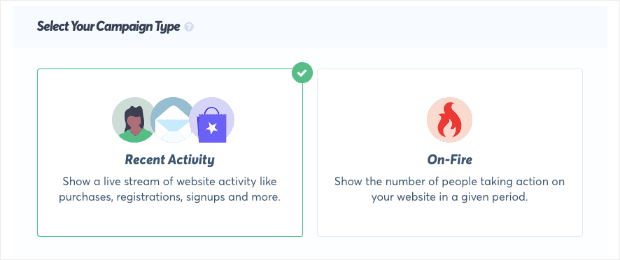
Today, we will select Recent Activity because we want to display a notification each time someone takes action on your Jimdo site.
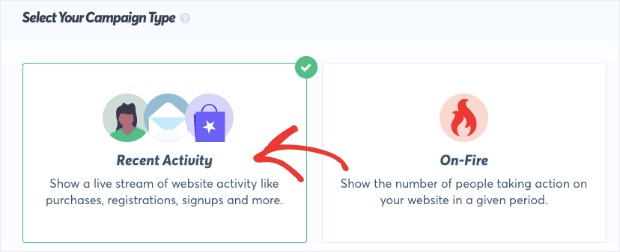
When you’re ready, click Next Step.

Step 2: Customize Your Social Proof Notification
Now, you’ll be able to customize your social proof notification.
You might only want to make small tweaks to the default notification because it looks good enough to go live right away.

But, you can change anything you want in minutes.
Customize the color, image, background, font, and position of your notification to fit in perfectly with your brand and website.
On this screen, you’ll see all your editing options.
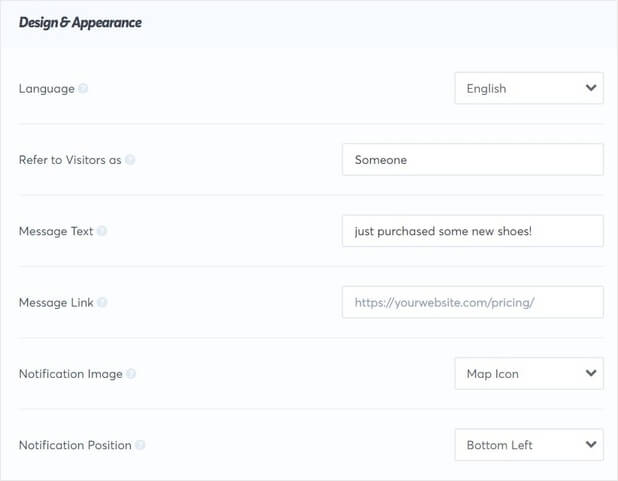
From here, all you have to do is select from a dropdown menu or add some text to a field box to make your changes.
Let’s take a closer look at some of the ways you can make your notification your own.
You’ll be able to customize:
- Message text: the copy of your notification.
- Message link: the page your users will be sent to when they click on your notification.
- Notification: by default, the map icon will be displayed, but you can upload your own image.
Then, you also be able to change the position, style, and size of notification.
For more style options, click Advanced Settings.
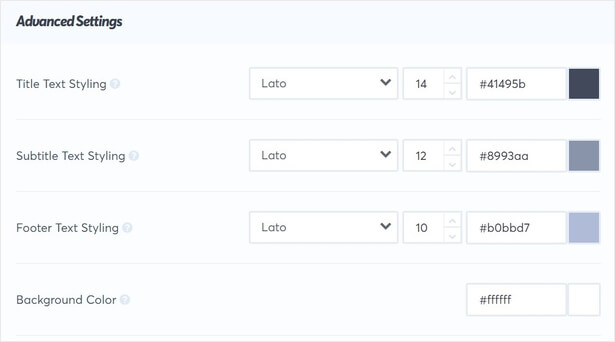
From here, you can change the background, font, and color of your notification.
Here are the changes we made to the default notification in only a few minutes.

Once you’re happy with the syle of your social proof notification, click Next Step.

Now, you’re ready to capture activity for your notification.
Step 3: Capture Activity on Your Jimdo Site
In this step, you’ll be able to capture activity for your social proof notification. In other words, you’ll decide which conversion you want to track and display.
TrustPulse gives you two ways to do this:
- AutoMagic
- Zapier
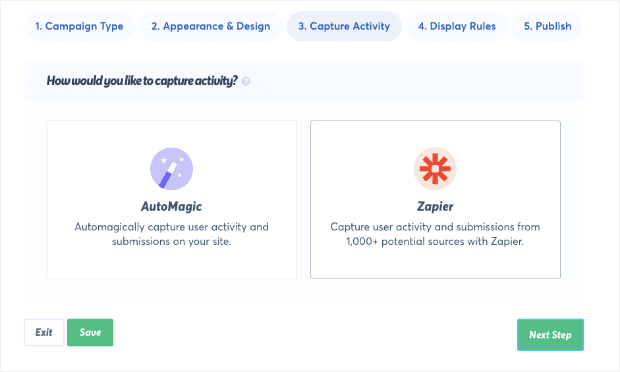
Here’s how these methods work.
AutoMagic automatically records form activity on your Jimdo site. Zapier, on the other hand, tracks activity from sources off your site. With Zapier, you can trigger a new notification whenever someone leaves you a Google Review or Facebook recommendation.
Today, we will go with AutoMagic.
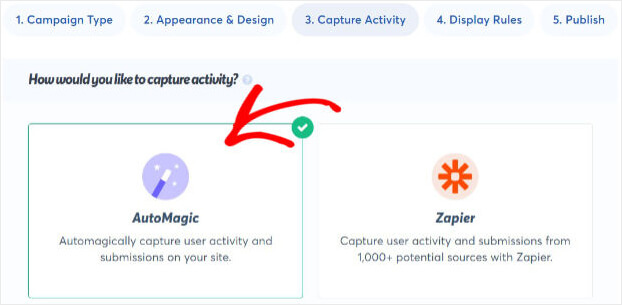
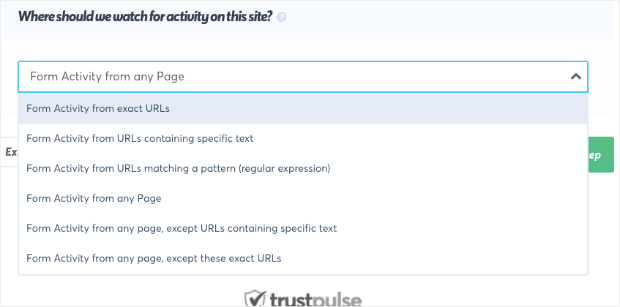
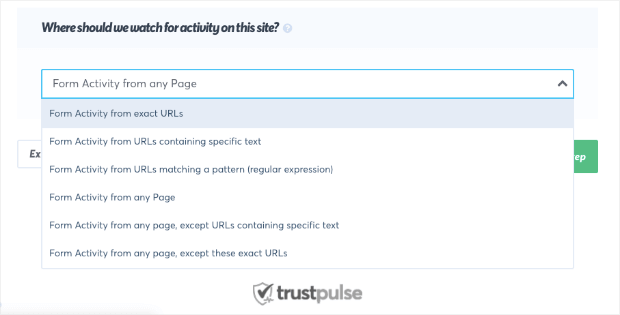
Now, choose the activity you want to track from the dropdown menu.
You can decide to capture activity from:
- Exact URLs
- Any page
- From URLs containing specific text
And more.
Click Next Step.

Step 4: Display Social Proof Notification on Jimdo
Now, you can choose where your notifications will appear on your Jimdo website.
By default, your notification will appear on all pages, but you’ll be able to target specific pages.
Simply scroll down to the section Where should we display your notifications?
Once you’ve decided where your notification should appear, you can also edit other settings, like the delay between alerts.
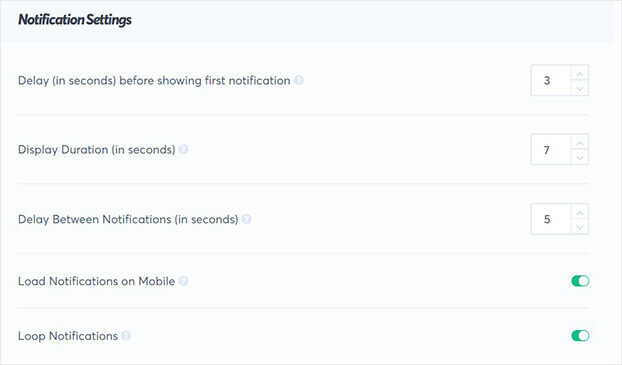
You’ll find these and other options in the Notification Settings section:
- Control when the first notification appears
- Enable mobile notifications
- Customize the duration of the notification
Once you’re finished, click Next Step.

It’s time to launch your campaign.
Step 5: Publish Social Proof Notification on Jimdo
The final step is to publish your campaign on your Jimdo site.
On the Publish screen, you’ll be able to review your social proof notification.
If you’re happy with the preview notification, you’re ready to add it to your site.
Now, if this is your first campaign, your Jimdo site won’t be connected yet.

Don’t worry. Connecting TrustPulse and Jimdo is quick and easy.
Copy the embed code at the bottom of the page.
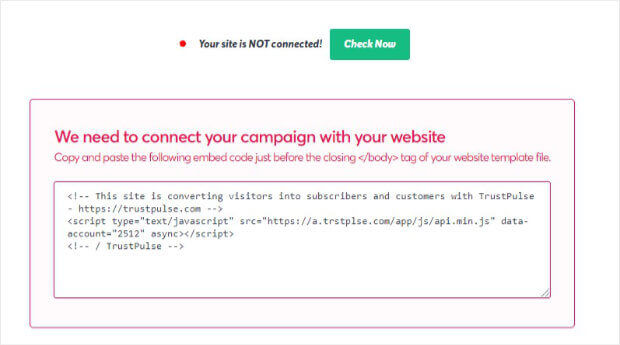
Head over to your Jimdo site.
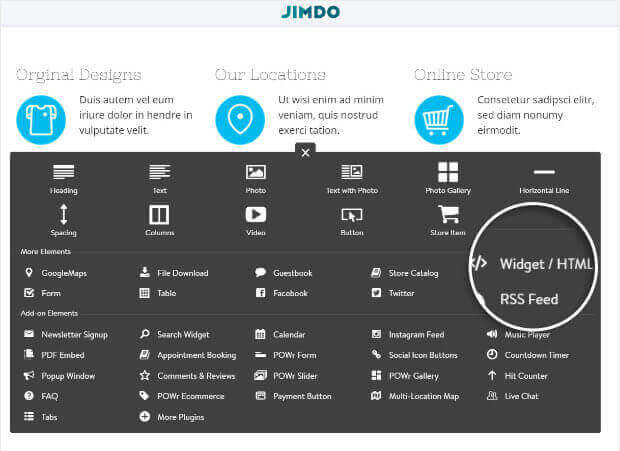
From the Admin area, hover over the area where you want to add your embed code.
Click the +Add Element button.
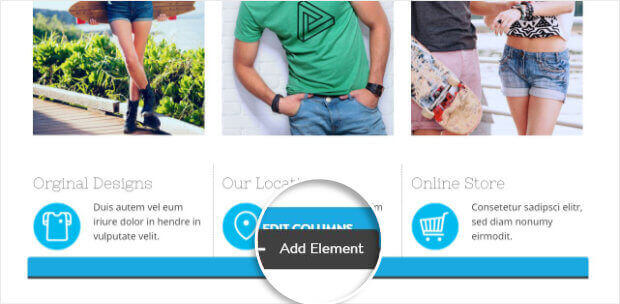
Select the Widget/HTML option.
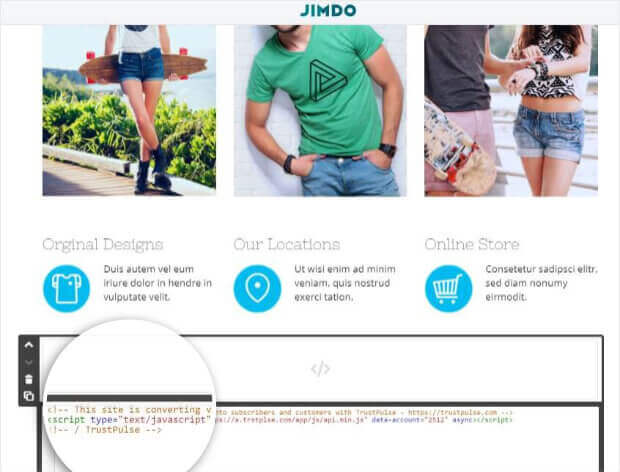
Go ahead and paste your TrustPulse embed code.
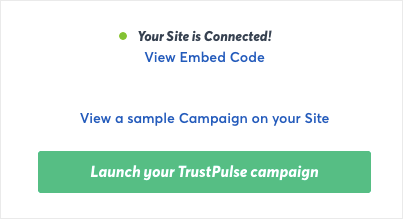
Head back to TrustPulse to confirm your site’s connected properly.
Go ahead and click Launch your TrustPulse campaign.
That’s it. Your social proof notification is now live on your Jimdo site.
We hope you found this article helpful.
If you’re looking for more resources on how you can use social proof to grow your business, check out these articles:
- 7 Types of Web Notifications to Increase UX and Boost Sales
- Social Proof: What It Is & How to Get Started [+ Proven Examples]
- How to Use Social Proof to Improve User Experience
Are you ready to use social proof notifications on your Jimdo site? Get started with TrustPulse today.
