Do you want to showcase Google reviews on your WordPress website?
You may have raving reviews from customers that will help build confidence and trust in potential customers.
In this article, we’ll show you how to embed Google Reviews on your site to boost sales and conversions.
Why You Should Display Google Reviews in WordPress
Reviews have become an important part of business because customers rely on them to make purchase decisions. In fact, 9 out of 10 consumers read reviews before they make a purchase.
Since you’re reading this article, you most likely already have reviews on Google. If you showcase good reviews on your website, it can serve as social proof to build trust with visitors.

Social proof encourages visitors to buy your product, sign up for your newsletter, or register as a member on your site. And Google Reviews are one of the best forms of social proof.
Now, you can embed individual Google reviews but this means you’ll have to add reviews manually and update them regularly to feature the latest reviews. Instead, you can set up a Google Review feed that will automatically fetch your reviews from Google and display them on your site.
“But what about negative reviews that may discourage visitors from converting into customers?”
Not to worry. We’re going to show you how to easily set up a Google Reviews feed using a tool that takes care of it all. It will let you filter your reviews and select how often you want the feed to be updated with new reviews.
Embedding Google Reviews in WordPress
The best tool to embed Google Reviews in WordPress is WP Business Reviews. It’s an all-in-one solution to display reviews from platforms like Google, Facebook, Yelp, and Zomato.
We’ll show you how to set up a fully customized Google reviews feed that automatically fetches reviews from Google and displays them on your site.
We’ll also show you how to select your best reviews and create a static review feed.
Step 1: Installing and Activating WP Business Reviews
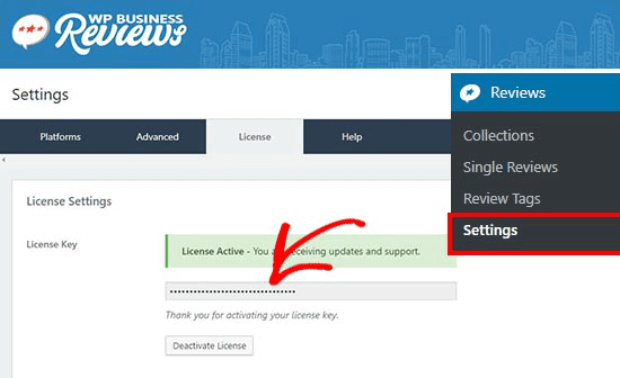
To get started, first install and activate the WP Business Reviews plugin on your site. Once done, from your WordPress dashboard menu, select the Reviews » Settings page.
First, you’ll need to open the ‘License’ tab and add your license key to activate the plugin. You can find the license key in your account on the WP Business Reviews site.
Step 2: Connecting Your Site To Google
On the same page, switch to the ‘Platforms’ tab to select where you want to fetch reviews from.
Here, you’ll see options to connect to Google, Facebook, Yelp, and Zomato. You can select as many as you want but for today, we’ll focus on adding Google reviews.
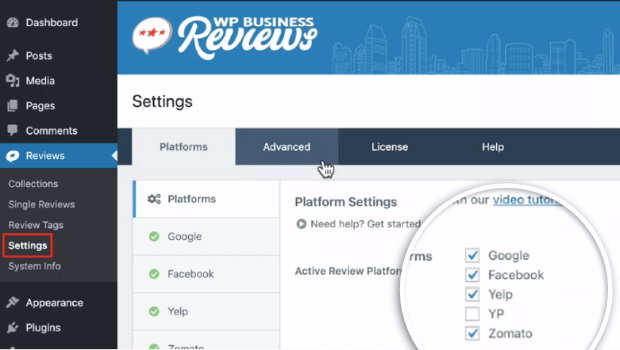
Select ‘Google’ by ticking the checkbox next to it and then hit the ‘Save Changes’ button.
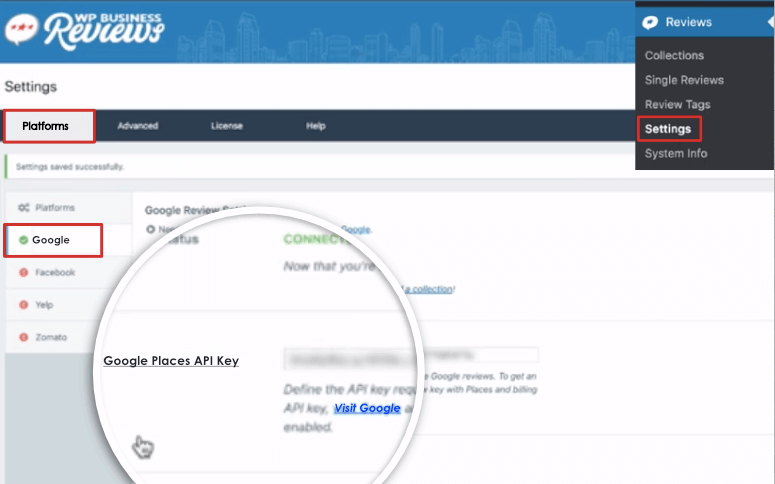
Now, open the Google tab from the left-hand menu. To connect to Google, you’ll need to enter a Google Places API key. Don’t have one? No worries, you can click on the link that says ‘Visit Google’ to create an API key.
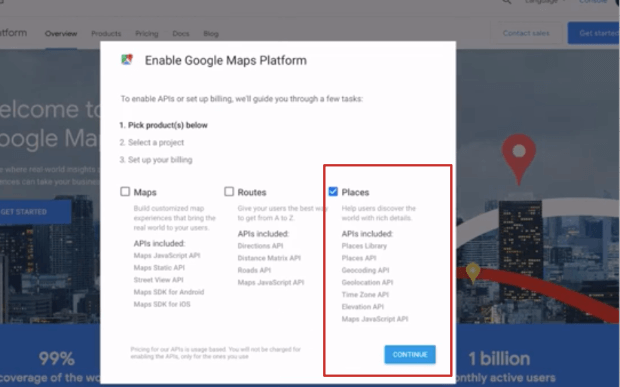
This will open a popup window with three options for you to choose. It auto-selects ‘Places’, so you simply need to hit the ‘Continue’ button.
Then enter a project name such as ‘My Business Reviews’ and move on to the ‘Next’ step.
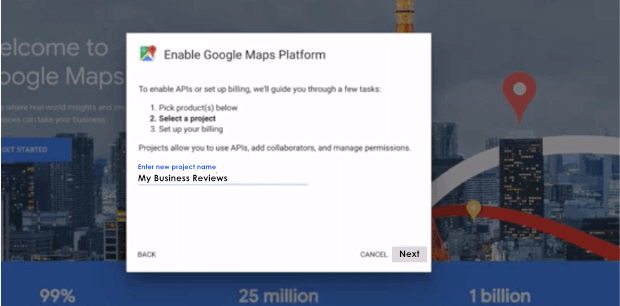
You’ll also need to select a billing account or create a new one, after which an API key will be generated for you.

Copy this key and then paste it in the API key field in the WP Business Reviews dashboard.
Don’t forget to save your changes to store your API key.
Now, your site is connected to Google. Next, you’ll need to connect it to your Google My Business account to fetch your reviews.
Step 3: Adding a Google Reviews Collection
To start displaying your Google reviews on your site, you’ll first need to add a collection.
Go to the Reviews » Collections tab, and you’ll see options to connect to different platforms. Select Google by clicking on the ‘Add Google Collection’ button.
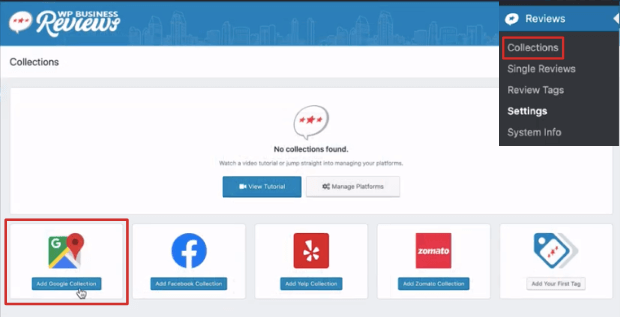
This will open up a collection editor screen where you can connect to your Google My Business page. From the right-hand menu, select the Review Source tab, and search for your Google My Business name or ID, and your location.
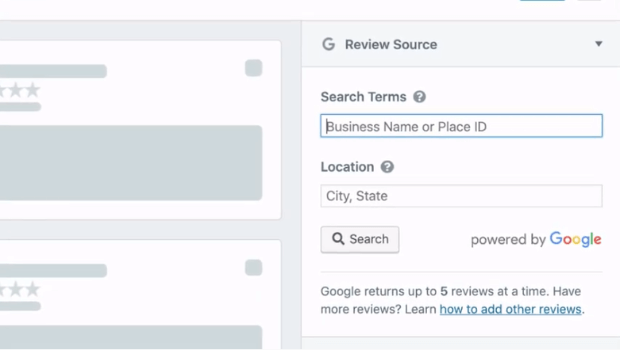
This will populate the business connected to the name or ID, you simply need to select the ‘Get Reviews’ button.

The plugin will connect your site to your Google account. When it does, you’ll see your reviews populate in the post edit screen. Now, you can start customizing the reviews feed.
Step 4: Customizing Your Google Reviews Feed
WP Business Reviews has a ton of customization options that you can explore. We’ll take you through the highlights to to make your Google Review feed look stunning.
Show/Hide Details of Reviews
By default, WP Business Reviews displays all the details of your Google reviews such as the reviewer’s name and image, timestamp, and rating. You can change this and display only the details you want.
To do this, open the ‘Review Components’ dropdown menu. You’ll see a list of details that you can show or hide on your feed.
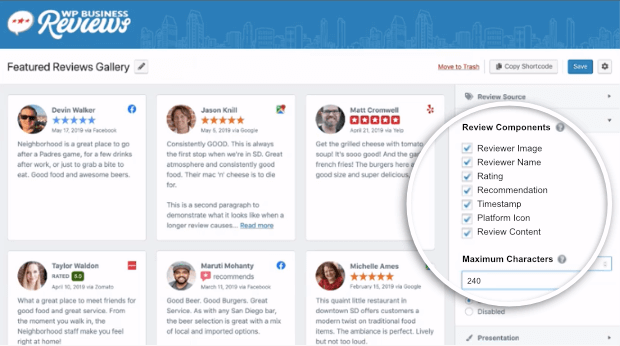
Simply uncheck the boxes next to the details you want to hide.
Next, long reviews can make your feed look messy and disrupt your layout. To solve this, you can also set a maximum character limit to be displayed so that your feed looks neat and presentable.
Change the Appearance of the Feed
WP Business Reviews gives you plenty of options to completely change the look of your feed.
Under the ‘Presentation’ tab, you can choose between a light, dark, or transparent theme to match your website.
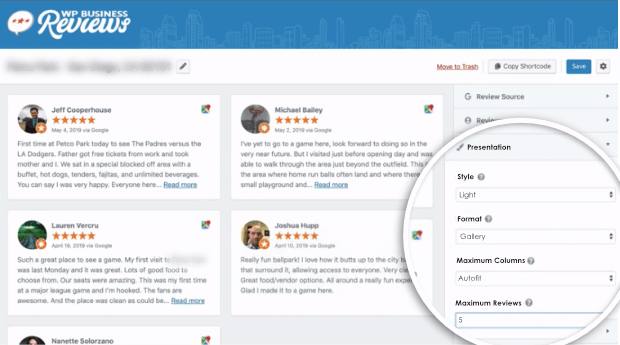
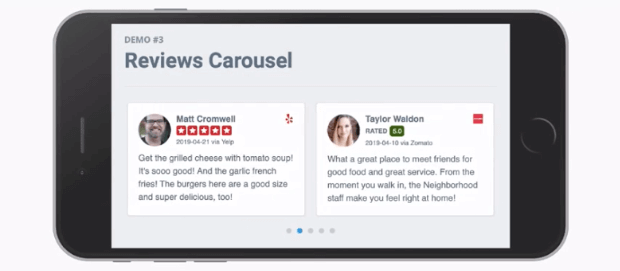
There are 3 different layouts to choose from as well – gallery, list, and carousel view.
Out of these, the carousel view is responsive so the reviews will display in a beautiful layout on mobiles and tablets.
Next, you can choose to display the reviews in a single column or in multiple columns. Or you can let the tool auto-fit the layout to your page.
And finally, by default, only 5 of the latest reviews from Google are displayed. You can change this to display as many reviews as you want.
Set Minimum Ratings
Next, you may want to display only your positive reviews on your website to build trust with your visitors.
To make sure your site displays only positive reviews, WP Business Reviews lets you select minimum rating options.
Under the ‘Filters’ tab, you can use the dropdown menu to select the minimum rating to display.
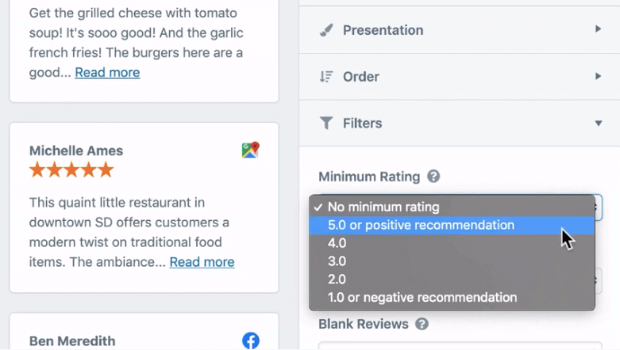
Once you’re happy with the customizations, save your collection and the Google Reviews feed is ready to be displayed on your site.
Step 5: Displaying Google Reviews Feed in WordPress
You can easily display the Google Reviews feed you created in pages, posts, and sidebars on your site.
Adding Google Reviews in WordPress Pages or Posts
For this tutorial, we’ll show you how to add the Google Reviews feed to a new page, but the steps remain the same for posts as well.
We’ll also show you how to add the page to your website’s menu so that your visitors can easily access your reviews.
First, in the collection editor page, click on the ‘Copy Shortcode’ button.
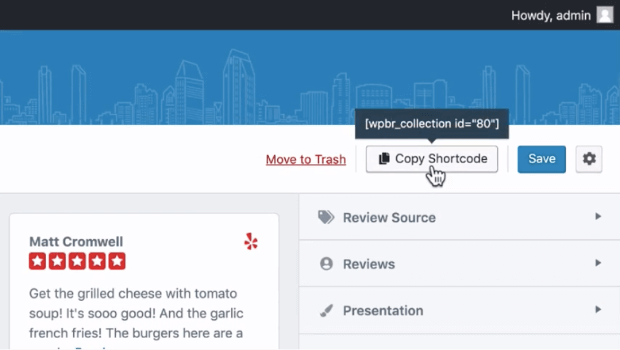
Now, from your WordPress dashboard menu, go to Pages » Add New link to create a new page. Then, paste the shortcode in the post edit screen.
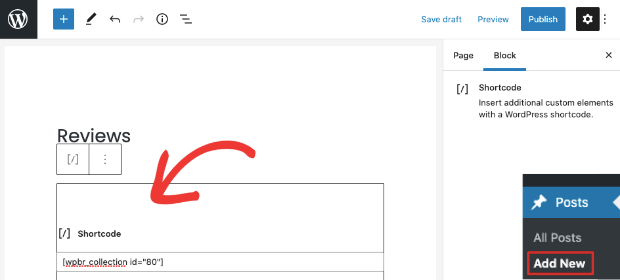
Save or Publish your page and then preview it to see your Google Reviews feed in action.
Now, head over to the Appearance » Menus page. Select your menu and then add the new ‘Reviews’ page you just created to your menu.
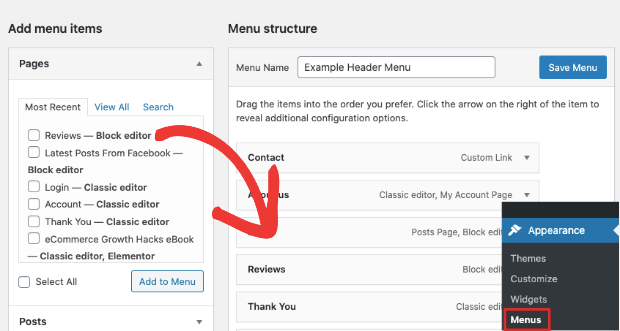
Save your menu and visit your site to see the Reviews page easily accessible in your menu.

Adding Google Reviews to a WordPress Sidebar
You can get more visibility for your Google Reviews by adding it to your sidebar. Go to the Appearance » Widgets page. Here, you need to add a text widget to your sidebar menu and you’ll see an edit screen open up.
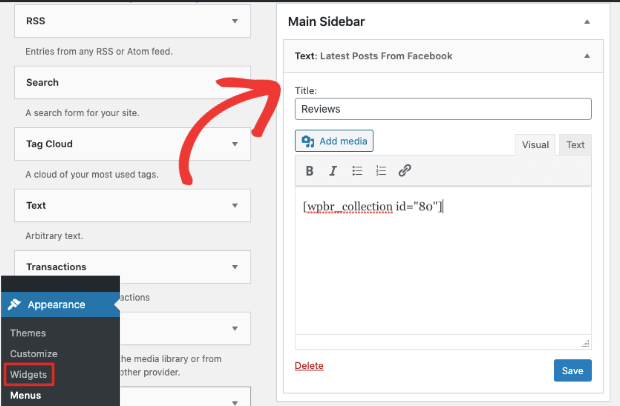
Add a title like ‘Reviews’ and paste the shortcode you copied into the text edit screen. Finally, visit your site to see your Google Reviews live in your sidebar.
Creating a Google Reviews Page With Selected Reviews
Now, we know there are times where you may not want a Google Reviews feed that automatically refresh. Instead, you may want to select a few of your best reviews and display them on your site.
To create this static feed, first, you need to disable the automatic refresh option. Head over to the Reviews » Settings page and open the ‘Advanced’ tab.
Here, you can change the refresh options to daily or weekly.
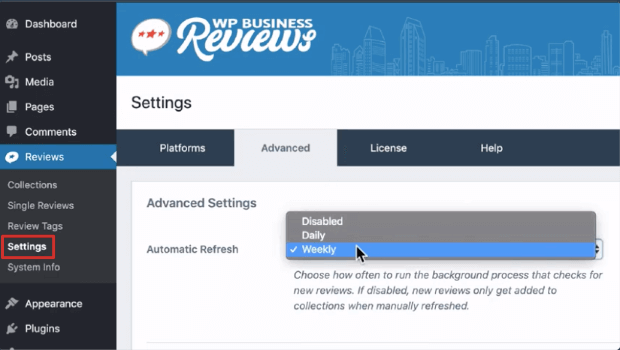
You can also choose to disable the auto-refresh option and display only selected reviews.
Once you disable the automatic refresh, head over to the Reviews » Single Reviews page. Here, you can select the reviews you want to display by checking the boxes next to them.
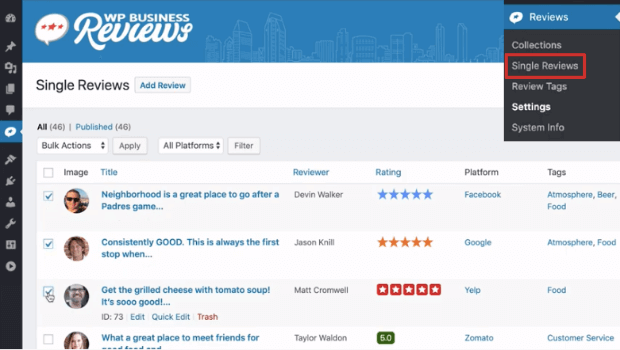
Now your Google Review feed will display only the best reviews you’ve selected.
And that’s it! You should have everything you need to display Google Reviews on your WordPress site.
We hope you found this post helpful, and if you did, you may also want to see our post on FOMO Marketing: Everything You Need to Know About Fear of Missing Out. This post is packed with information on how to use social proof to build trust and improve your conversions.
And if you want to see an instant boost in your sales and conversions on your site, sign up for TrustPulse now!

