TrustPulse can work with any website. The best social proof tool works on Shopify too! This guide will show you how you can integrate the power of TrustPulse into your Shopify site.
Create a Campaign
The first step is to create a campaign. Once your campaign has been created you’ll be provided with the embed code to add to your Shopify site.
See this guide on creating and editing your campaign for a step-by-step walkthrough if this is your first time creating a campaign.
Paste the Embed Code
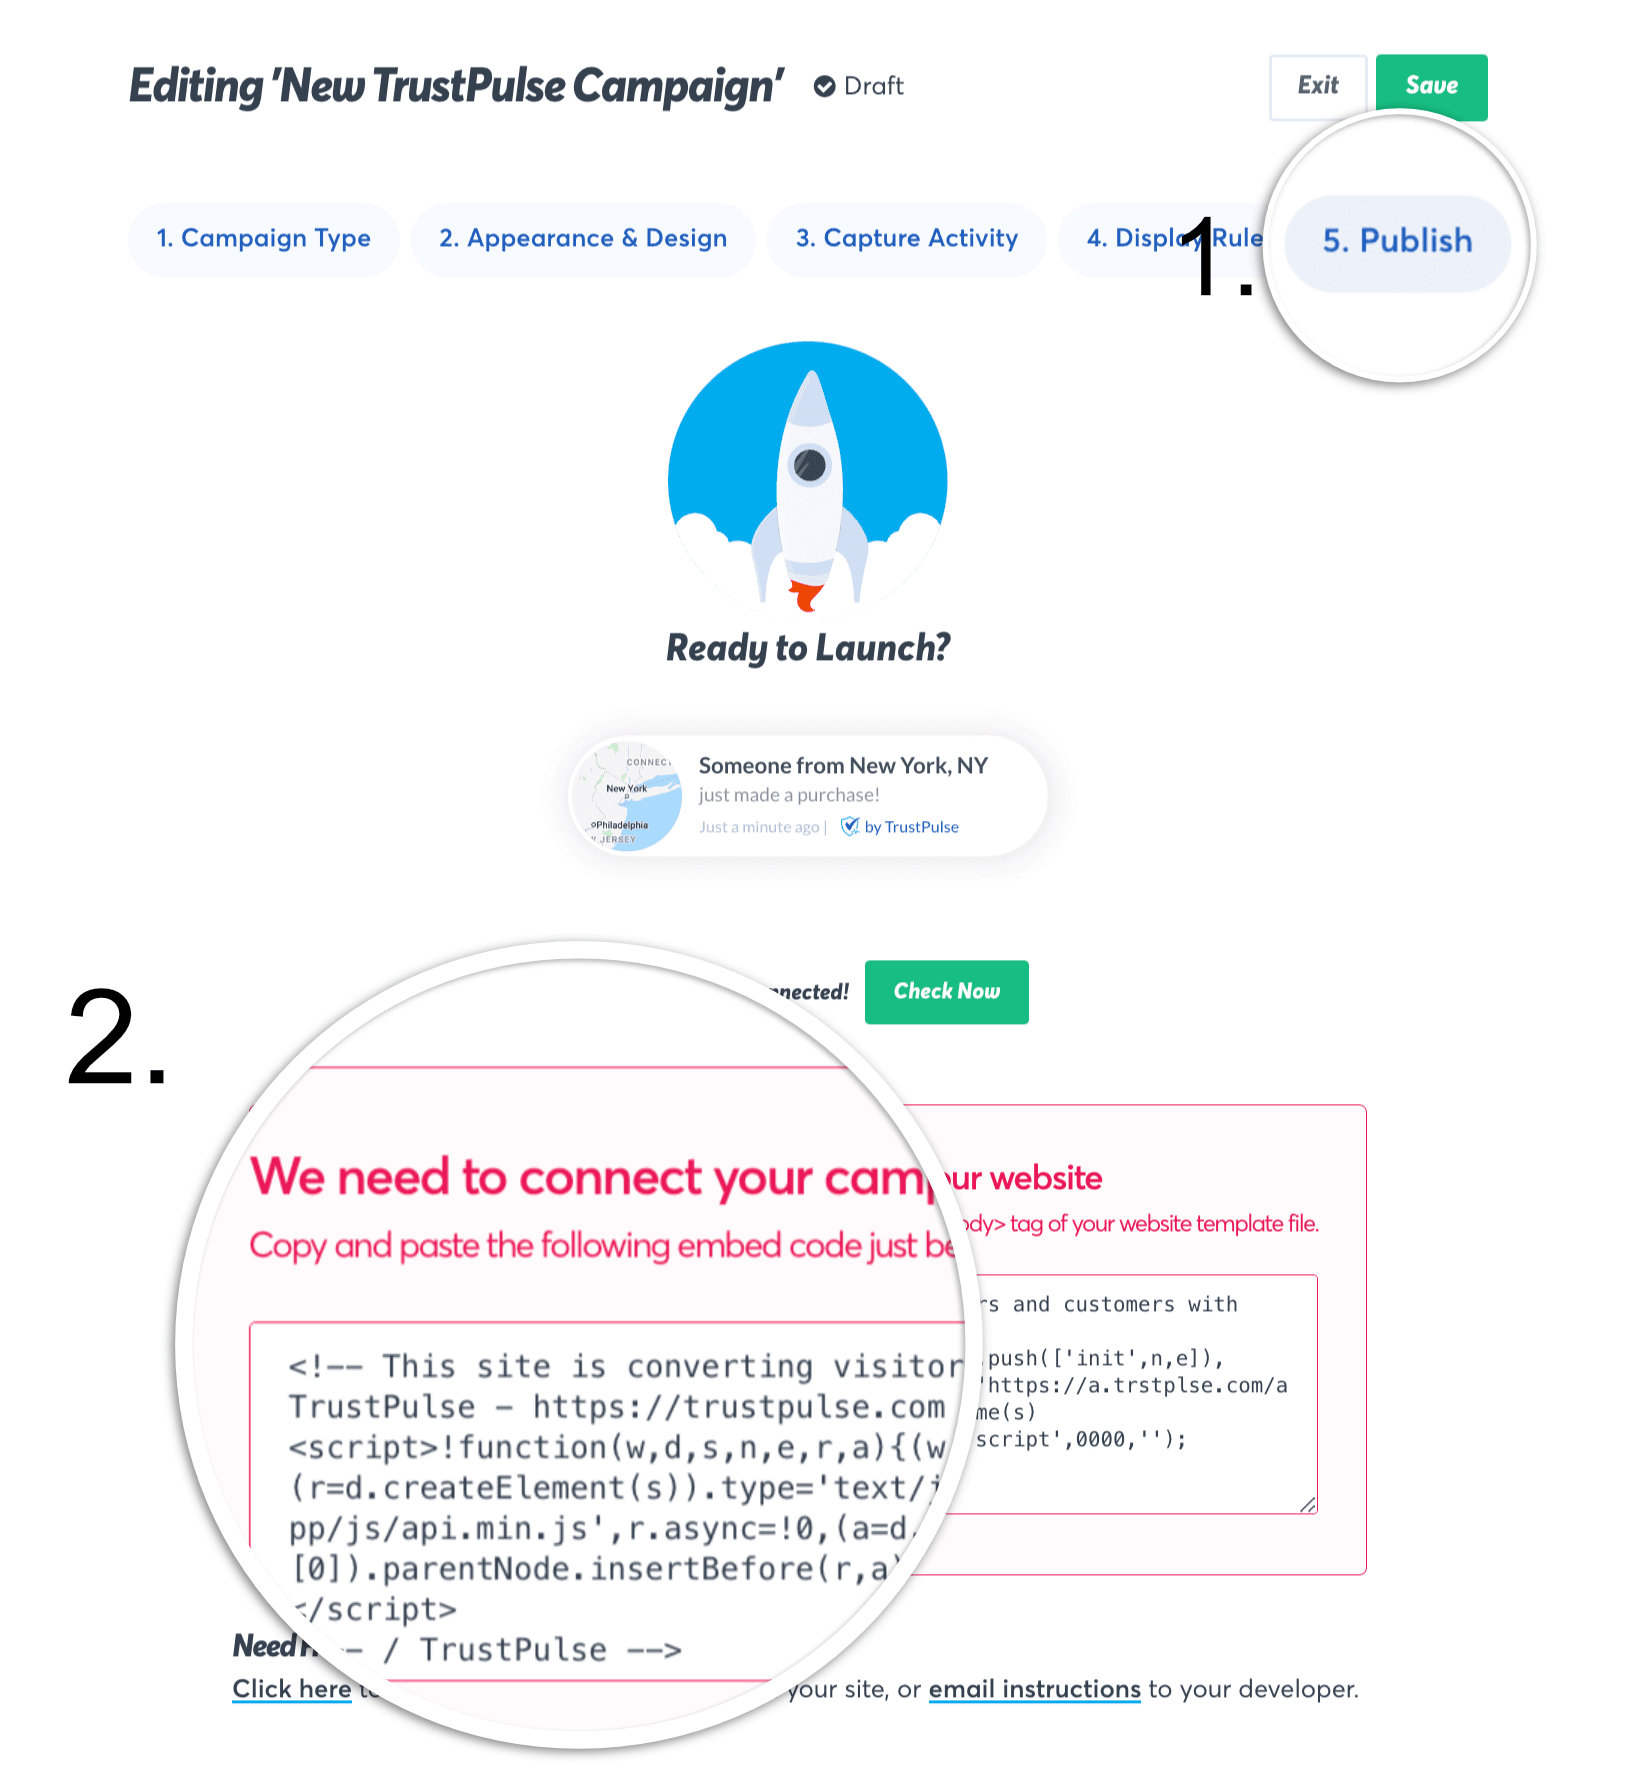
Once you’ve created your campaign, navigate to the Publish tab from the campaign edit screen and copy the embed code for your campaign.
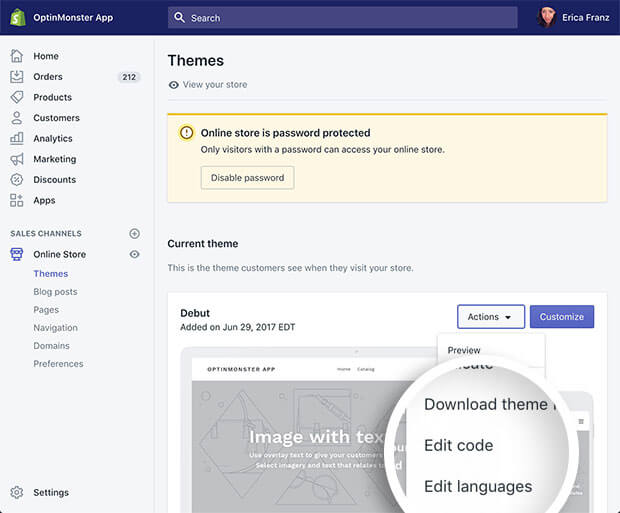
In the admin of your Shopify site navigate to Online Store > Themes. On this screen, from the Actions dropdown select Edit Code. This will launch Shopify’s template file editor.
Locate the Sections folder and select the footer.liquid file to edit. You’ll want to paste your TrustPulse embed code just before the </footer> tag.
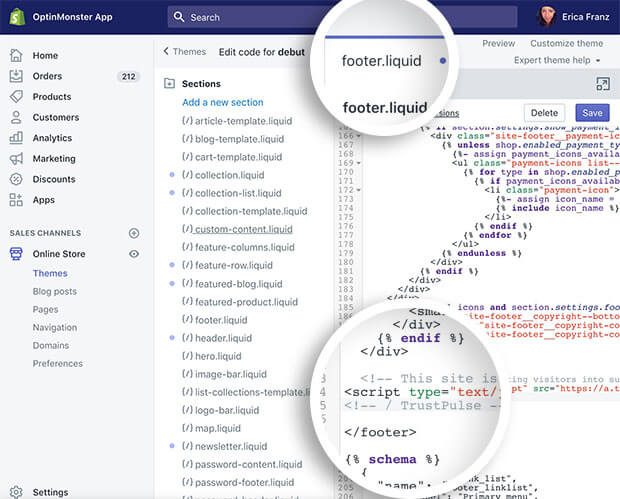
Save the changes to the template file.
Now, return to the Publish tab of the TrustPulse campaign editor and select the Check Now button to confirm your embed code is correctly placed on your Shopify site.

TrustPulse will confirm if the embed code is correctly added to your site, then you can Launch your campaign!
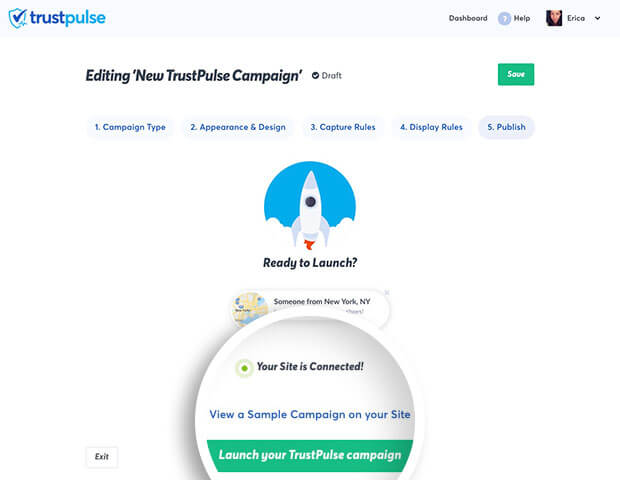
You can now navigate to the front-end of your Shopify site and test your TrustPulse campaign!
Recording Checkout Events With TrustPulse
Using the above steps, you can track most forms on your Shopify site. You can also use Zapier to quickly and easily record notifications for specific Shopify Products and events on your site.
However, due to limitations in Shopify’s support for custom scripts, we cannot actually track submissions on the checkout page itself using TrustPulse. In order to track completed orders, we need to follow a couple extra steps.
First, in Shopify click on Settings, then select Checkout. Then, scroll down to the Order processing section.
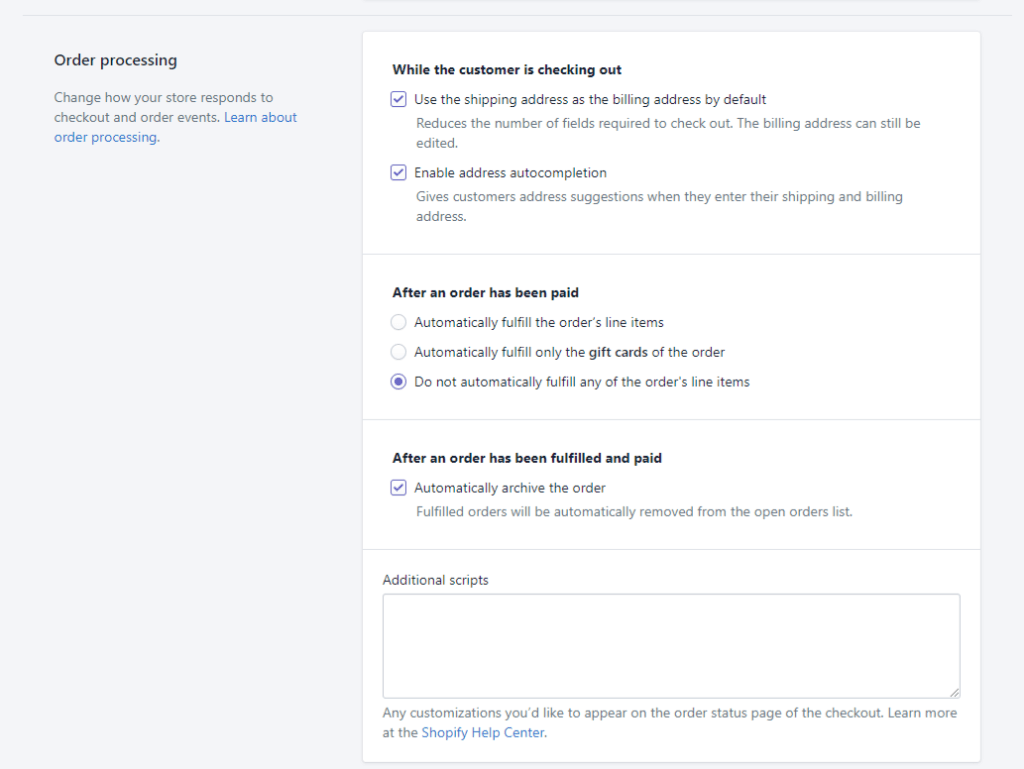
Under Additional Scripts, paste a copy of your TrustPulse embed code, and click Save. This will add your TrustPulse script to the Order Confirmation page on Shopify.
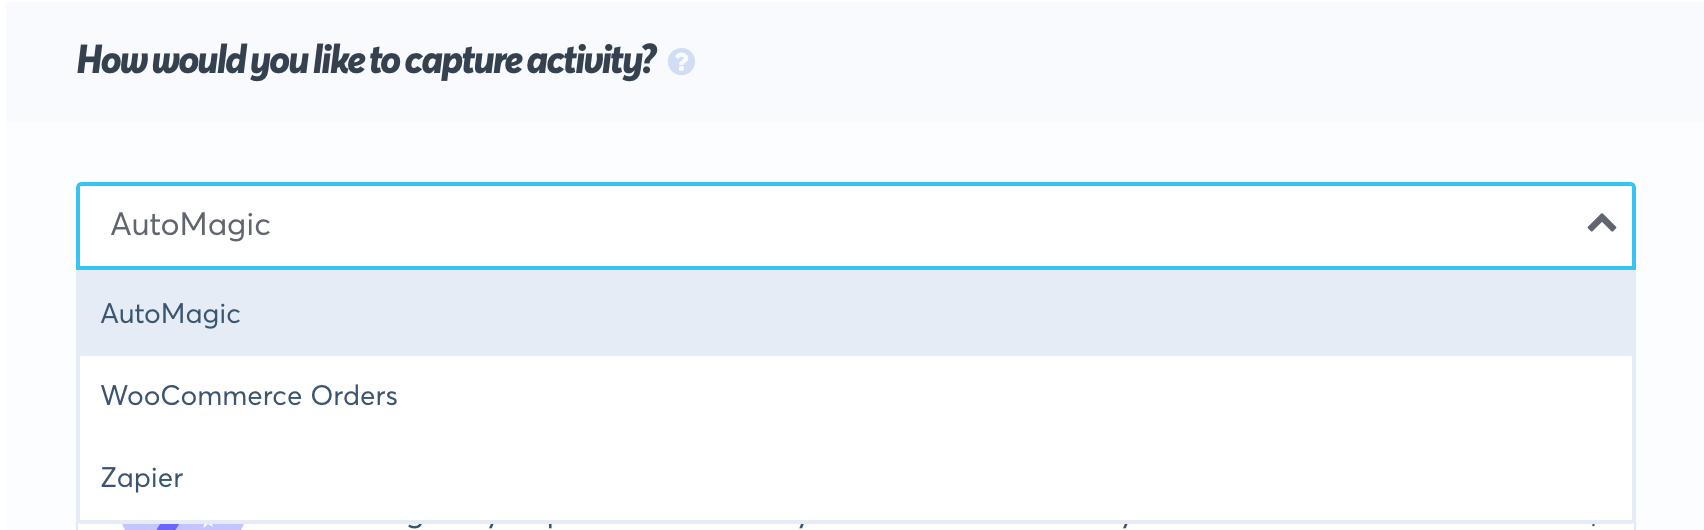
Then, back in the TrustPulse App, click on the Capture Activity tab.
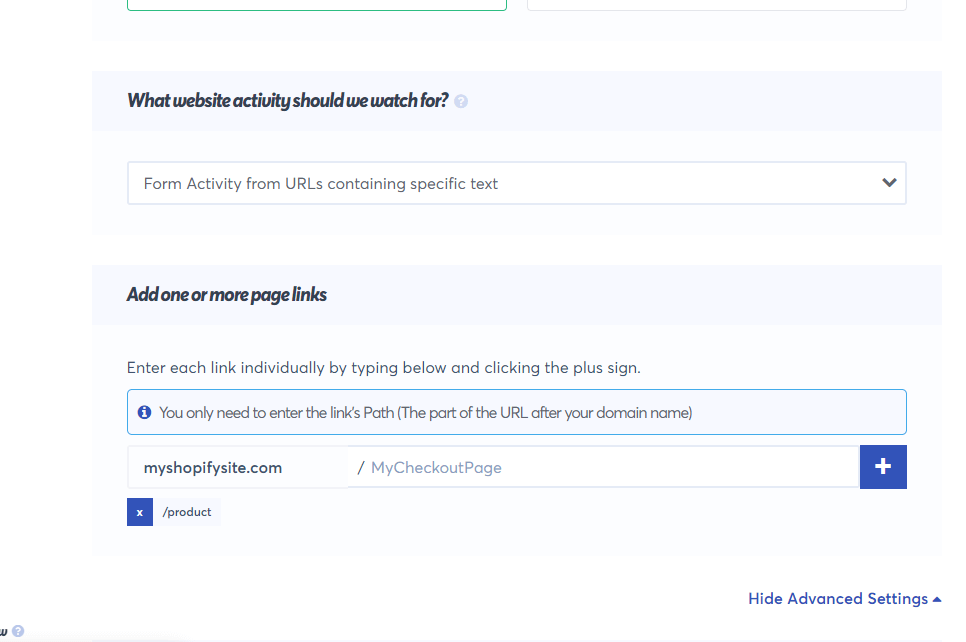
Then, enter any rules you would use to match Products that should trigger this notification. You can enter specific product URLs if you want to target individual products, or a more generic rule to capture all of your products. For example, in the settings below, TrustPulse will trigger for any page that has product in the URL.
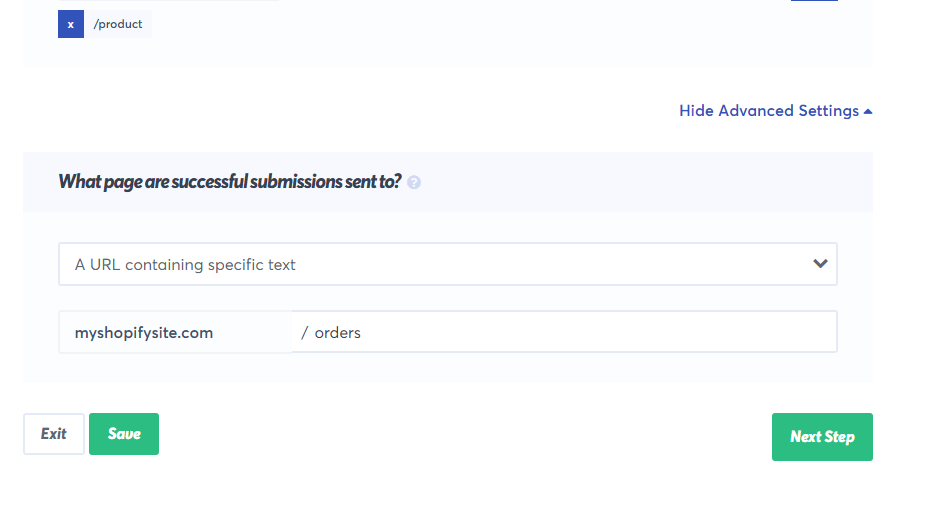
Then scroll down and click on Show Advanced Settings. This will show you an option titled “What page are successful submissions sent to?”
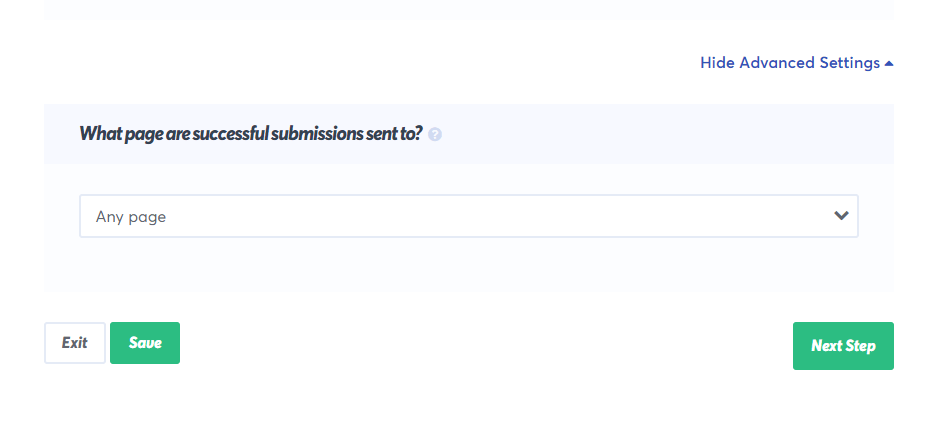
This setting is telling TrustPulse that any successful submissions on your site should be sent to this page. Since all shopify Order Confirmation pages have orders in the URL, we will set this rule to capture on any URLS that contain the word “orders.”
Once you’ve made these changes, save your campaign. Now, the products you specified in your display rules will automatically be captured with TrustPulse
FAQs
Q: What domain do I enter when creating my campaign?
A: Shopify allows you to use a custom domain like mywebsite.com or a sub-domain on Shopify like mywebsite.myshopify.com.
You will want to use the domain you configured in Shopify on the Online Store > Domains screen.
If you’re serious about supercharging your website with social proof then get started with TrustPulse today!