
Do you want to add social proof notifications to WordPress but aren’t sure where to start? Or maybe you’ve seen tons of different social proof software, and you don’t know which one to choose.
Social proof notifications can be a great addition to any WordPress site. These small messages can have a huge impact on your overall sales.
But if you’re new to WordPress or haven’t used social proof notifications before, the thought of creating one may seem intimidating.
That’s why we’re going to show you exactly how to add social proof notifications to WordPress in a matter of minutes. Before we start, though, let’s get clear on what social proof notifications are and how they can help your site thrive.
What Are Social Proof Notifications?
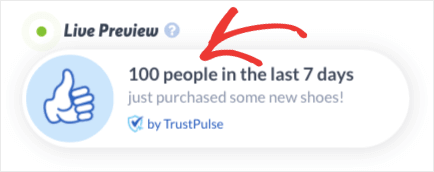
Social proof notifications are small messages across your site that show how other visitors are positively interacting with your brand. Here’s one example of a social proof notification:

This type of social proof shows when someone leaves a review on a 3rd party review site like Yelp. But you can create many other notifications that show when visitors on your site:
- Sign up for your newsletter
- Make a purchase
- Register for a webinar
And much more.
These small notifications appear on your website to show other visitors just how popular your brand and products are. But now for the big question…
Do social proof notifications make an actual impact on customer behavior?
In a word, YES!
Social proof notifications motivate hesitant visitors to take some kind of action. These tiny messages create FOMO (“fear of missing out”).
FOMO is the idea that consumers don’t want to “miss out” on any of the positive benefits your product or services have to offer. When they see real people enjoying these benefits, they feel a powerful urge to join in.
It’s like when a friend tells you about a great new restaurant they recently tried. Even though you’d never heard of the restaurant before, you’re now way more likely to try it out.
In fact, our social proof notifications have been shown to increase sales by 15%. That’s a big impact for such a small change to your site.
Want to learn even more about social proof notifications and how they can help your brand? Check out this in-depth guide on social proof.
Now that we know what social proof notifications are and why they matter, let’s get into how you can add these notifications to your WordPress site.
Adding Social Proof Notifications to WordPress
For this tutorial, we’ll be using TrustPulse to create our WordPress social proof notifications.
TrustPulse allows you to create many different types of social proof notifications. Plus, it’s only a fraction of the cost when compared with our nearest competitors.
You can start TrustPulse at just over $4/month, which is about the cost of your morning cup of coffee. ☕
Want to learn more? Check out this post, FOMO vs. UseProof vs. TrustPulse: Which Is Best for Social Proof.
This is an excellent place to learn about the benefits of using TrustPulse and a breakdown of pricing.
Now, let’s dive into the tutorial.
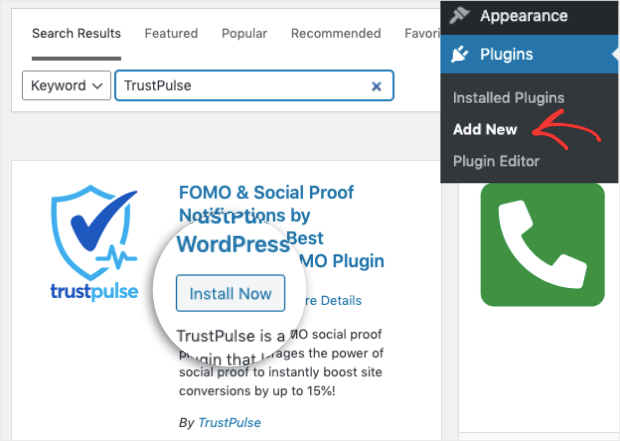
Step 1: Download the TrustPulse Plugin
The first thing you need to do is head to your WordPress site and download the TrustPulse plugin.
In your WordPress dashboard, navigate to Plugins » Add New. Then search for the TrustPulse plugin in the search bar and click Install Now:
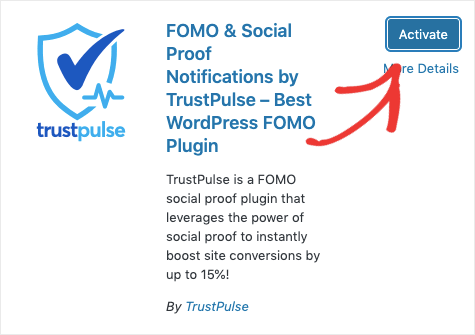
Then click Activate to get started with the plugin:
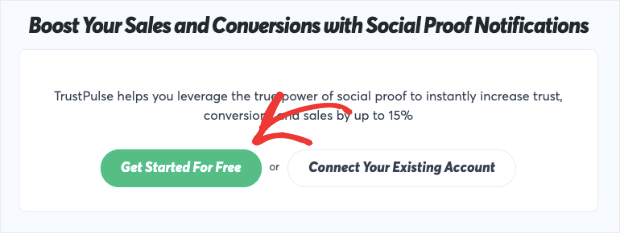
At this point, you can either connect your existing TrustPulse account or create a new one for free. For this tutorial, we’ll start a new one. Click Get Started Free:
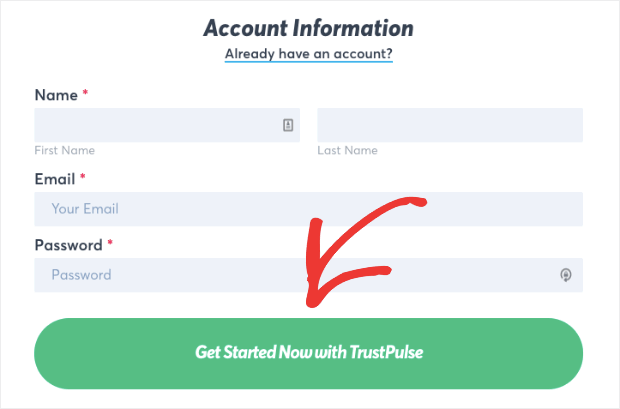
And now you’ll just need to sign up for whichever plan suits your needs. Then enter your account information and click Get Started Now With TrustPulse:
Once you’ve signed up, you’ll see that your TrustPulse account is connected in your WordPress dashboard:
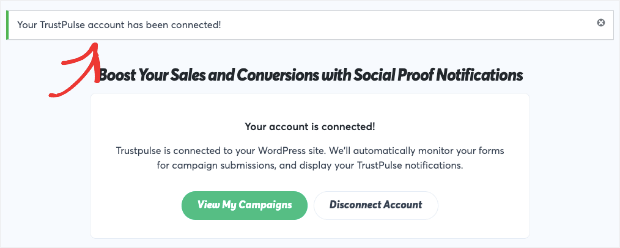
Then you’re ready to create your social proof notification for WordPress.
Step 2: Create Your Social Proof Notification
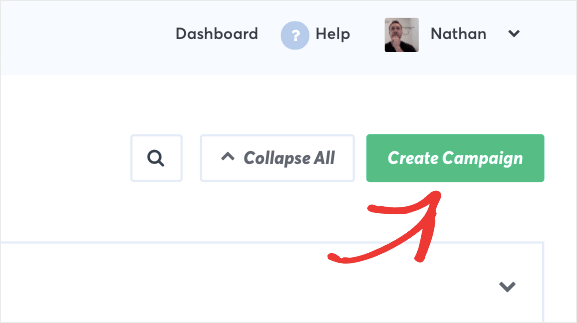
Once you’re in your TrustPulse dashboard, you can begin creating the right social proof notification for your website. To get started, click Create Campaign in the upper right-hand corner:
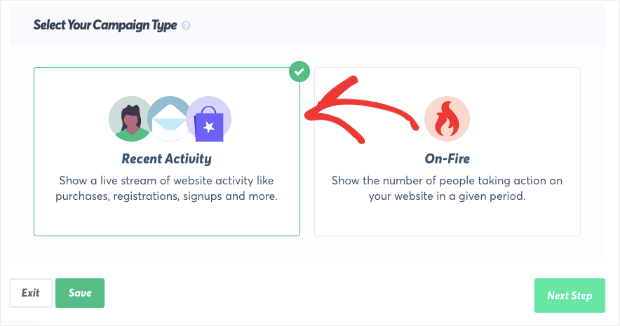
Now you’ll determine which type of social proof notification you want to create. Here you have two options:
- Recent Activity
- On-Fire
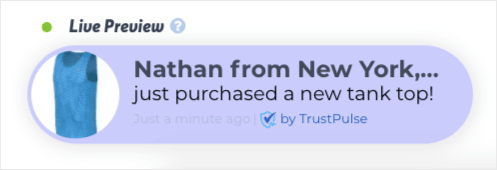
Recent activity notifications are great for everyday interactions with your website. That’s because these messages show when an individual engages with your brand. When possible, these messages refer to visitors by name:
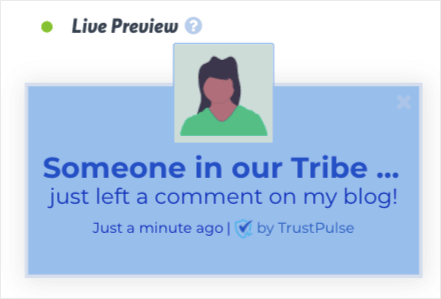
When that information isn’t available, you can change the visitor reference that displays on your social proof notification:
The point is that Recent Activity campaigns show how other individual visitors are interacting with your brand.
On-Fire notifications are different. These show how larger groups of people are taking the same action with your brand:
These types of campaigns are perfect for popular activities on your site like flash sales, webinar sign-ups, or any other event that brings in large numbers.
Both types of social proof notifications are super powerful, depending on what you want to show. For today’s tutorial, we’ll go with a Recent Activity campaign:
When you’ve selected the right notification type for your WordPress site, click Next Step.
Step 3: Modify Your Notification’s Design
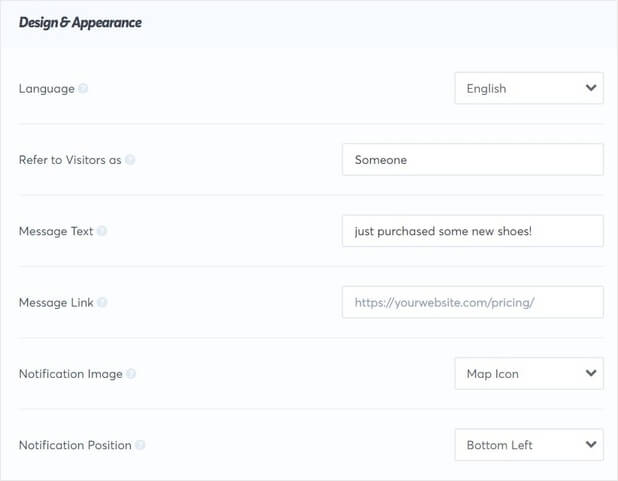
In this step, you’ll be changing the appearance, text, and link of your social proof notification. Doing so is super simple and requires zero coding skills at all.
You can make all the changes you want to your campaign by filling in a few field boxes, selecting options from drop-down menus, or flipping toggle switches on and off.
This includes changing aspects of your notification like:
- Language
- Visitor reference
- Message text
- Message link
And much more.
One of the most important aspects of your social proof notification is the image you use. This can visually attract your site’s visitors and capture their attention.
By default, your social proof notification will show a map overview of where your visitors are located:
![]()
You can change this to one of our pre-made icons:
![]()
Or upload your own image:

Whatever you decide, TrustPulse allows you to tailor your social proof notification to fit the design of your website.
You even have a list of advanced options to let you change the font and color of your campaign to match your brand:
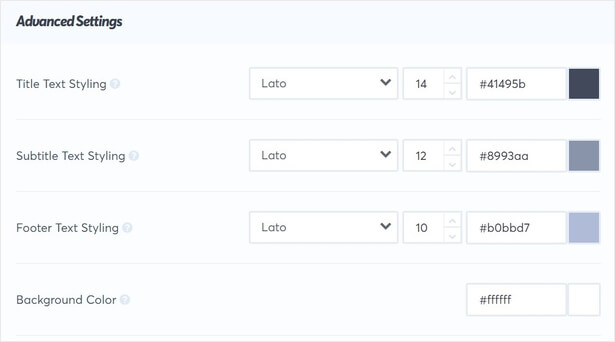
These customization options allow you to create a social proof notification that grabs your audience’s attention without disrupting the user experience (UX).
In other words, your notification can powerfully complement your website and engage your visitors without distracting them.
Here’s the social proof notification we built for today’s tutorial in under 3 minutes:

Once you’ve designed the perfect notification for your site, click Next Step.
Step 4: Capture Activity With Your Brand
Now your notification looks awesome, but you need to capture the activity that will trigger your message. For this, you have two choices:
- AutoMagic
- Zapier
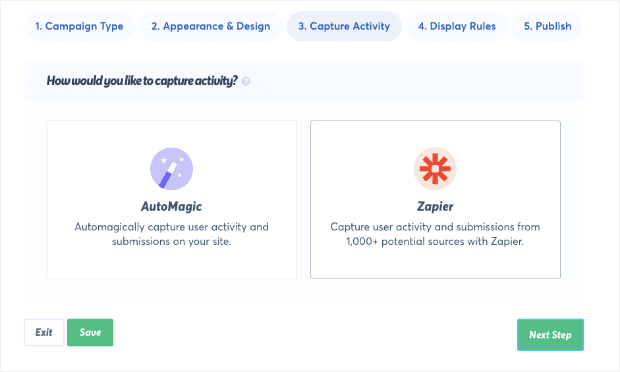
AutoMagic will capture activity that’s taken directly on your WordPress site. This would be like when someone signs up for a newsletter or makes a purchase with your store.
Zapier allows you to create social proof notifications for actions that are taken off of your website. This would be like when someone leaves you a review on a 3rd party site or engages with another software you’re using, such as ClickFunnels.
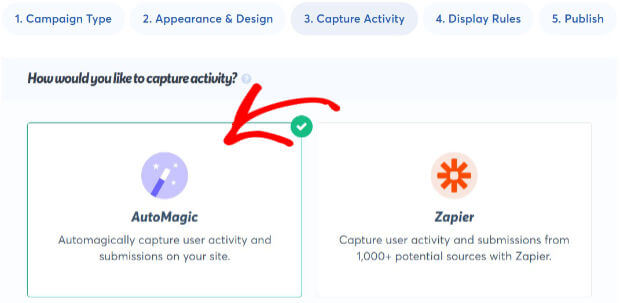
For this tutorial, we’ll be using AutoMagic:
And now, you can choose the form activity you want to capture from the drop-down menu just below. This will capture activity from:
- Any page
- Exact URLs
- URLs matching a pattern
And much more.
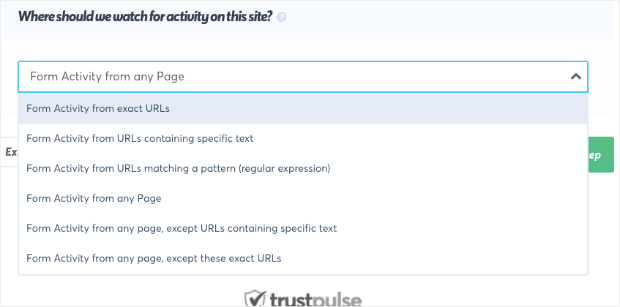
Once you’ve determined which activity you’d like to trigger your social proof notification, click Next Step.
Step 5: Configure Your Display Rules
One of the last steps is to decide where you want your social proof notification to appear and for how long.
The first step is to choose which pages of your site you want your notification to appear on. You can easily do this from a drop-down menu, and you can choose from:
- Any page
- Exact URLs
- URLs with specific text
And many more.
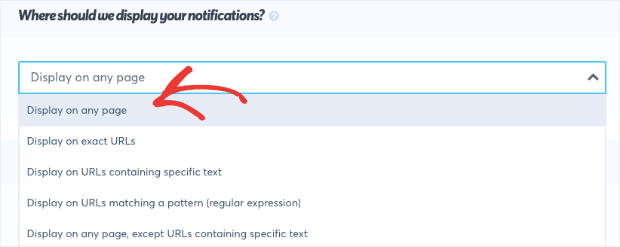
This allows you to set different social proof notifications for different pages on your site. So, for example, you can make live sales notifications for product pages and other notifications for your webinar’s landing page.
With TrustPulse, your customization options are limitless!
Once you’ve determined where you want your notification to appear, you can set different rules for how long and how frequently these messages appear. This is done in your Notification Settings.
You can change your campaign’s:
- Delay for the first notification
- Duration
- Delay between notifications
And other display setting options.
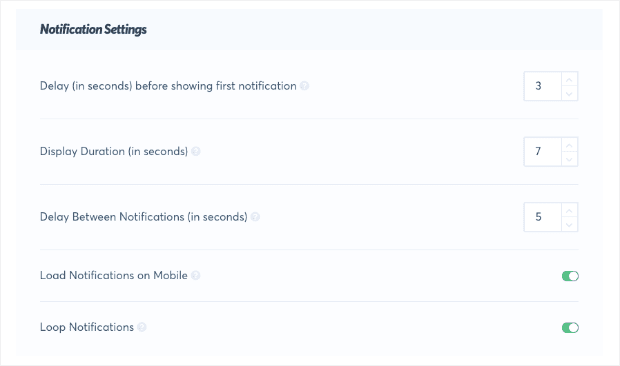
When you’ve configured your notification settings, click Next Step to review and launch your campaign.
Step 6: Review and Publish Your Campaign
In this last step, you’ll simply need to review and launch your campaign:

If you followed this tutorial and downloaded the TrustPulse plugin, your site will already be connected. If you get a message that shows your site isn’t connected yet, no worries.
Just check out this helpful resource on how to integrate TrustPulse with WordPress. Or, you can go back through this tutorial to see if any steps were skipped.
When you’re happy with your campaign, click Launch Your TrustPulse Campaign:
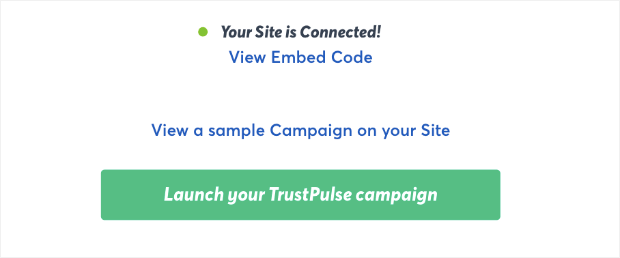
And that’s it! Your social proof notification will now be live on your WordPress site.
We hope you found this article helpful. If so, you may want to check out the following resources:
These articles will get you more familiar with social proof and how these notifications can help your business grow.
Ready to get started with TrustPulse? Head over and sign up for your risk-free account today!
