
Do you want to learn how to create a contact form in WordPress, but not sure how to get started?
A contact form can be an excellent way to improve user experience (UX) across your site. It opens up a channel of communication that lets your site’s visitors reach out to you if they have any questions.
But how do you set up a contact form in WordPress if you don’t have a lot of time or you simply don’t consider yourself “tech-savvy”?
That’s what we’re going to cover today. Because, in this post, we’re going to teach you step-by-step how to set up a contact form in WordPress in under 5 minutes.
Before we jump into the tutorial, though, let’s get clear on why you should add a contact form to your website in the first place.
Why Add a Contact Form in WordPress?
Adding a contact form to your WordPress site can have tons of benefits for both you and your customers. Contact forms:
- Improve UX: Giving visitors a way to contact you helps if they have questions about your products or services.
- Generate Leads: You’ll grow your email list from people who reach out to you. Then you can nurture the relationship over time.
- Boost Sales: As you nurture your new leads, you can guide people down your sales funnel until they are lifelong (and paying) customers.
But now you may be wondering, “why wouldn’t I just post my email address on a contact page so users can contact me with their preferred email provider?”
Though posting your email address seems like an easier option, it comes with a big problem: SPAM.
Spambots are notorious for scraping websites for email addresses and sending loads of junk email. As your website grows in popularity, it can be more difficult to tell which of your messages are from spam and which are from genuine customers.
To save yourself lots of time, headaches, and lost leads, the best solution is a contact form.
Now that we know why contact forms are such a great addition to your WordPress site, let’s check out our step by step guide on how to add one to your website.
How to Add a Contact Form to WordPress
For today’s tutorial, we’ll be using WPForms:

WPForms is the best contact form plugin for WordPress. It allows you to quickly and easily embed various types of forms on your website.
And the best part is that it doesn’t require any coding to install or add forms to your site’s pages.
That’s because WPForms comes with many pre-made templates for all kinds of forms. These save you time and energy as you design your contact form.
Plus, it has a drag and drop builder that lets you customize your contact form, so it functions exactly the way you want it to.
With WPForms, you can add a contact form to your WordPress site in under 5 minutes. Let’s see exactly how.
Step 1: Download and Install WPForms
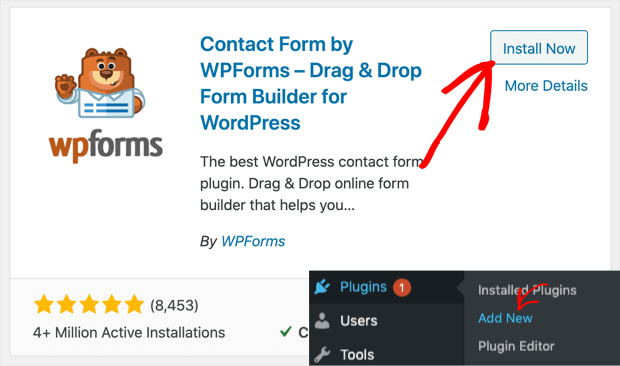
The first thing you’ll need to do is download and install WPForms. You can do this like you’d install any other plugin.
Simply go to your WordPress dashboard and click Plugins » Add New. Then search for WPForms and click Install Now:
Then activate the plugin just like you would with any other plugin you’ve installed in the past.
Never added a new plugin? No worries. Just check out this helpful resource: How to Install a WordPress Plugin: 3 Easy Methods.
Once it’s installed, you’ll be ready to add your contact form.
Step 2: Create a Simple Contact Form
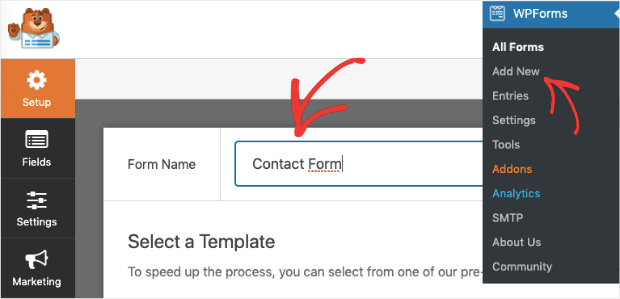
In your WordPress admin menu, select WPForms » Add New. This will bring you to a new window where you’ll see a list of templates you can use. First, be sure to name your campaign:
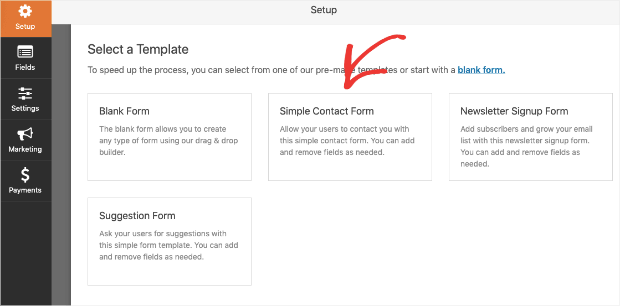
Then click Simple Contact Form:
This will pull up a simple contact form with 3 fields for users to fill out:
- Name (first and last)
- Email address
- Message
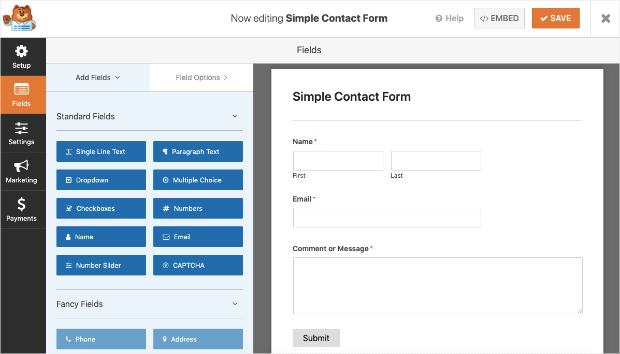
For many users, this is the perfect contact form template and comes out-of-the-box with WPForms Lite.
But if you want to add any of the standard form fields from the left-hand side menu (like single-line text, dropbox options, multiple-choice options, and so on), then you can simply drag and drop them into place:
Then you can modify your new field’s settings in the left-hand side editing menu.
Once your form is complete, you might want to hook it up with your email service provider (ESP). That way, you can keep everything organized as you add new leads to your list.
Step 3: Sync With Your ESP (Optional)
Integrating WPForms with your email service provider (ESP) couldn’t be easier. In your WPForms menu, click Marketing:
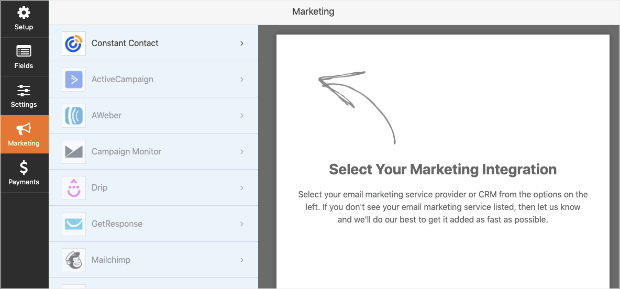
You’ll see a list of ESPs on the left-hand side, such as:
- Constant Contact
- Active Campaign
- Drip
- Mailchimp
- And many others
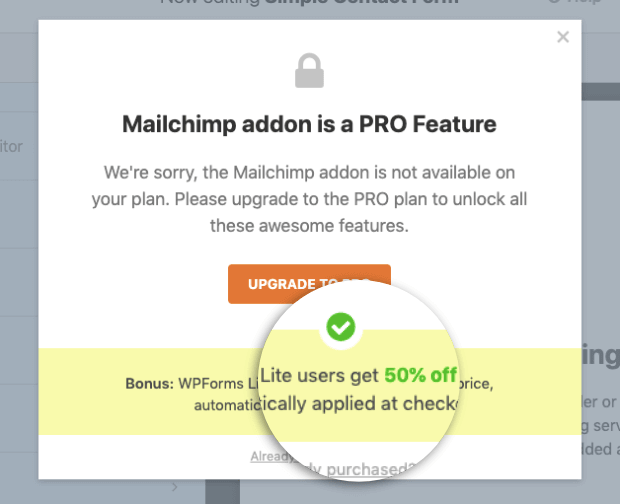
Note that some of these integrations are for Pro plans and higher. If you want to upgrade to sync your ESP, you’ll get 50% off the Pro plan just for having started with WPForms Lite:
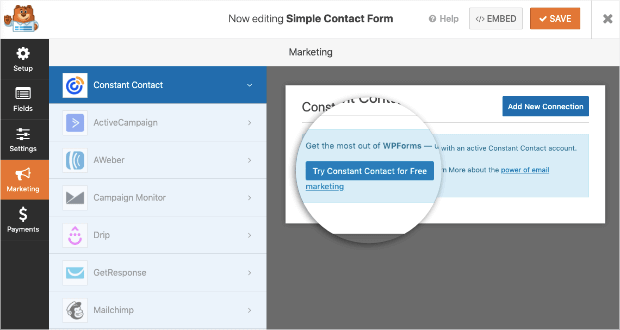
Otherwise, we highly recommend using Constant Contact. That’s one of the best ESPs on the market with a pricing model that helps you scale.
Plus, you can get started totally free, and it works out-of-the-box with WPForms Lite:
From there, you can use this helpful guide: How to Connect Constant Contact With WPForms.
That’s an in-depth guide that will show you how to hook up Constant Contact with WPForms in just a few minutes.
Now you’ll want to save your contact form and add it to a contact page.
Step 4: Adding Your Contact Form to Posts and Pages
To add your contact form to a post or page on your website, you have 2 options:
- Using a shortcode
- Using the WPForms block
In your WPForms main menu, you’ll see a list of the forms you built along with the shortcode for that form:
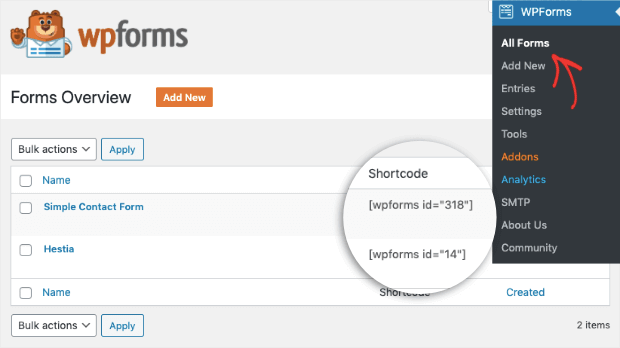
You can then add this shortcode to your posts and pages just like you would use any other shortcode on your site.
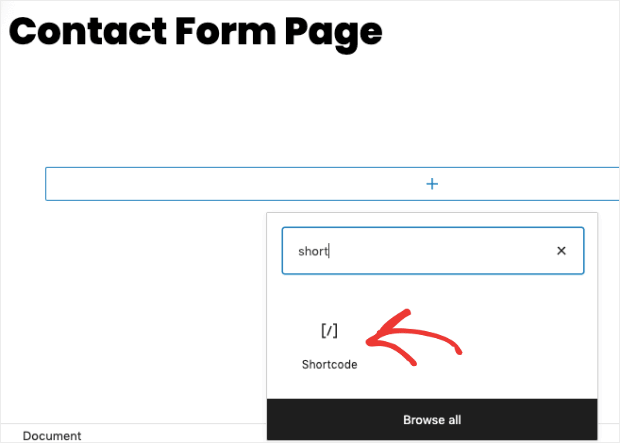
If you were editing a Contact Form Page, for example, you could add a new block and search for Shortcode:
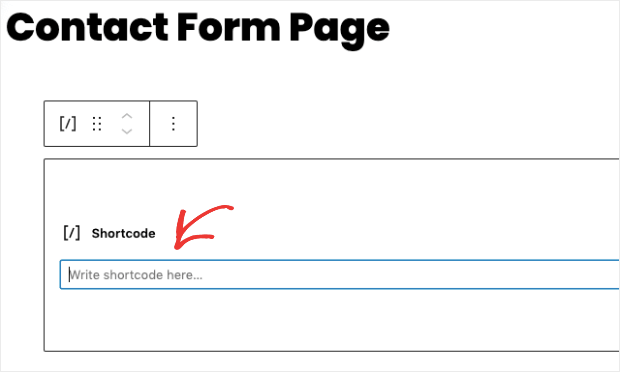
Then you’d only need to add your WPForms shortcode:
The next method is even more simple: simply use the WPForms block:
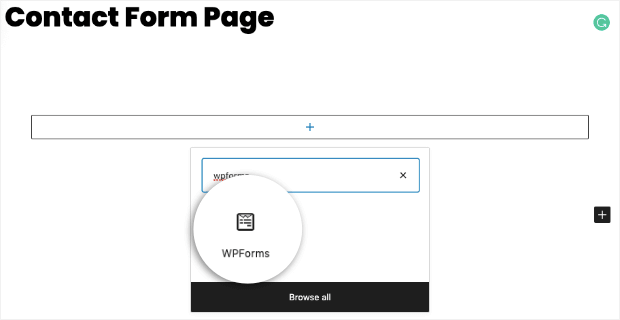
Then you’ll see a list of the forms you have built. You can select your contact form from the drop-down menu:
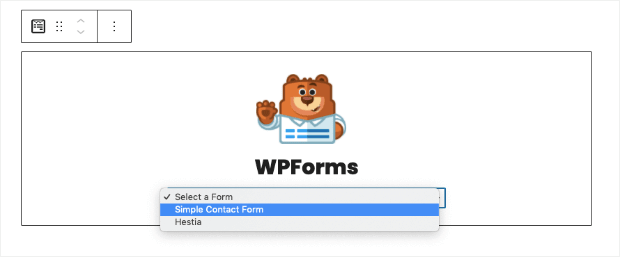
And that’s it! Once you save and publish the page, your contact form will now appear:
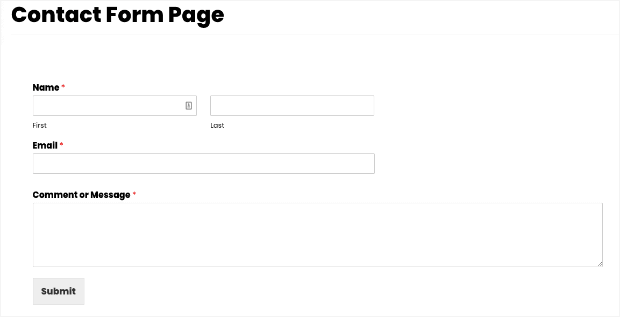
But before wrapping up this article, let’s look at one more component of your contact page: getting people to actually use it.
How to Get More Contact Form Submissions
One of the downsides of using a contact form is that customers don’t always think to use it.
That’s because most online consumers have learned to start somewhere else when they have a question: Google.
As a result, if a potential customer has a question about your product, they might not even think to use your contact form at all.
That’s where a tool like TrustPulse comes in:

You may know TrustPulse as the #1 social proof software on the market. It allows you to create professional social proof notifications in minutes.
These notifications have been proven to instantly boost conversions and sales by up to 15%.
But what do social proof notifications have to do with a contact form? You can use TrustPulse to create static messages across your site.
This means you can make a small “Got Questions?” notification to remind users about your contact page.
You’d do this by using TrustPulse’s Action Message campaign:
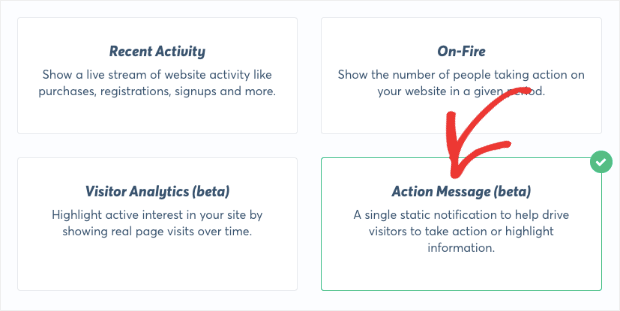
This makes a clickable notification with whatever message you want your site’s visitors to see. In this case, you could quickly modify your message to encourage users to visit your contact page.
Here’s an example of what this notification might look like:

Then you’d add your contact page’s URL to the notification:
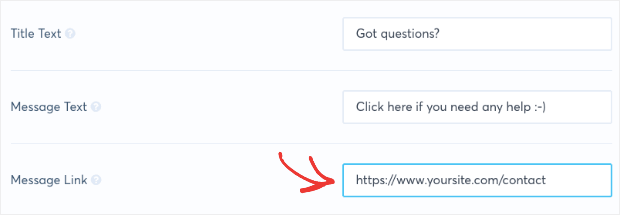
Now you have a clickable notification to remind users they can contact you with your new form.
Then you can use TrustPulse to build other social proof notifications across your site to boost conversions and generate more revenue.
Want to see it in action for yourself? Sign up for your 100% risk-free trial of TrustPulse today!
And that’s it! We hope this tutorial helped you add a contact form to your WordPress website.
If you enjoyed this post, you should definitely check out the following resources:
- WPForms Review: Is It the Best Form Builder for WordPress?
- 41 Best WordPress Plugins & Tools to Grow Your Business
- How to Create a Recent Activity Campaign to Boost Conversions
These articles will have even more tools, tips, and tricks for getting increasing engagement with your site and driving more sales.
