
Wondering how to create an NPS survey in WordPress?
Net Promoter Score (NPS) surveys measure customer loyalty to your brand and satisfaction with your products or services.
In this article, you’ll learn how to create an NPS survey on your WordPress site.
NPS Survey Definition
NPS is short for Net Promoter Score. It’s one of the most important metrics of customer feedback, even though it’s usually only one question:
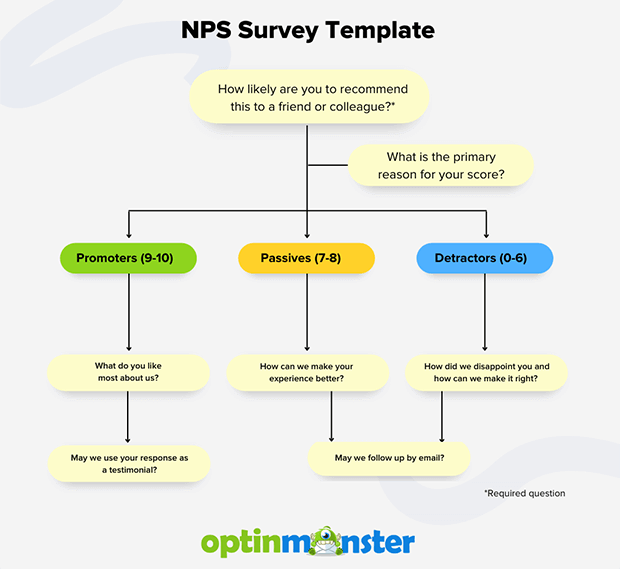
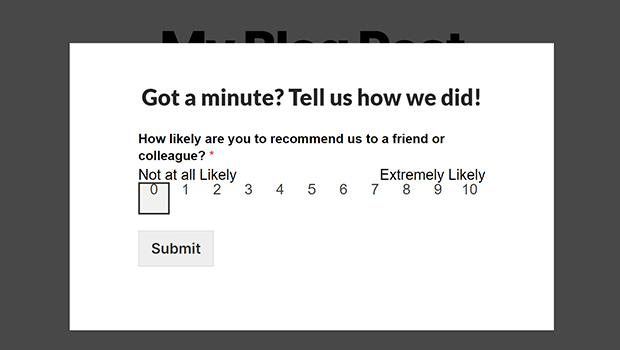
“How likely are you to recommend this company, product, or service to a friend or colleague?”
Customers rate their likelihood using a 10-point Likert scale, with 10 being the most likely and 0 being the least likely. The higher your Net Promoter Score, the better.
Here’s how to interpret individual net promoter scores:
- 9-10: These are Promoters who love your business and will probably continue to purchase and recommend you
- 7-8: These are Passives who are satisfied but not very enthusiastic
- 0-6: These are Detractors who did not like their experience and may warn others to stay away
The Net Promoter Score is calculated by subtracting the percentage of Detractors from the percentage of Promoters. Passives have less effect on your NPS score, but it’s still better to try and turn Passives into Promoters.
For example, if 60% of your customers are Promoters and 40% are Detractors, your NPS score would be 20. You want your NPS scores to be as high as possible, but certain industries may just have lower NPS scores overall.
You can think of Net Promoter Score surveys as a way to determine what kind of social proof that customer is likely to provide.
Types of NPS Surveys
The 2 main types of NPS surveys are relational and transactional.
Relational NPS surveys provide long-term data on overall customer loyalty. You conduct relational NPS surveys regularly among your existing or potential customers.
On the other hand, you only send out transactional NPS surveys after a customer interacts with your company. Typical examples include after purchasing, using customer support, or installing the product. This is a great way to get detailed information about customer satisfaction with different processes in your business.
You can conduct NPS surveys about specific products, different physical locations, pages on your website, staff interactions, marketing channels, and just about anything else you can think of in your business.
NPS Survey Question Examples
The core question of an NPS survey is simple and rarely changes: “How likely are you to recommend this to a friend or colleague?”
Sometimes you may want to follow up with a question about why they chose the score they did. This is typically a free response question, and should be optional. You can even use conditional logic to ask specific followup questions based on the NPS score they select.
You can also request permission to follow up by phone or email, or to use their responses in a public testimonial.
Your NPS survey should be as short as possible. Only the core question should be required. All other questions should be optional.
Here’s a visual NPS survey template:
Now we’ll show you how to create an NPS survey in WordPress the easy way.
How to Create an NPS Survey on Your WordPress Website (5 Step Guide)
Our favorite way to create an NPS survey is to use a WordPress survey plugin. For that, we recommend WPForms.
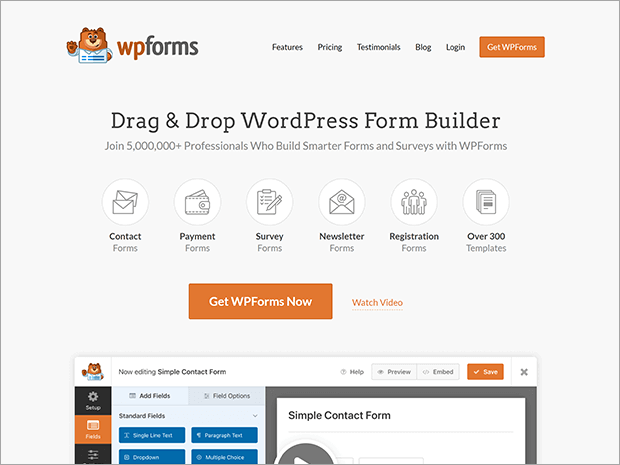
WPForms is the best drag and drop form builder for WordPress. It’s an affordable and beginner-friendly forms plugin for small businesses.
You can use WPForms to create contact forms, surveys, polls, and so much more for your WordPress website. It has lots of integrations with other tools you may be using for your business.
Let’s get started on your NPS survey!
Step 1: Install WPForms
The first thing you need to do is subscribe to a WPForms plan. Make sure to get a Pro plan or higher, as those plans include the Surveys & Polls addon you’ll need to create your survey.
Then, you need to download the plugin file and copy your license key to a text file. You can do both of those in the Downloads section of your WPForms account.

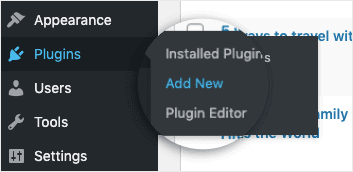
Once you have those, log into your WordPress dashboard. Click on Plugins » Add New.
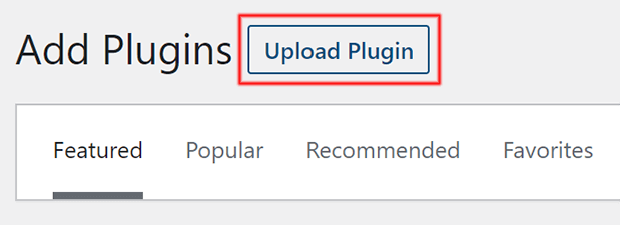
Next, click the Upload Plugin button at the top of the page.
Now, click the Choose File button and find the WPForms plugin file you downloaded earlier.
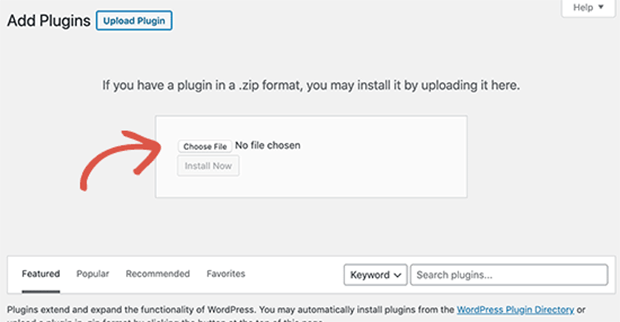
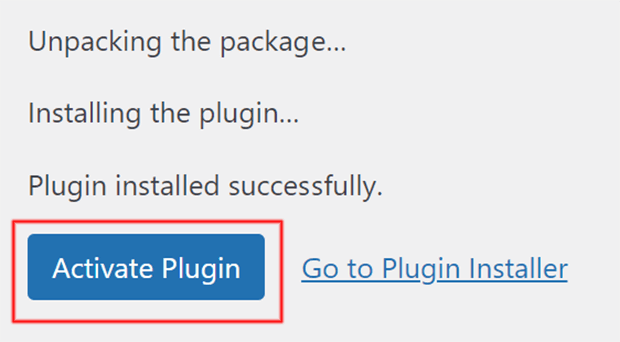
After that, click on Install Now. After WordPress uploads and installs the plugin, click the same button which now reads Activate Plugin.
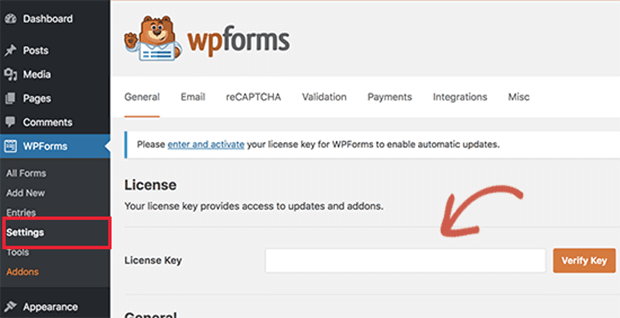
Now click on WPForms ˃˃ࣼ Settings in the sidebar of the WordPress dashboard. Paste your license key in the appropriate field under the General tab.
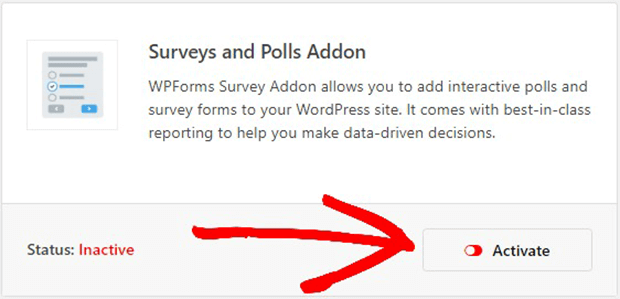
Once your license key is entered, click on WPForms » Addons. Look for the Surveys and Polls Addon and click Install Addon.
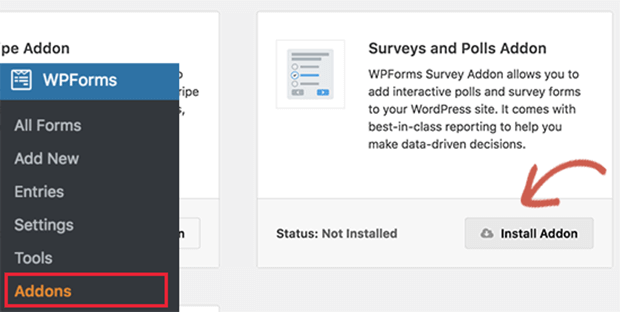
Finally, click the Activate button.
Now you can create your NPS survey.
Step 2: Create an NPS Survey
First, click on WPforms » Add New in the sidebar to create a new form.
On the WPForms form builder setup screen, name your form and search for the NPS Survey Enhanced Form template.
This template will come preloaded with the following fields:
- Net Promoter Score core question (Likert scale)
- Reason for score (paragraph text box)
- Testimonial permission (checkbox)
- Email address
If you want to add more fields, simply drag them from the Fields panel on the left into the form panel on the right. You can also delete fields any fields you don’t need.
Editing the form fields is also easy. Just click the field you want to edit and make the changes in the Field Options panel on the left. To reorder fields, simply drag them to the order you want.
Personalization is a great way to improve your conversion rates. It would sound silly at best and arrogant at worst to ask a customer giving a low NPS score what they love most about the product or company.
Instead, we can use conditional logic to display the relevant followup question based on each customer’s NPS score.
Scared you’ll have to do complex coding? Don’t worry! The NPS Survey Enhanced Form template already has conditional logic built in.
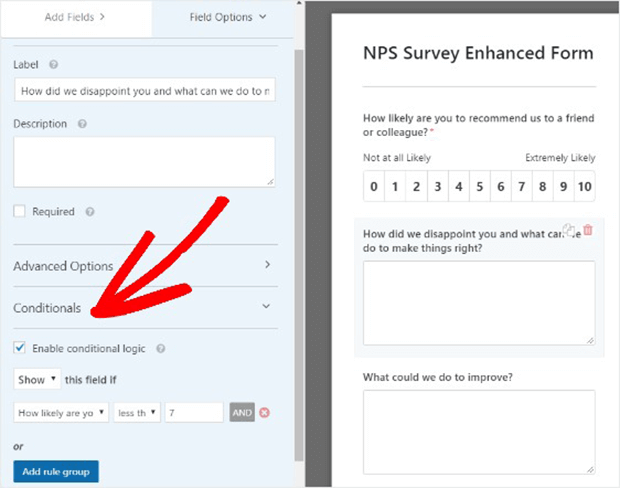
In the form template, you’ll see 3 free response fields. But the customer will only see one of them based on their NPS score:
- Promoters (8+) will be asked, What do you like most about us?
- Passives (7-8) will see a text box that asks, What could we do to improve?
- Detractors (0-6) will get the chance to share, How did we disappoint you and what can we do to make things right?
You can easily change these followup questions to match your brand voice and business processes. Just click on the field you want to edit, then select Conditionals in the left side Field Options panel.
Step 3: Configure Form Confirmations
Make sure you configure the form confirmation settings. If someone takes the time to fill out a survey, even a short one, they deserve to know that their response has been submitted. With WPForms, you can automatically and instantly let visitors know that you’ve received their form.
Edit your form notifications by clicking on Settings » Confirmation inside the WPForms form editor.
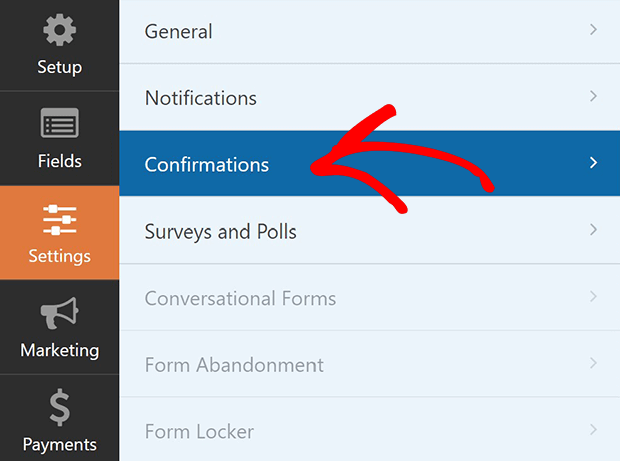
There are 3 types of confirmations you can choose from:
- Message: A simple text message appears on the page after successful submission. You may include a preview of their form submission after the confirmation message.
- Show Page: This sends visitors to a specific page on your WordPress website, such as a special thank you landing page.
- Go to URL (Redirect): This will take visitors to a page on a different website. You may want to use this option if you’re sending visitors to your NPS survey from social media or another platform.
Step 4: Add Form Notifications (Optional)
If you’d like, you can set up notifications to alert you or a team member when someone fills out your NPS survey.
To edit form notifications, click on Settings » Notifications.
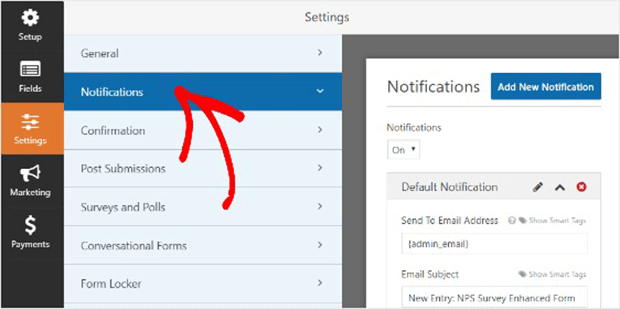
By default, the form submission notification will go to the admin email for your WordPress site, unless you disable notifications completely.
To send the notification to someone else, just add their email address to the Send to Email Address field.
You can also use smart tags to send an email to your visitor letting them know their form has been received. But keep in mind that filling out this survey does not automatically give you permission to add them to your email marketing list.
You can check the WPForms documentation for more details on how to set up form notifications in WordPress.
Step 5: Display Your NPS Survey in WordPress
You’re almost done! Now let’s add your NPS survey to your website.
WPForms lets you place your survey practically anywhere on your WordPress site using block embedding, shortcodes, or widgets.
First, let’s take a look at the block embed option.
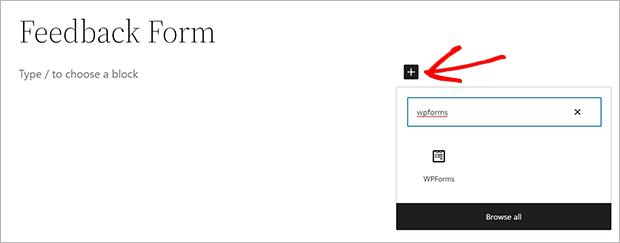
Create a new page or post in WordPress, or open an existing one where you want to add your NPS survey.
Next, click the black square with the plus sign in the Block Editor. Search for WPForms and click on the WPForms block to add it to your page or post.
When the WPForms block appears, choose your NPS survey form from the dropdown.
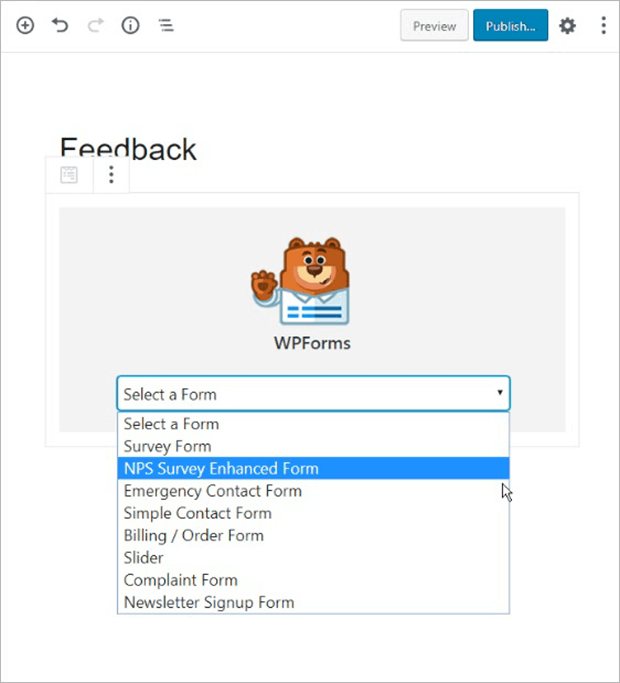
Now you can add anything else you need to the page or post. When you’re done click Publish in the upper right corner. That’s it!
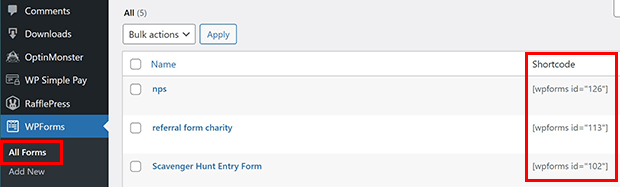
To use a shortcode, click on WPForms » All Forms. Find the shortcode for your NPS survey form. Copy and paste this anywhere on your site you want to add the form.
Finally, there’s a WPForms widget you can use to add your NPS survey to your site sidebar or footer.
Click on Appearance » Widgets. There will be a list of different widget areas available in your theme. Click the widget area where you want to insert your NPS survey.
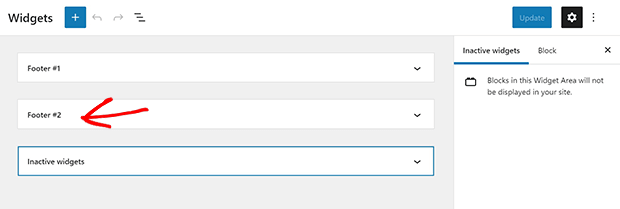
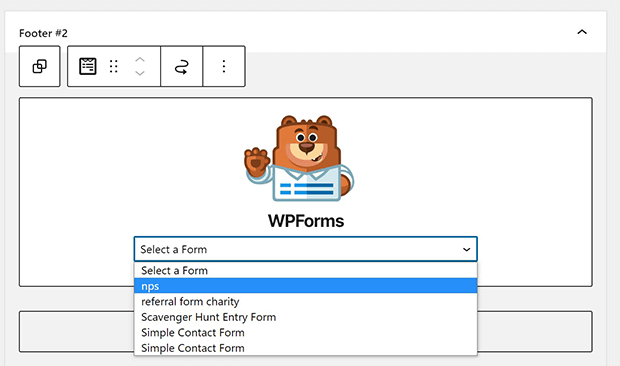
Similar to the block embed option, add a block by clicking on the plus symbol. Click on the WPForms widget. Find your NPS survey from the dropdown menu and click to insert.
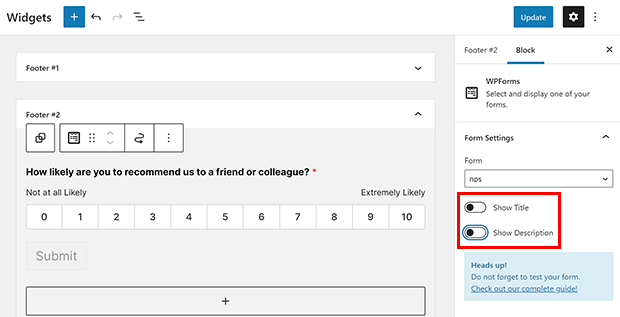
You can hide or display the title and description of the widget. In most cases it’s probably okay to leave them out.
How to See Your NPS Score
WPForms automatically calculates your NPS score as your survey responses come in.
If you want to see your NPS score, click on WPForms » All Forms. Mouse over the form name to see the extra menu items and click on Survey Results.

The results page will show the number of promoters, passives, and detractors as well as your overall NPS score.

How Often to Send NPS Surveys
Relational NPS surveys should go out on a regular basis to customers. We suggest sending these out 2-4 times a year through your email marketing service. You can also set up a survey popup on your website and share the survey link on social media.
Meanwhile, transactional NPS surveys should only be sent after customer interactions. Email is generally the most targeted and reliable way to send NPS surveys to your customers. You can also add links to your NPS survey in help tickets, live chat conversations, or post-support landing pages.
One way to get more survey responses is to add your NPS survey to an OptinMonster popup campaign.
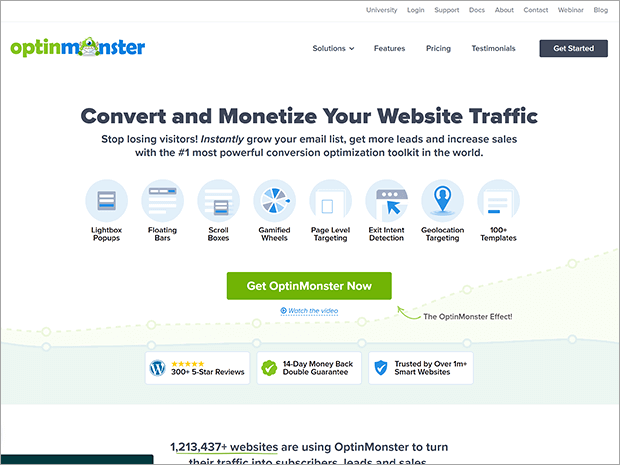
OptinMonster is the best survey popup builder for showing your NPS survey to the right people at the right time.
You can easily add your NPS survey shortcode to an OptinMonster campaign. The survey will look exactly the way you styled it in WPForms.
Once you have a popup survey built, you can use OptinMonster’s targeting rules to show the survey to precise segments of your audience. For example, you may want to target past visitors, existing subscribers, or new customers. OptinMonster also has advanced Exit-Intent® Technology and MonsterEffects™ to attract and convert more visitors to fill out your NPS survey.
That’s a wrap! Now you’ve learned how to create an NPS survey in WordPress.
If you’re interested in other ways to improve customer experience, check out our step by step guide to an awesome customer feedback strategy. You might also be curious about the best from builder tools for gathering customer feedback.
Ready to gather NPS data the easy way? Get started with WPForms today!
If you like this article, please follow us on Facebook and Twitter for more free articles.
