
Do you want to set up SMTP in WordPress, but you’re not sure how to get started?
Configuring SMTP for your WordPress site is an excellent way to improve deliverability rates. It lets email providers know that your emails aren’t SPAM.
That means more engagement with your audience, a strong email reputation for email marketing, and more of your emails getting where they belong: in your customers’ inbox.
So, in this post, we’re going to teach you how to set up SMTP in WordPress. Then, we’ll talk about how to get more engagement from your site to boost email signups in the first place.
But, first, let’s clarify what SMTP is and why it’s worth setting up properly.
What Is SMTP (& Why Does It Matter)?
SMTP stands for “simple mail transfer protocol,” and it’s the industry standard for sending emails of all kinds. It’s used to increase deliverability and help your emails get to your recipient’s inbox (instead of their SPAM folder).
Many email service providers like Gmail, Yahoo, Zoho, and more are constantly working to prevent spammers from harming their clients. As such, these platforms look for signals to know whether an email is authentic or spammy.
One of these signals is whether or not the email is coming from the location that it claims to be. If it isn’t, then one of two things will happen to your emails.
- They end up in your customer’s SPAM folder
- They don’t get delivered at all
But now, you may be wondering, “What does this have to do with my WordPress site?”
The problem is that WordPress sends emails (by default) using the PHP mail function for any emails generated by WordPress. It also uses the PHP mail function for any contact form plugin like WPForms.
And many WordPress hosting companies don’t have their servers set up to support sending PHP emails.
As a result, WordPress emails may not get delivered because email providers instantly view them as SPAM.
Configuring SMTP for WordPress fixes this problem.
Now, if all of this sounds a bit more technical than you’re comfortable with, no worries. Everything boils down to this:
- Having SMTP configured to WordPress improves deliverability rates
- Not having SMTP configured to WordPress harms deliverability rates
At the end of the day, it really is as simple as that. So the only question left is, “how can you set up SMTP in WordPress?”
Let’s turn our attention to answering that problem.
How to Set up SMTP in WordPress
Setting up SMTP in WordPress can be as easy or as complicated as you choose to make it. In many cases, the job is infinitely easier when you have the right tool.
That’s why, today, we’re going to use WP Mail SMTP:
WP Mail SMTP is the best SMTP plugin for WordPress. It’s easy to set up, integrates with major email service providers, and drastically improves open rates for all emails sent from WordPress.
This plugin lets you manage notifications, so you always know what emails were sent and which ones bounced. Plus, if you choose the Elite plan or higher, you have total white-glove service.
That means the WP Mail SMTP team will configure everything for you.
But by the end of this tutorial, you’ll also be able to do it yourself. Let’s dive in!
Step 1: Install the WP Mailer SMTP Plugin
The first thing you’ll need to do is install and activate the WP Mailer SMTP plugin. To do so, you can choose your plan and sign up for your risk-free account here.
Once you’re in your account, navigate to the Downloads tab. Then click Download WP Mail SMTP:
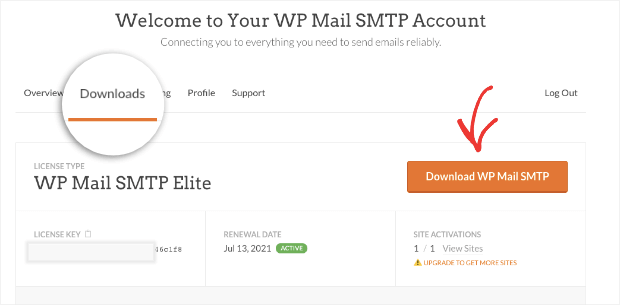
This is also where you’ll find your license key, so keep this tab open for later.
Once you have your WP Mail SMTP plugin downloaded, you can install it like any other WordPress plugin you’ve used before. And if you’ve never installed a plugin before, no worries.
Check out this resource on how to install and activate a WordPress plugin.
Then, you’ll need to navigate to WP Mail SMTP from your WordPress dashboard and click Settings.
The first thing you’ll see is a place to enter your license key. Again, you can find this from your WP Mail SMTP account (where you downloaded the plugin from before). Then enter the key and click Verify Key:

When you’ve done this successfully, you’ll get a small confirmation message:

Step 2: Configure Your “From” Email
Now we need to set up your “from” email. This is the email address that your recipients will see when your emails go to their inbox.
From your WordPress dashboard, click WP Mail SMTP » Settings. Then scroll down until you see the Mail section:
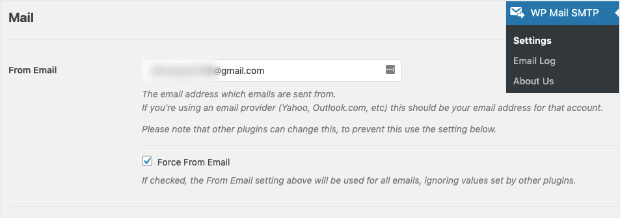
Here you’ll be prompted to enter your “From” email address. Again, this is what your recipients will see when your emails appear in their inbox.
So if you’re using WP Mail SMTP, you may want to enter your business email address if it’s different than what you used to purchase the plugin.
You should also know that this field box will be greyed out if you’re using Zoho Mail SMTP as your email service provider. That’s because if you’re using Zoho Mail SMTP, all your emails will be sent straight from your Zoho Mail address.
You’ll also want to decide if you leave the option Force From Email checked or unchecked:
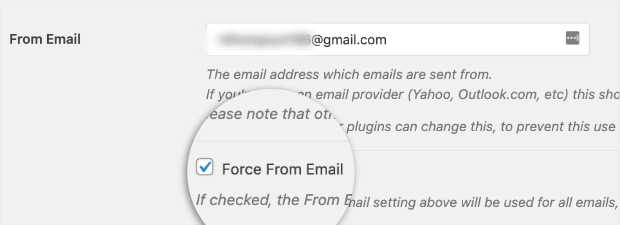
Checking this box means that all of your emails will be sent from the address you entered, overriding any values set by other plugins.
This option is highly recommended. It will save you the trouble of going through all your plugins and editing the WordPress email settings to send notifications from your SMTP provider.
Step 3: Add Your “From” Name
Next, you need to add the name that will appear with your “from” email address. Scroll down until you find the From Name field box:
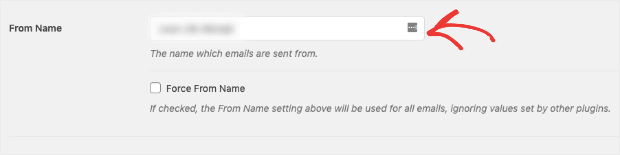
Here, you’ll enter the name that you want to appear when recipients get your emails. Just like before, you can also choose to check the box Force From Name.
If you checked the box in the last step, we highly recommend doing so here as well.
We also suggest checking the box labeled Return Path:

When this box is checked, you’ll be notified if any of your emails bounce if your recipient has an issue with their email address.
Step 4: Select Your Mailer
Now you can choose which email service provider you’re using to send your WordPress emails:
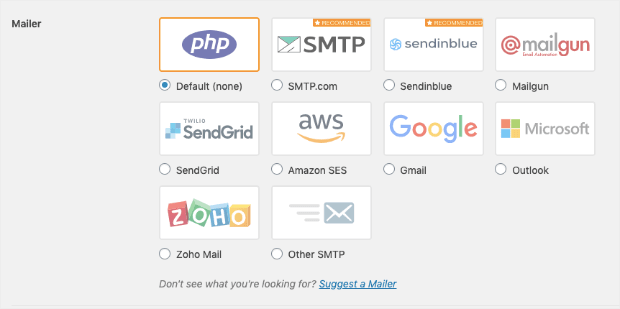
WP Mail SMTP recommends two email providers if you don’t already have one:
- SMTP.com
- Sendinblue
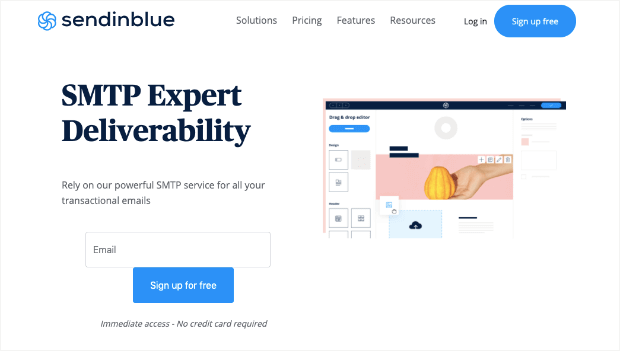
Both providers are easy to use, highly well-known, and totally secure. But, today, we’ll use Sendinblue because it’s a more popular platform and free to get started:
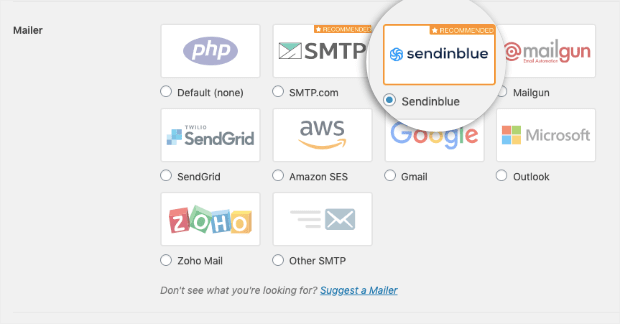
In fact, if you don’t already have a Sendinblue account, you can scroll down and click Get Sendinblue (Free):
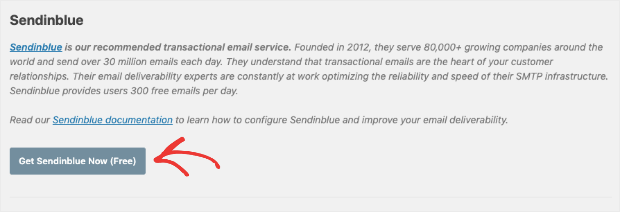
This will send you to Sendinblue SMTP’s landing page where you can sign up for a free account (no credit card required):
Once you’ve created your account, you’ll be ready to configure your mailer with WP Mail SMTP.
Step 5: Configure Your Mailer
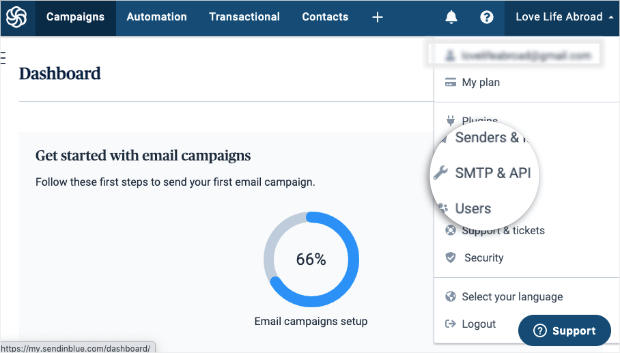
As we already mentioned, today, we’ll be using Sendinblue SMTP with the WP Mail SMTP plugin. For that, all we’ll need is our Sendinblue account’s API key.
To find this, head over to your Sendinblue dashboard and click your name from the upper right-hand corner. Then click SMTP & API from the drop-down menu:
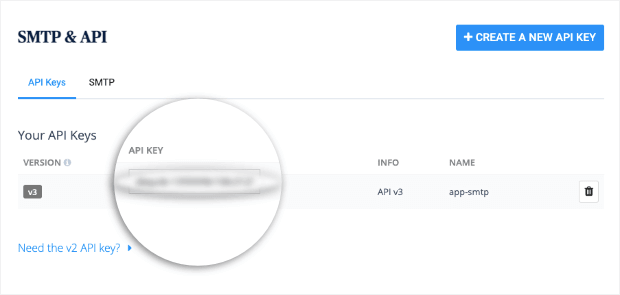
Then you’ll see your API key in the dashboard:
Copy and paste this API key into your WordPress dashboard where indicated by the WP Mail SMTP plugin:
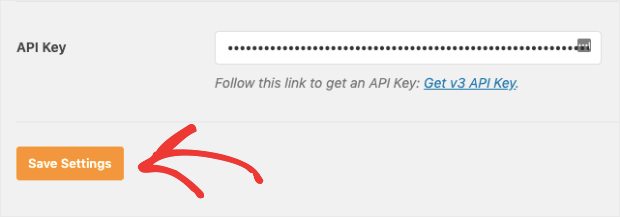
And that’s it! Your WordPress SMTP is all set up with Sendinblue.
Now you can scroll up and find the Email Test tab. Then you can enter an email address to send your test and click Send Email:
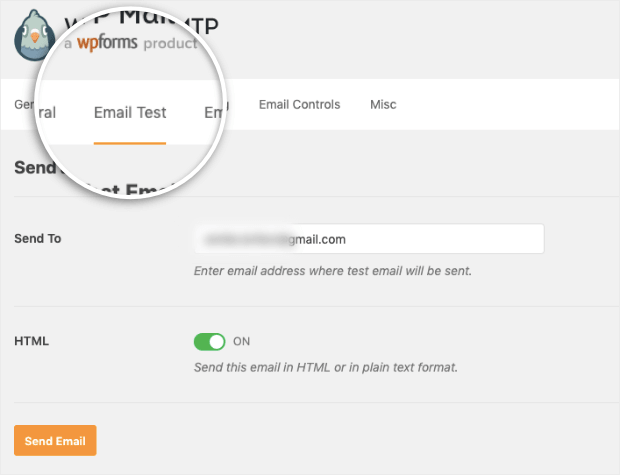
If you followed this tutorial, you should now receive a confirmation message that the email was sent successfully.
You should know that this is just one of the many options you can use for sending WordPress emails. You also have other providers such as Gmail, MailGun, Amazon SES, and more.
Each of these platforms has different steps, but you can find the corresponding tutorials below:
These tutorials will make sure you’re ready to use WP Mail SMTP even if you aren’t using Sendinblue.
That said, if you don’t already have an SMTP email service provider, Sendinblue is an excellent option. It’s fast, reliable, secure, and the perfect option for small businesses looking to scale.
And that’s it! Before wrapping up this tutorial, we quickly wanted to talk about how to increase engagement on your site.
How to Increase Engagement With Social Proof
The biggest advantage of setting up SMTP for WordPress is making sure your emails get to your customers’ inbox.
In many cases, this means transactional information from forms on your site by plugins like WPForms. So for any of this to really matter at a practical level, it means you need people to fill out those forms in the first place.
That leaves the question, “How do I get more people to engage with my WordPress site?”
One of the biggest ways you can do this is to leverage social proof notifications. And for that, there’s no better tool than TrustPulse:

TrustPulse is the best social proof notification plugin for WordPress. It allows you to quickly and easily create social proof notifications to boost engagement, conversions, and sales across your site.
In other words, if you want more people to fill out any kind of form on your WordPress site, then TrustPulse is an excellent solution.
These notifications work because they leverage FOMO (“fear of missing out”). When consumers see that other people are filling out forms like newsletter signups or webinar registrations (to name a few), they’ll be more motivated to do so.
That’s because it’s a part of consumer psychology to not want to miss out on any benefits you see other people experiencing. As a result, more people take actions that require the transactional emails your WordPress site is now equipped to send.
And that’s it! We hope you enjoyed this post. If you did, you might want to check out the following resources:
- How to Increase eCommerce Sales Now: 8 Ideas You Need to Try
- 7 Growth Hacking Strategies to Boost Your Business Now
- 18 Best WordPress eCommerce Plugins to Build & Grow Your Business
These articles will have everything you need to improve engagement across your site and grow your business.
And now that you’ve gone through this post, your WordPress site is ready to deliver emails to your customers’ inbox as you gain more leads and customers along the way.
