Do you want to use Ontraport FOMO notifications to increase your sales? Adding FOMO is a quick way to create demand for your products.
And if you’re using Ontraport to sell online, you can show FOMO notifications every time someone makes a purchase. This means when potential customers land on your site, they’ll see people just like them buying your products.
Successful eCommerce sites display this type of activity notifications to build trust and create anticipation.
The best part is you can set up FOMO notifications in less than five minutes without writing any code.
In this tutorial, we’ll look at the simplest method to create Ontraport FOMO notifications that boost your sales.
Why Use Ontraport FOMO Notifications
Ontraport is a marketing and sales automation software that makes it easy for small businesses to sell online. Using Ontraport, you can design order forms in a drag and drop builder, and you’ll have complete control over the payment gateways you use.
Ontraport also lets you turn any landing page into a checkout page. It’s as simple as adding the embed code of your order form to your site.
So, where do FOMO notifications fit in?
Each time a new Ontraport customer makes a purchase, you can display a notification on your website.
Your site visitors will see the recent sale notification as a small popup.
These notifications attract your site visitor’s attention without interrupting them. And though they’re tiny, FOMO popups increase conversions by as much as 15%.
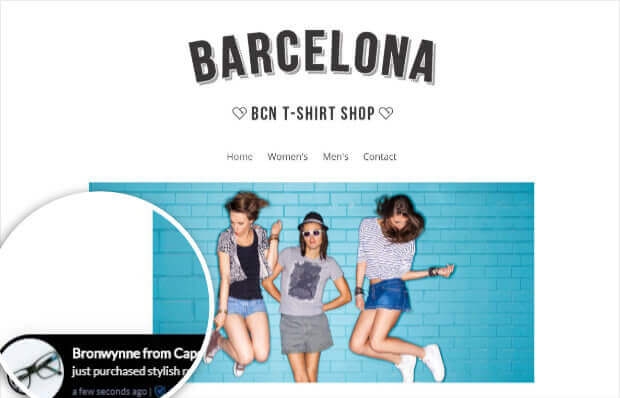
But, why do they work so well?
FOMO notifications are based on a proven psychology concept, the Fear of Missing Out. As humans, we’re wired to want to be involved in things. We don’t like the idea of losing out on an interesting or valuable experience.
Smart companies take advantage of this basic human behavior trait with FOMO marketing campaigns.
If your site visitors see other people buying, they’ll want to check out your products too. The assumption is that people must be benefitting from what you’re selling.
Another reason live notifications work well is that showing recent sales is a powerful form of social proof. Social proof adds credibility to your online store because you’re able to show real people are buying from you.
Legitimate social proof tools show the customer’s first name and location, so it’s clear these are actual sales.
In sum, FOMO is effective for building trust and boosting sales.
Today, we’ll look at how you can create FOMO notifications like the one created below.

How to Create Ontraport FOMO notifications
In this tutorial, we will be using TrustPulse.
TrustPulse is the best social proof tool for creating real FOMO notifications because it offers:
- 100% no code setup
- Easy to use editor to customize your FOMO notification
- Fast, simple integration with your website
TrustPulse only shows verified sales, so you’ll never have to worry about ruining your brand with fake social proof.
Don’t have an account yet? Get started with TrustPulse here. There’s no risk to you when you sign up because of our 14-day 100% money-back guarantee.
All set?
Let’s get started.
Step 1: Select Your Notification Type
The first thing you need to do is log into your TrustPulse account. After you’ve logged in, click Create Campaign from the dashboard.

Now, you’ll need to give your campaign a title and assign it to your website.
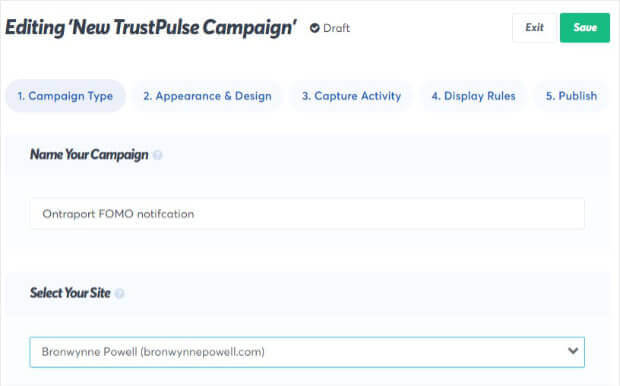
The next step is to decide which type of FOMO notification you want to display.
And here are your options:
- Recent Activity
- On-fire
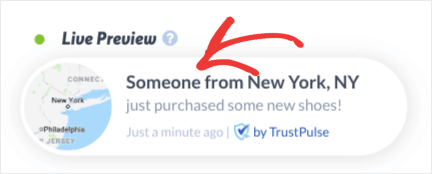
Recent Activity is great for showing a live stream of your purchases. So, it will display a notification each time you get a new Ontraport customer.
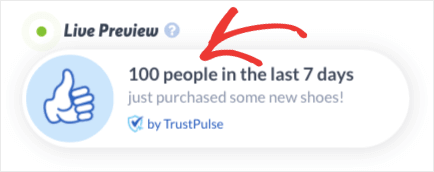
On-fire campaigns show the number of customers who make purchases over a specific time period. These work well for flash sales or time sensitive offers.
Today, we’ll go with Recent Activity.
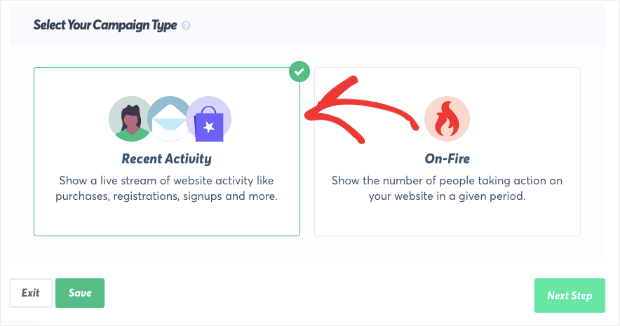
Click Next Step.
We’re ready to customize our notification.
Step 2: Design Ontraport FOMO Notification
In this step, you can change the notification’s color, message text, size, and more.
You’ll see TrustPulse has an easy to use editor.
You can customize your notification to match your brand in minutes instead of hours.
You’ll be able to change:
- The language of your notification
- The term TrustPulse will use to refer to your visitors when their name isn’t available
- The page people will be sent to when they click on the notification
A live preview in the bottom browser window will show your changes in real-time.
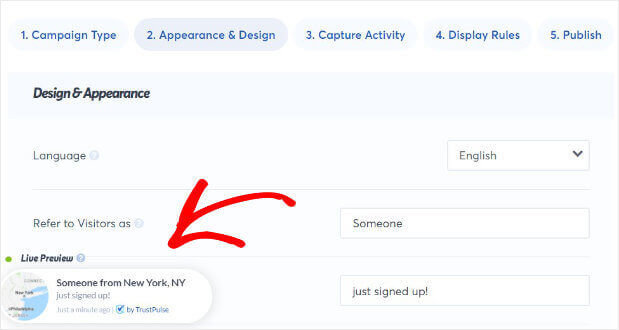
Pay special attention to the message link and notification image. For the message link, make sure you’re directing your customer to the product page. And add an image of your product to grab your customer’s attention.
From the Appearance and Design tab, you can also customize:
- Animations: the position of the notification on the screen
- Notification corner style: rounded or sharp
- Notification size: compact or expanded
Use the Advanced Settings to customize your fonts, colors, background, and more.
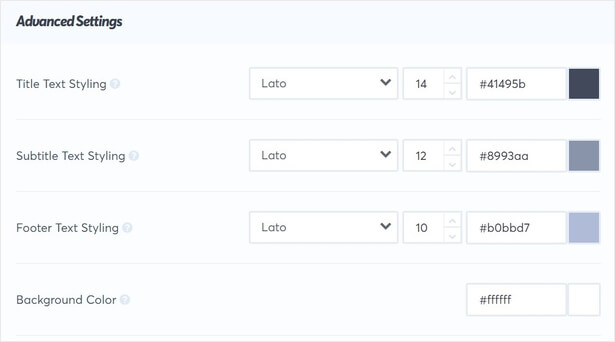
Once you’re happy with your design, select Next Step.

Step 3: Capture Site Activity
Now, you’re ready to select the site activity you want your FOMO notification to show.
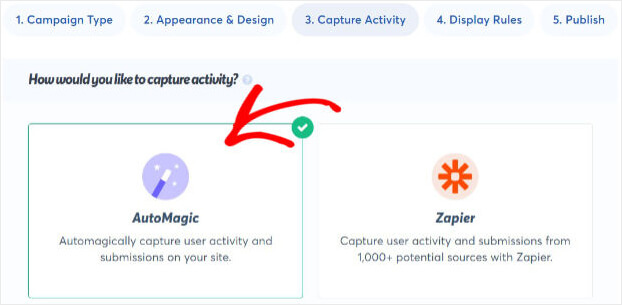
In the Capture Activity tab, you’ll see two options:
- AutoMagic
- Zapier
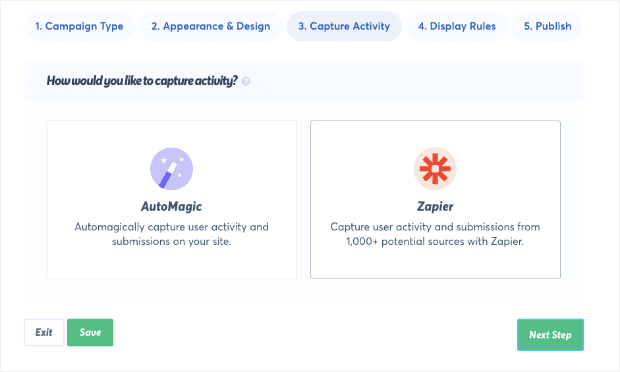
Here’s a breakdown of how these methods work.
AutoMagic automatically records form submissions from across your website. Zapier tracks activity off your site from more than 1,000 sources. Using Zapier, you can display social proof notifications from across the web, like Google or Yelp reviews.
In this example, we will use AutoMagic because we’re embedding our Ontraport order form directly into our eCommerce site.
So, select AutoMagic.
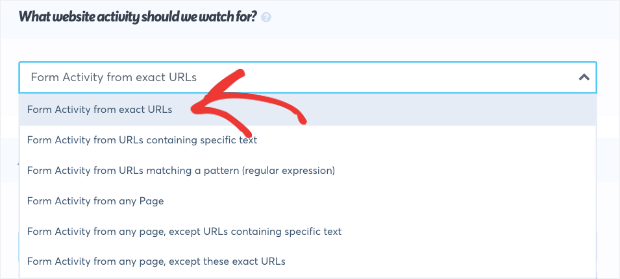
Now, you’re able to target the site activity you want to capture. AutoMagic lets you capture form activity on all pages, specific URLs, and more.
If you want to capture site activity for a specific page, click Form Activity from exact URLs.
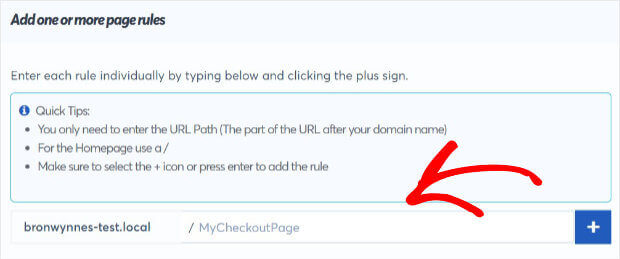
Next, add your URL and click +.
Click Next Step when you’re done.

Step 4: Display FOMO Notification
In this step, you can decide where to show your FOMO notification.
And, you can display your recent sale on all pages or specific pages.
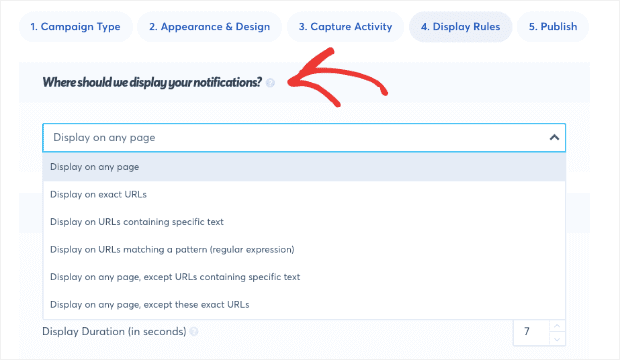
You can also refine your notification settings, like:
- The delay before showing the first notification
- The gap between notifications
- Setting notifications to run on loop
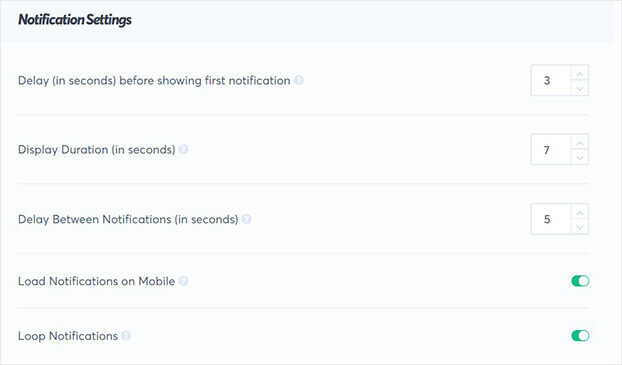
Once you’re happy with your notification settings, click Next Step.

You’re ready to publish your notification.
Step 5: Publish Your FOMO Notification
Publishing your Ontraport FOMO notification is simple and takes only a few minutes.
On the Publish screen, your campaign might not be connected yet.
If you’re using WordPress, you simply need to download and activate the TrustPulse plugin. Here’s a quick article on how to integrate TrustPulse with WordPress.
Not using WordPress? No problem. All it takes a line of code you need to add to your website. Check out these guides for instructions on how to connect TrustPulse with any website platform.
Once your site is connected, click Launch your TrustPulse campaign.
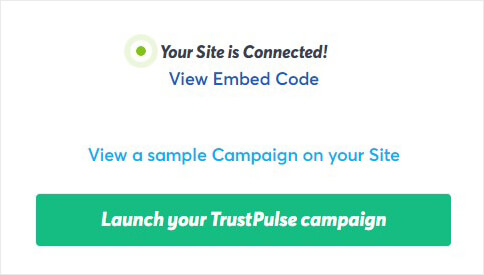
That’s it. You can now view your live FOMO notification on your website.
We hope you enjoyed this article.
For more resources on using FOMO and social proof to grow your business, check out these articles:
- FOMO Statistics You Need to Grow Your Business
- 7 Ecommerce Business Challenges + Easy Ways to Solve Them
- How to Increase eCommerce Sales Now: 8 Ideas You Need to Try
Want to create FOMO notifications that will boost your sales? Get started with TrustPulse today.
