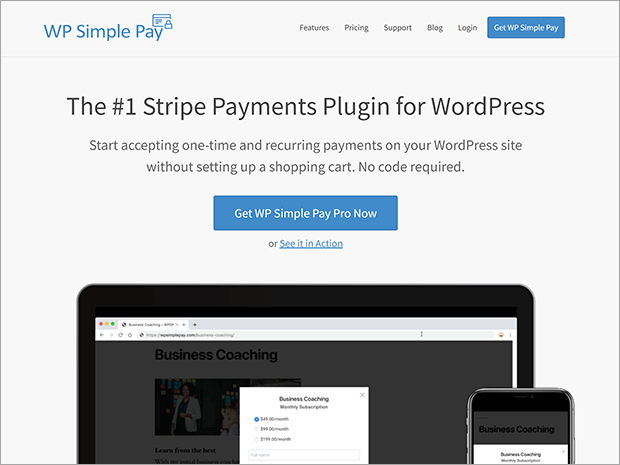
Want to add a buy now pay later payment method to your WordPress website or eCommerce store?
Buy Now Pay Later (BNPL) can help boost sales by making your product or service more accessible financially.
In this article, we’ll show you the easiest way to add a buy now pay later payment to your website using WordPress.
What Is A Buy Now Pay Later Payment Method?
Buy Now Pay Later (BNPL) is a type of short-term financing offered on the checkout page.
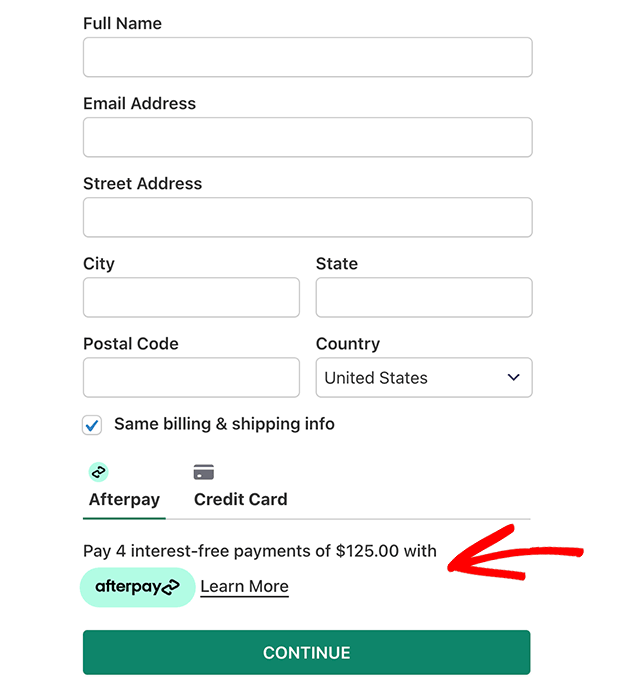
The customer typically makes a first payment upfront, and then pays off the remainder over time. The installment payments and payment schedule are usually determined by the BNPL provider.
Meanwhile, you as the business owner receive the full payment at time of purchase. The BNPL provider makes up the difference between the full price and the customer’s first payment.
There many buy now pay later apps you can use, such as Klarna, Afterpay/Clearpay, and Affirm. These apps work across a variety of eCommerce platforms such as WooCommerce and Shopify.
The payment gateway PayPal also offers buy now pay later features for sellers who accept PayPal payments.
Why You Should Offer Buy Now Pay Later Payments
Buy Now Pay Later is an effective way to boost your sales in your online store without any additional risk to your business. It also creates a better checkout experience for a broader range of customers.
With BNPL, customers who might not be able to pay the full price all at once can still afford to buy from you. BNPL can also increase average order value as customers buy more than they otherwise would have if they had to pay all at once.
While the customer has time to pay off their balance, you still get paid in full at the time of purchase. You don’t run the risk of missed or late payments that you might experience with traditional payment plans. The BNPL provider assumes the risk of repayment and also offers some protection against fraud.
In general, using BNPL doesn’t damage customer credit scores, unlike a traditional credit card. Many BNPL providers offer interest-free installments, since BNPL is meant to be a short-term financing option.
BNPL payments are popular with businesses selling high value goods and services, like luxury products or travel services. Lower value retailers can also benefit from BNPL because customers purchase more than they otherwise would. Your business will also be more accessible to customers who don’t have credit cards.
Now that you know how great BNPL payments can be for your business, let’s learn how to add one to your website!
How to Add Buy Now Pay Later Payments in WordPress
The simplest way to add a buy now pay later payment method to your WordPress website is to use a plugin called WP Simple Pay.
WP Simple Pay is the best Stripe payments WordPress plugin. With WP Simple Pay, you can easily create payment forms without setting up a complicated checkout process or full shopping cart.
You don’t need to know any coding to create completely custom buy now pay later payment forms. WP Simple Pay integrates automatically with the BNPL apps Klarna and Afterpay (also known as Clearpay in certain countries).
Both Klarna and Afterpay/Clearpay have geographic limitations, so make sure you look up your country to choose the right option for your business.
We love WP Simple Pay but feel free to check out these other Stripe payment plugins if you’re still deciding.
You’ll also need a Stripe account for payment processing. You can get a Stripe account for free and pay transaction fees only when you process a payment. WP Simple Pay doesn’t charge any additional transaction or monthly fees.
Once you’ve got your Stripe account set up, let’s create a buy now pay later payment form using WP Simple Pay.
Step 1: Install WP Simple Pay
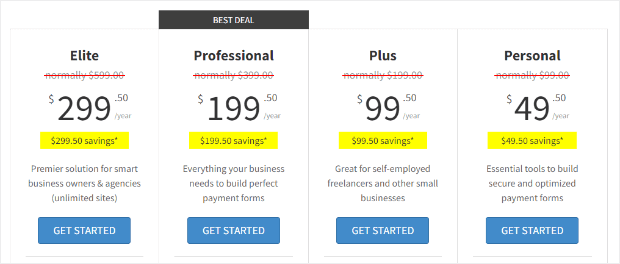
First, you’ll need to purchase a WP Simple Pay license. Klarna and Afterpay integration are available on the Professional and Elite pricing plans, so pick the one that works best for you.
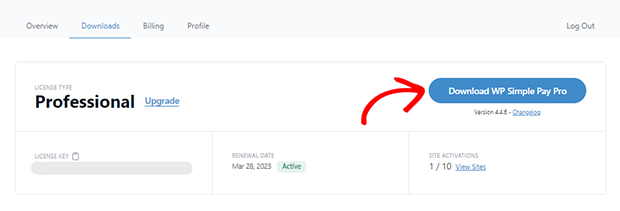
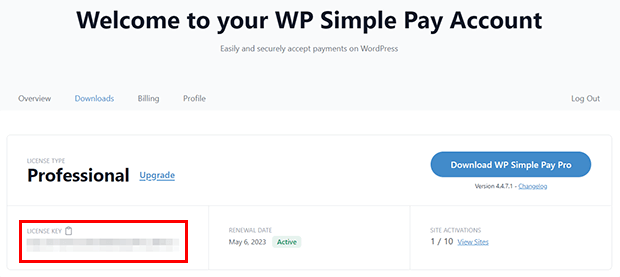
Once you’ve purchased your license, log into your WP Simple Pay account. Find the Downloads section and click on the Download WP Simple Pay Pro button to download the plugin file. It will be a .zip file. Save this file where you can find it easily.
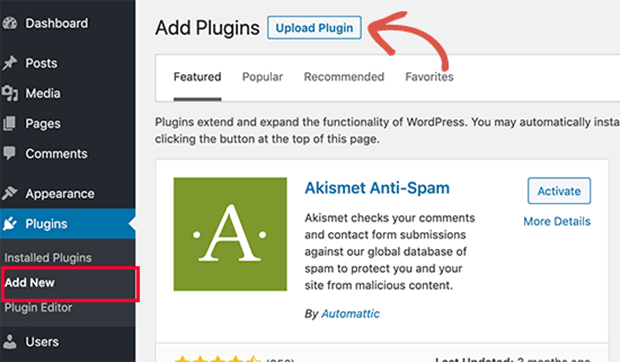
Now you can install and activate the plugin on your website. In a new window, log into your WordPress dashboard and go to Plugins » Add New.
Once you’re there, click on the Upload Plugin button at the top of the page.
Click on Choose File and select the plugin file you downloaded earlier from your WP Simple Pay account.
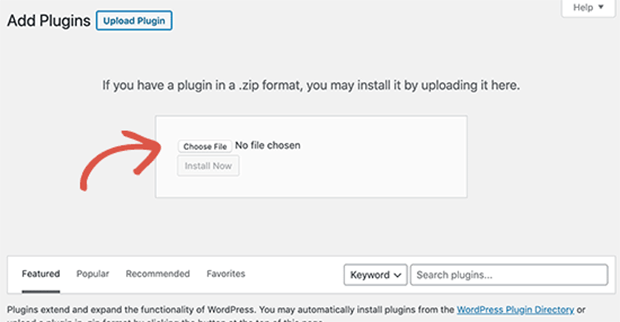
After selecting the file, click the Install Now button.
WordPress will upload the plugin file and install it for you. Once that’s done, all you need to do is click Activate Plugin to start using WP Simple Pay.
Step 2: Set Up WP Simple Pay
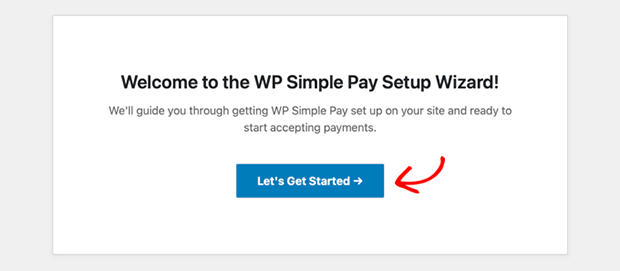
WP Simple Pay comes with a setup wizard to help you get started. Click on the Let’s Get Started button.
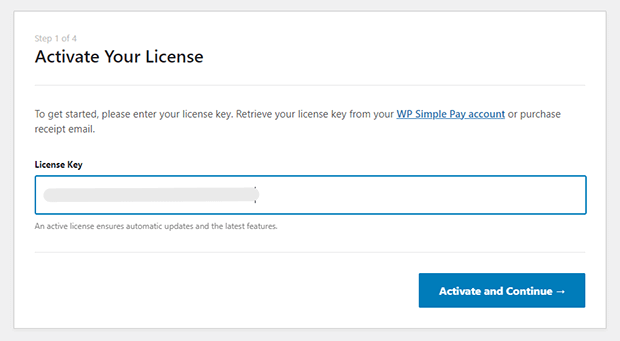
The first thing to do is activate your plugin license. Go back to the Downloads section of your WP Simple Pay account. Click on the clipboard icon to copy your license key.
Now, return to the WP Simple Pay setup wizard in WordPress. Paste your license key into the License Key field and click the Activate and Continue button.
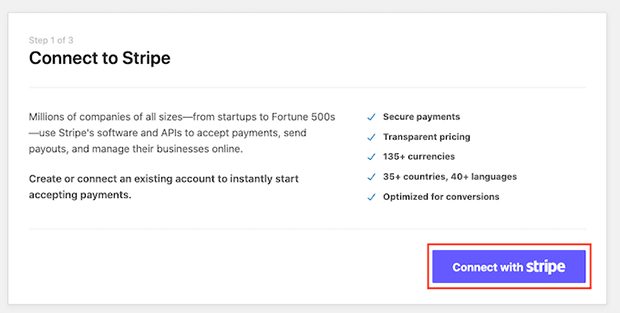
Next, click on the Connect with Stripe button. Follow the instructions to log into your Stripe account and connect WP Simple Pay.
After you connect to Stripe, you can enable payment receipt emails and upcoming invoices for your customers, as well as payment notifications for you. When you’re done, click on Save and Continue.
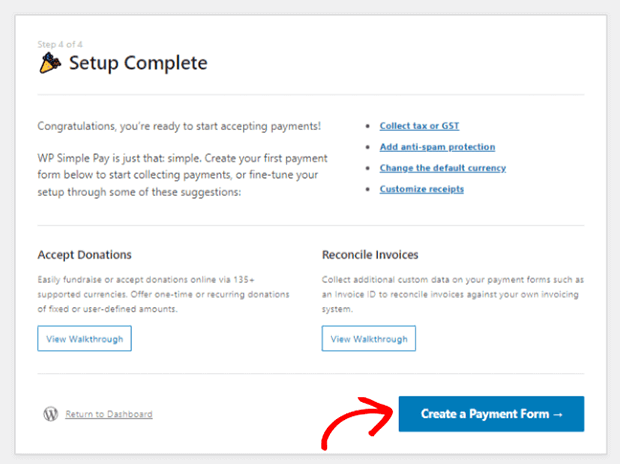
This will take you to the last step of the setup wizard. Click Create a Payment Form to continue.
Step 3: Create a Buy Now Pay Later Payment Form
To create a buy now pay later payment form, go to WP Simple Pay > Add New.
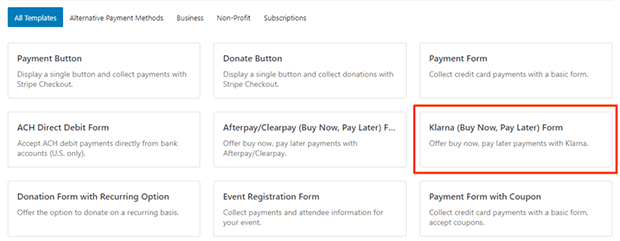
Choose the Klarna (Buy Now, Pay Later) Form or the Afterpay/Clearpay (Buy Now, Pay Later) Form template. Again, the app you choose may depend on what country your business is in.
You’ll be taken to the payment form builder. Once there, click on the Payment tab. Then click Add Price.
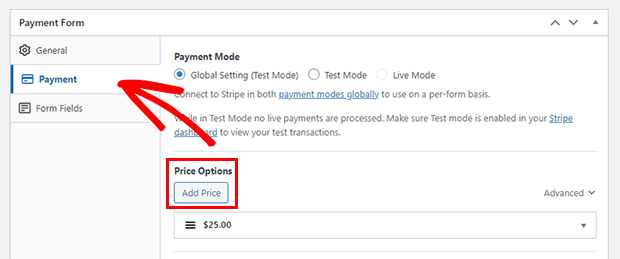
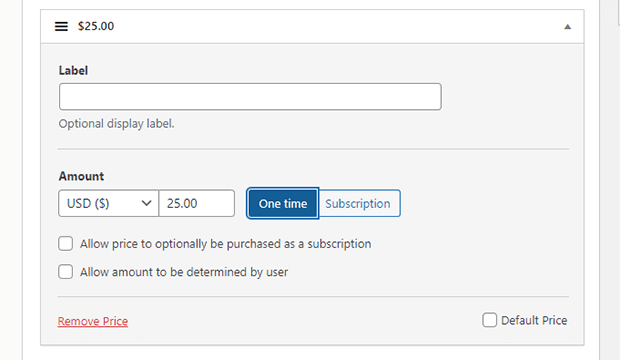
When you add a price, you can set the amount and select between one-time or subscription payment options. Klarna and Afterpay only work for one-time payments.
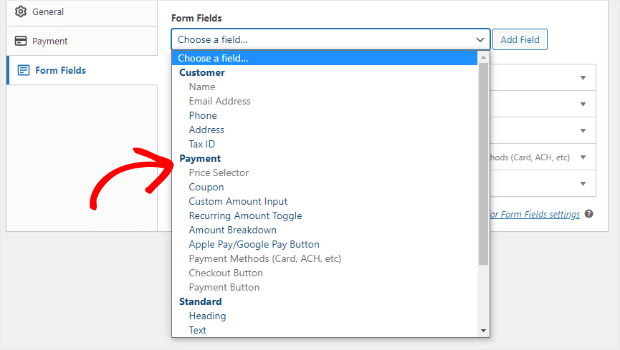
Next, customize the payment form fields if you need to.
You can add new fields by clicking on the Form Fields section. Choose the fields you want from the Form Fields dropdown menu and then click the Add Field button. You can add customer information fields, payment fields, and more.
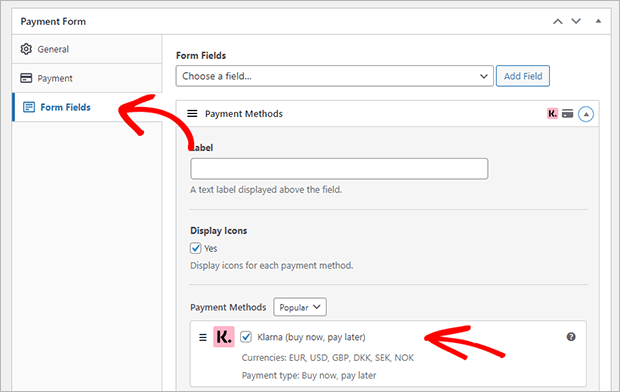
Once your form looks the way you want it, click on Payment Methods, which is right below the Form Fields dropdown. Choose Klarna or Afterpay, and any other payment methods you want to accept, such as credit or debit card, ACH, or Apple Pay.
Save the form as a draft and click on Preview to see what it looks like.
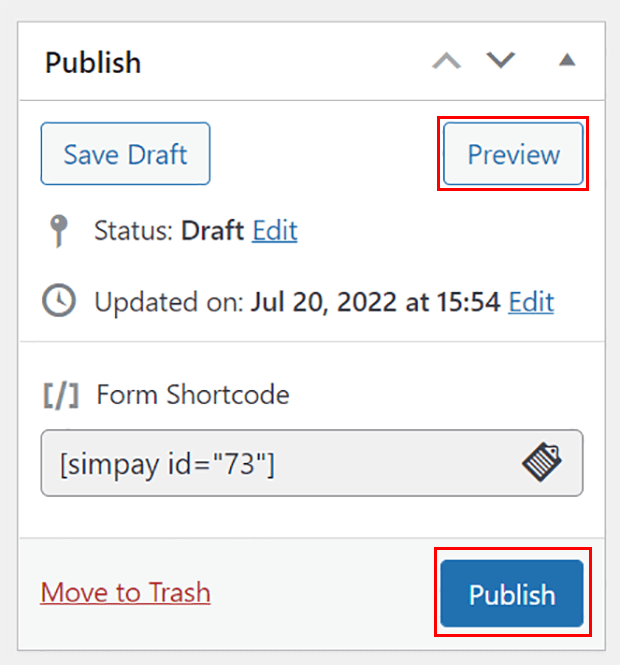
If you like what you see, go ahead and click Publish.
The hardest part is done! Now let’s add the form to your website.
Step 4: Add the Buy Now Pay Later Payment Form to Your WordPress Site
There are 3 easy ways to add your new buy now pay later payment form to your WordPress site.
Embedded Form – Block Editor
By default, your payment form will be embedded directly on your WordPress page or post. To add an embedded form, find the page or post where you want to add the form. Click Edit to open the content editor.

Insert a new block and search for WP Simple Pay. Select the block to add it to the WordPress block editor.
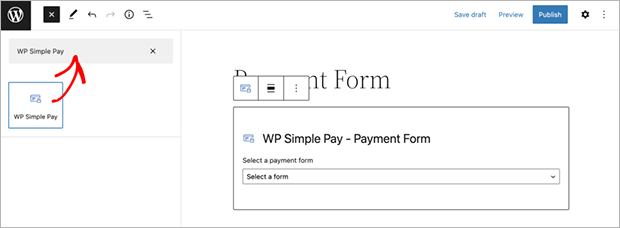
After you insert the block, select the payment form you want to add from the dropdown.
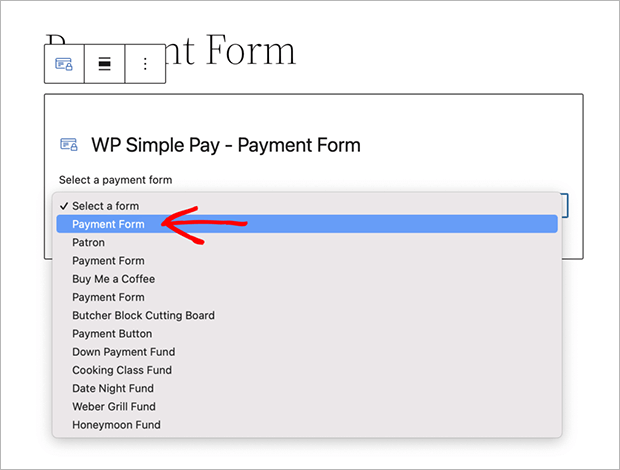
Once you select the form you want, you’ll see an image of the form in your page editor. You can continue adding anything else you like to the page as needed.
Embedded Form – Classic Editor or Non-Block Theme
If you’re using the WordPress classic editor or a theme that doesn’t support blocks, all you have to do is copy the shortcode from the payment form list and paste it onto any page.

Modal Forms – Block Editor
You can also have your payment form pop up when customers click a link or button. To do this, first you need to go back to your payment form editor. Go to WP Simple Pay > Payment Forms and click Edit under your buy now pay later form.
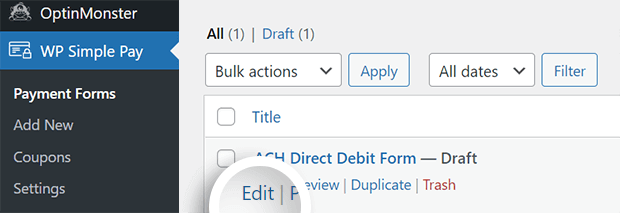
Click on the General tab and check the box that says Open in an overlay modal. Save and go back to your page editor.
You can add a Button block and link it to your buy now pay later payment form in the button block’s settings sidebar.
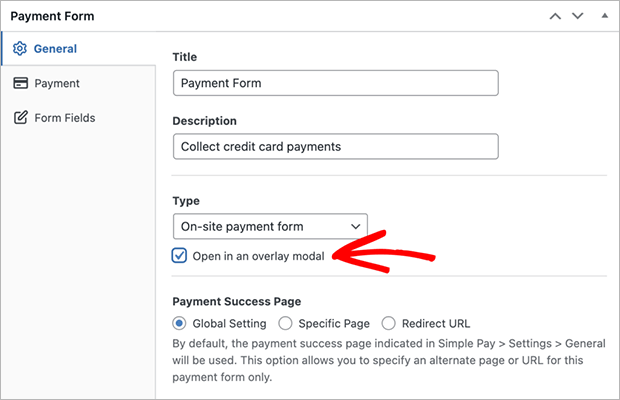
You can also add the overlay modal to a regular link or other elements, but this requires a bit of extra coding. You can read the full WP Simple Pay documentation to learn more.
Before we wrap up, let’s test your payment form to make sure it works properly!
Step 5: Test Your Buy Now Pay Later Payment Form
Now you can view your form and make a test payment.
Go to your buy now pay later form and use any of the test card numbers provided by Stripe.
After Stripe processes the test payment, you’ll see the default payment confirmation page. If everything goes well, you can take your form live.
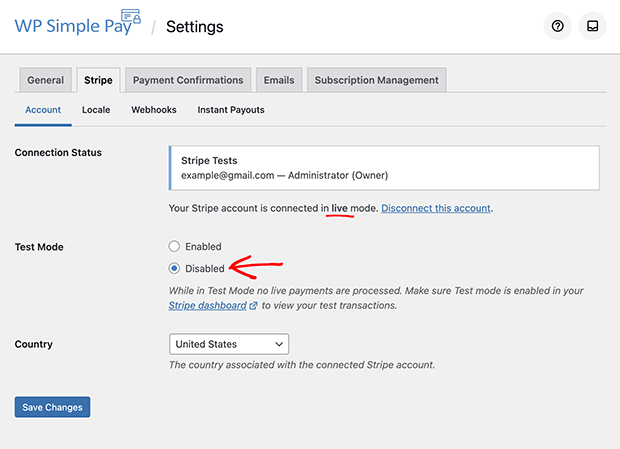
From the WordPress dashboard, go to WP Simple Pay > Settings > Stripe > Account tab. Set Test Mode to Disabled and then click the Save Changes button.
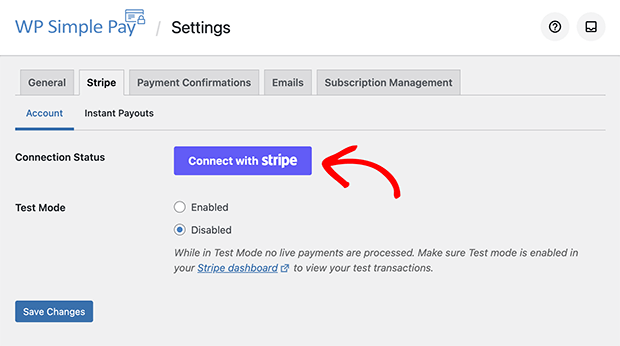
Now click the Connect with Stripe button again, just like you did in the initial setup. Now we’ll be connecting to Stripe in Live Mode.
Follow the instructions provided by Stripe to connect your account.
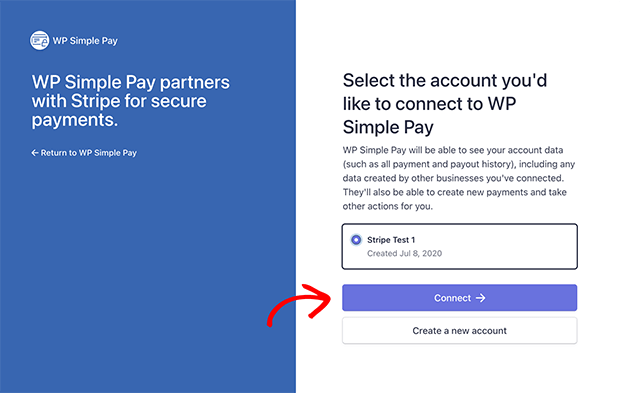
Once you’ve successfully connected, you’ll be sent back to WP Simple Pay. You will now see that your Connection Status is Live.
You did it!
Bonus: More Alternate Payment Options to Boost Revenue
BNPL isn’t the only payment option that can increase your sales. Here are some other options you can offer with the WP Simple Pay plugin:
- Custom amount payments let customers pay what they want, so you get some revenue rather than nothing
- Free trial on subscriptions allows customers to try before they buy, which can increase conversion rates
- Discount coupons can motivate customers to buy, especially if the discount is only available for a limited time
- ACH payments have lower transaction fees, which can save you a lot of money over time and on large payments
Now you know how to create a Buy Now Pay Later payment form for your WordPress site!
BNPL and other alternate payment options are a creative and effective way to grow your revenue, simply by offering more choices to your customers.
If you want to learn more about WP Simple Pay, check out our full plugin review.
What else are you waiting for? Get started with WP Simple Pay today!
If you like this article, please follow us on Facebook and Twitter for more free articles.
