Are you looking for an easy way to add a search bar to your WordPress website?
A search bar helps visitors find the content from your posts, pages, and products quickly. WordPress comes with a search bar widget by default but offers limited searching functionalities. On the other hand, a dedicated search plugin comes with many features that you can use on your website.
In this tutorial, you’ll learn how to add a search bar on your website, step by step.
How to Add a Search Bar to WordPress
Adding a search bar to your website comes with many benefits like:
- Content Discoverability: Adding a search bar offers visitors an easy way to search content across posts, pages, categories, comments, and other website areas.
- Improved User Experience: Showing live search results in the search box enhances user engagement, and they spend more time on your website.
- Reduced Bounce Rate: Since users get faster search results, they’ll stay longer to read content or explore products. Eventually, it helps reduce the bounce rate on your website.
To add a search bar that allows visitors to search anything on your website, you can use the SearchWP plugin.
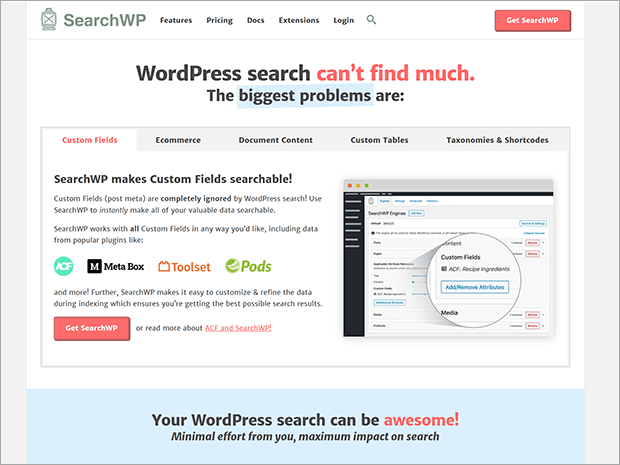
SearchWP is the most popular WordPress search plugin. It allows customers to find content in posts, pages, taxonomies, comments, and custom fields not supported in the default WordPress search widget.
The plugin integrates seamlessly with popular plugins and offers you all the customization settings to create a beautiful and fully functional search bar.
Before we jump into the actual steps, let’s look at some of the prominent features of this plugin.
- Autocomplete Search: With SearchWP’s autocomplete keyword suggestions, visitors feel the same, like typing in Google or social media search boxes.
- Live Search Results: Using SearchWP’s advanced Ajax search, you can offer live search results without reloading the page.
- Custom Fields Support: The WordPress search widget does not include search results from the custom fields. SearchWP offers advanced options so you can perform a search inside custom fields as well.
- Search Analytics: You can check all the search statistics and create a content strategy around the searches performed.
- Search Engine: You can create a dedicated search engine that will perform searches based on the inclusion and exclusion rules.
- WooCommerce Integration: SearchWP seamlessly integrates with WooCommerce, so visitors get all the product matches in seconds without checking each category.
And many more.
Now let’s see how to add a custom search bar to your website.
Step 1: Install the SearchWP Plugin
For adding a custom search bar, you’ll need to install the SearchWP plugin.
SearchWP is a premium search plugin and is available in three different pricing packages – Standard, Pro, and Agency.
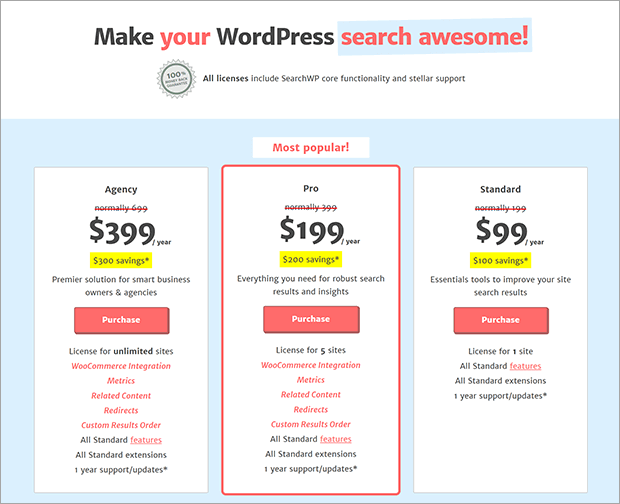
You can select the plan that makes the most sense for your business. Note that if you start with the Standard Plan, you can upgrade to higher packages anytime in the future.
Go ahead and complete the signup process.
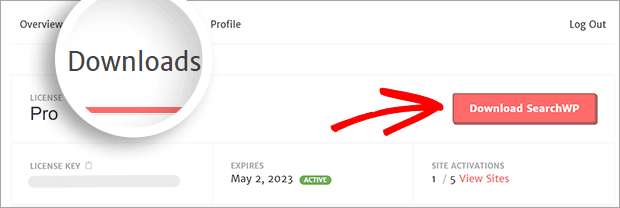
Next, log in to your newly created SearchWP account and head over to the Downloads tab.
Click on the Download SearchWP button to download the plugin zip.
Now, you can install and activate the plugin on your website. Navigate to the license tab and enter the license key.
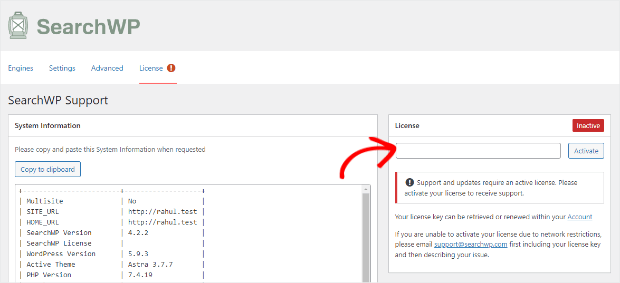
Click on Activate.
That’s all for this step.
Step 2: Add a Search Engine
With the SearchWP plugin, you can easily set rules when searching for matching results.
Let’s begin creating a customized search engine for your website.
Navigate to SearchWP » Settings » Engines tab.
You’ll see a search engine by default. You can even modify the default search engine if you’d like to.
To add a new search engine, click on Add New.
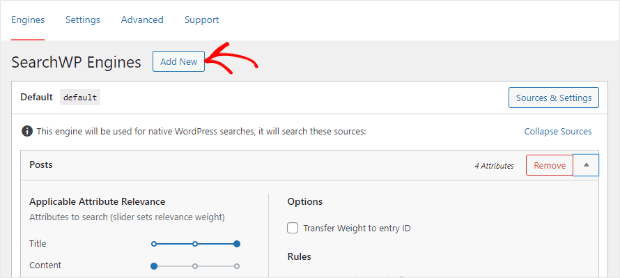
You’ll see a new search engine named “supplemental.”
Next, click on the Sources & Settings button from the top right corner. It will open a popup where you can select the sources for finding search results from posts, pages, media, and so on.
You also have the option to change the Engine label.
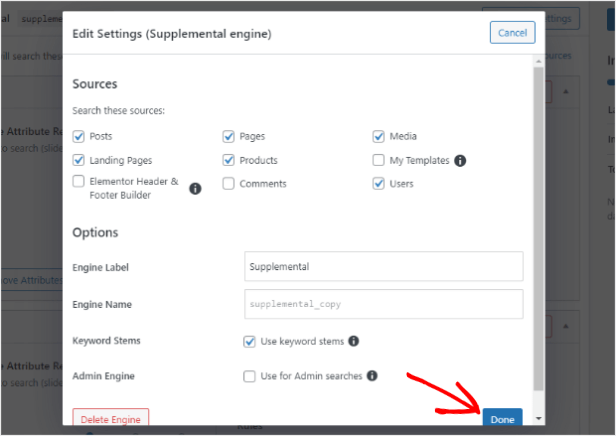
Notice the keyword stems are selected by default. It ensures that users get some results related to searched keywords even if the exact match is not found.
Don’t forget to click on the Done button.
You need to specify where you want to look for matching keywords. For example, in posts title, post content, slug, excerpt, and so on.
Click on the Add/Remove Attributes button and check the options from the popup.
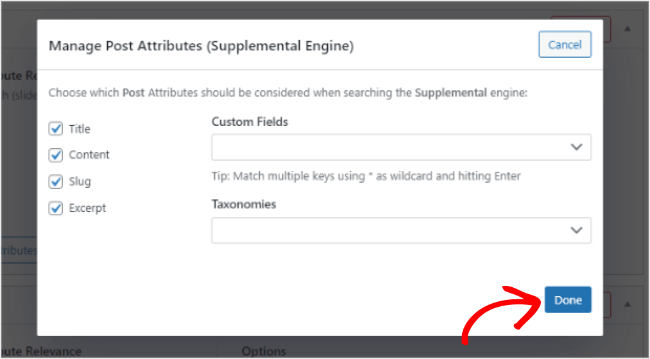
You can even select the custom fields and taxonomies for performing searches.
Click Done after selecting the attributes.
If you want to add some specific search rules, you can do that by going to the Edit Rules option.
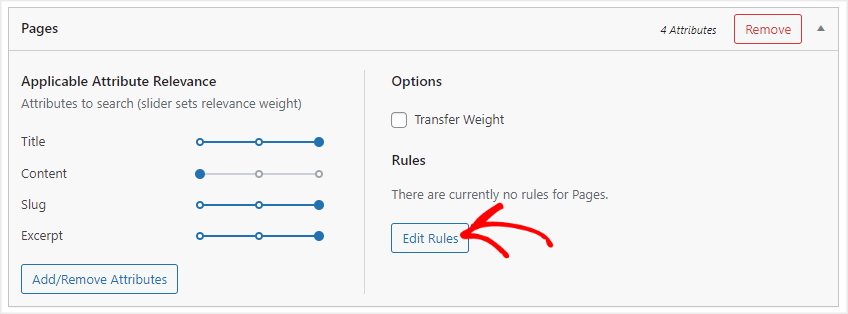
Here you can set the date range for posts or pages that will be considered while performing the search.
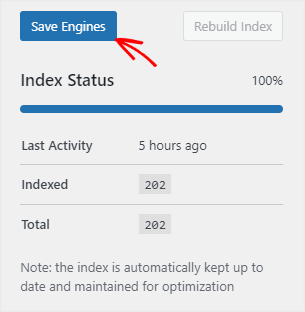
Once you set the rules, click on Save Engines to save your first SearchWP search engine.
Step 3: Add the Search Bar to Your Website
The last step is to add the search bar to your website.
You can add the search bar in the navigation menu header, footer, and sidebar. In this tutorial, we’ll add the search bar in the sidebar.
Navigate to Appearance » Widgets from your admin dashboard.

On the widget page, you can choose the area where you wish to add the search bar.
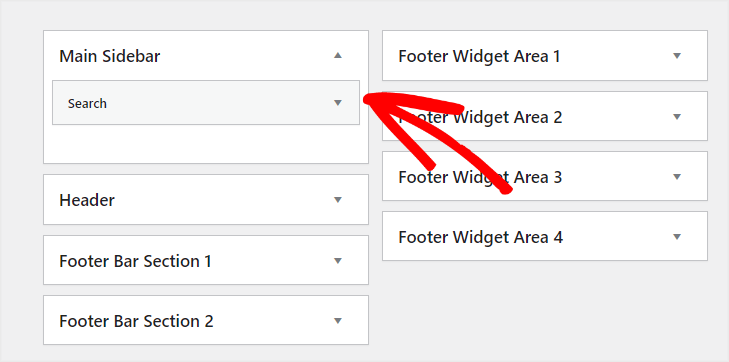
Finally, click on Update to save the changes.
That’s it.
Let’s have a look at our search bar in the front.
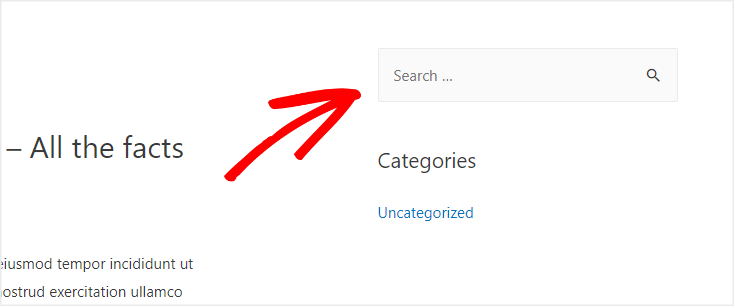
Now, visitors can use this search bar and get results from posts, pages, and the options selected in the search engine.
That’s all for this tutorial.
You’ve successfully added the search bar in your website sidebar.
You can also use OptinMonster along with a search bar to retain visitors.
For example, you can ask visitors to subscribe to the email list using a popup. If you publish the content they were searching for, they’ll get notified with your business emails.
We hope this tutorial was helpful and you learned something new today. If you liked this article, consider checking out the below articles that cover similar topics:
- SearchWP Review: Is It Worth It?
- 15 Best WordPress Search Plugins (Compared)
- 17 Best WordPress eCommerce Plugins to Build & Grow Your Business
- 12 Best Website Builders for Small Businesses
- OptinMonster Review 2023
Ready to add a search bar? Get SearchWP today!
If you like this article, follow us on Facebook and Twitter for more free articles.
