Do you want to use the power of FOMO to increase the number of readers and comments on your WordPress blog?
FOMO (fear of missing out) can be an effective tool to engage your site’s casual browsers. And creating a FOMO notification may be just what you need to boost the number of people who interact with your blog.
That’s why, today, we’re going to teach you step by step how to create a FOMO notification for your WordPress site.
But before we do, let’s get clear on what a “FOMO notification” is and why they work.
What Is a FOMO Notification?
A FOMO notification is a small message that appears to your site’s visitors, letting them know how other people are interacting with your website.
This type of notification gets its name because it leverages the power of FOMO, or “fear of missing out.”
FOMO is something that happens to all of us when we see other people experiencing something that we view as pleasurable.
If a friend recommends a new restaurant we haven’t tried before, we suddenly feel the urge to make a reservation.
Or when a family member posts photos of their vacation online, suddenly we feel the need to take some time off, too.
Smart marketers have figured out how to use FOMO to get their audience to take action. And that includes getting people to interact with their blog.
The best part is that in just a few minutes, you can do the same no matter what level marketer you are.
Because we’re going to teach you how to create FOMO notifications for when people leave a comment on your WordPress blog posts.
When other people on your site see this notification, they’ll be more motivated to read your blog and leave a comment, as well.
We are going to teach you how to create a FOMO notification for your WordPress site in under 5 minutes even without writing a single line of code.
Let’s dive in.
How to Create a FOMO Notification for Blog Comments
Creating a FOMO notification with TrustPulse is easy. And the best part?
You can get started totally free.
TrustPulse allows notification for up to 500 sessions on your site for 100% free. And when you need to upgrade, we’re still only a fraction of the cost compared to our competitors.
Just check out the pricing section in this review of FOMO vs. UseProof vs. TrustPulse. When you break everything down, our starter plan comes out to only $3.29 per month.
Ready to get started? Sign up for a free TrustPulse account today!
When you’ve signed up, you’ll be ready to begin.
Step 1: Select FOMO Notification Type
The first step is to give your notification a name and assign it to your website:
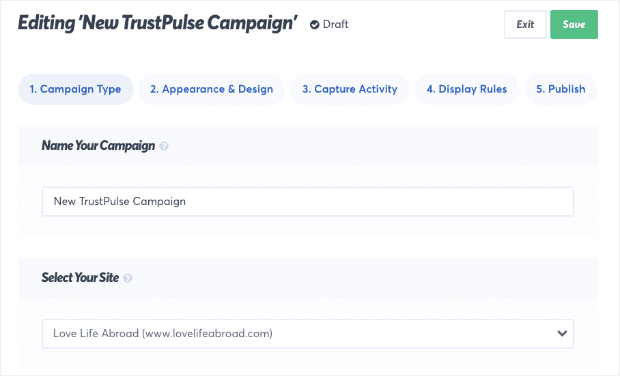
And then, you need to determine what type of FOMO notification you want. You have 2 choices:
- Recent Activity
- On-Fire
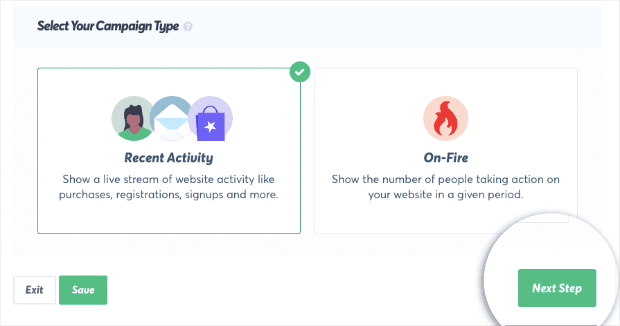
Both of these notifications work great in the right context. But how do you choose between the two?
Recent Activity is best for common types of activities taken on or off your website. This can include events such as:
- Individual sales
- Signing up for a newsletter
- Leaving a review on a 3rd party website
And more. This type of notification will display an individual either by name or a reference that you choose. Here’s an example of what a Recent Activity notification looks like:
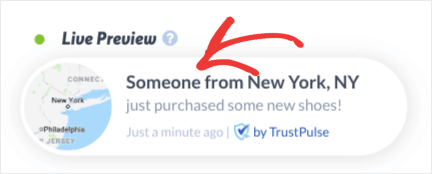
Again, by default, the message will show your users’ first name. But if that information isn’t available, you’ll be able to assign a visitor reference for your FOMO notifications.
On-Fire notifications are a bit different. They show the total number of people who have taken the same action on or off your website. Here’s what an On-Fire notification looks like:
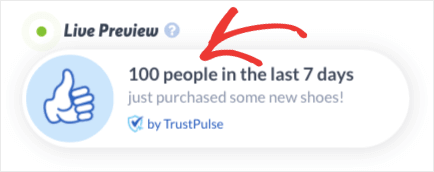
These are great when you expect large amounts of people to do the same thing. On-Fire notifications are perfect for things like:
- Flash sales with large numbers of clients
- Popular product pre-orders
- Webinar registrations
And more.
For today’s tutorial, we’re going to stick with Recent Activity for our FOMO notification:
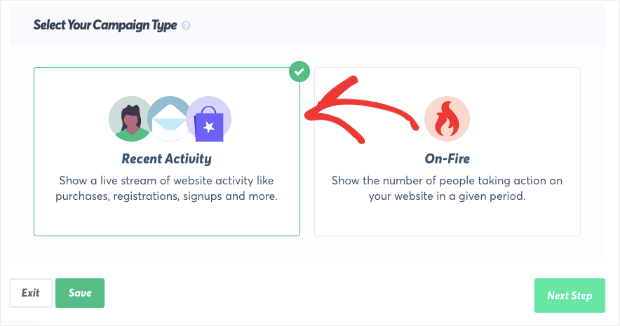
That’s because most bloggers won’t get hundreds of comments in a short period of time.
However, if your blog is super popular, and you get loads of comments on your WordPress site, you can always switch to an On-Fire notification.
When you’re done, click Next Step.
Step 2: Design Your Notification
Now that you’ve chosen the type of FOMO notification you’ll use for your blog comments, you can work on the design.
TrustPulse makes your notifications easy to modify. Everything can be changed with a drop-down menu, adding a bit of text to a field box, or flipping a toggle switch on and off.
You can change things such as:
- Language
- How you refer to whoever leaves you a comment
- Notification text
- Notification link
And a whole lot more.
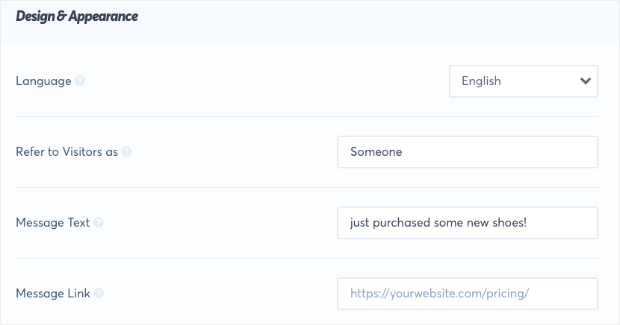
That last one (notification link) is particularly important. This allows you to make your FOMO notification a clickable link that redirects your site traffic to your blog.
So when someone leaves a comment, anyone else on your site will get the notification. Then, because you linked back to your blog, you can attract new readers for your content.
You also have tons of Advanced Settings that allow you to change the color, font, border shadows, and other visual elements about your FOMO notification:
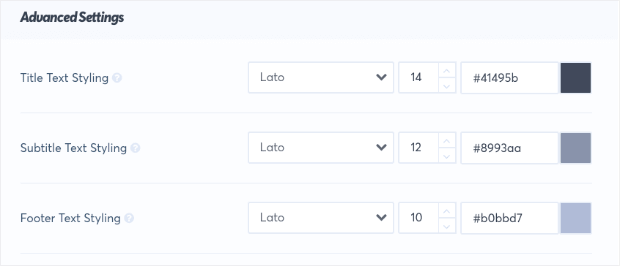
You can create a font and color scheme that matches your brand. That way, your FOMO notifications can continue to build brand awareness, even as you let people know how popular your blog is!
All of these styling options make it easy to modify your TrustPulse campaign. Here’s an example of what we built for today’s demo in under 3 minutes:
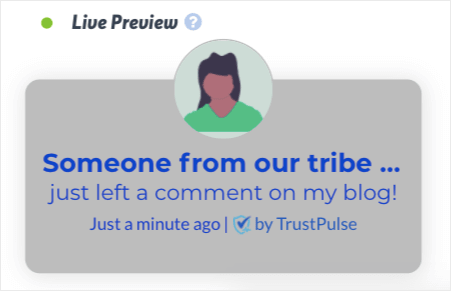
Again, the way you design your FOMO notification is completely up to you and your brand’s voice. Once you’ve designed the perfect notification for your WordPress site, just click Next Step.
Step 3: Capture Activity from Your WordPress Comments
You’ve got your notification type, and you’ve styled it to look, say, and link to what you want. Now it’s time to sync your notification with your WordPress blog.
We call this “capturing activity.” But all that means is finding which trigger will set off your notification. In this case, it will be whenever someone leaves a comment on your blog.
To capture activity with TrustPulse, you have 2 choices:
- AutoMagic
- Zapier
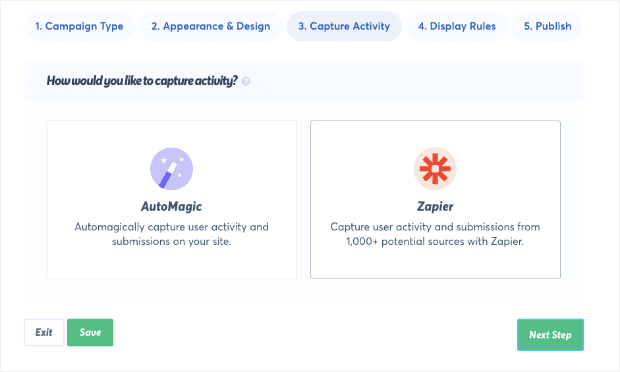
AutoMagic will display notifications from any activity that’s taken on your site. This would be things like:
- Purchases made in your online store
- Email signups
- Webinar registrations forms
And so on.
Zapier opens up so many more doors. That’s because our Zapier integration will capture activity with your brand from over 1,000 other sites.
So let’s say someone left you a comment on a 3rd party site like Google My Business or Yelp. You could still set up a notification to appear to your audience even though the action wasn’t taken directly on your site.
In today’s case where users are leaving a comment on your blog, we’ll actually be using the Zapier integration.
That’s because TrustPulse will need to hook up with your WordPress site to specifically capture comments on your blog pages.
If you don’t have a Zapier account yet, no worries. You can sign up for free! Once you have your account set up, you’ll be ready to use it with TrustPulse.
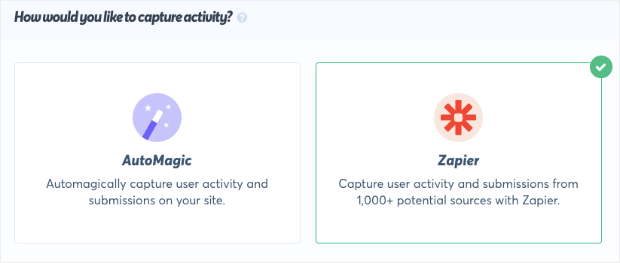
First, click on the Zapier integration option:
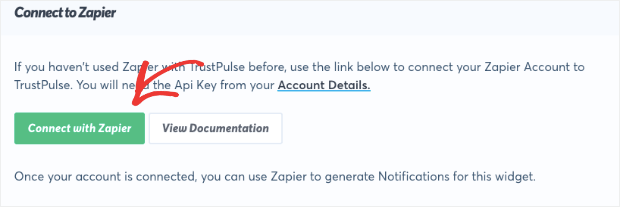
Below that, click Connect to Zapier:
You’ll be redirected to confirm that TrustPulse wants to work with the Zapier app:
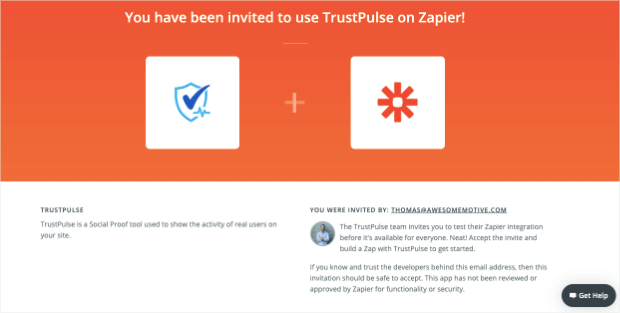
Click Accept Invite & Build a Zap:

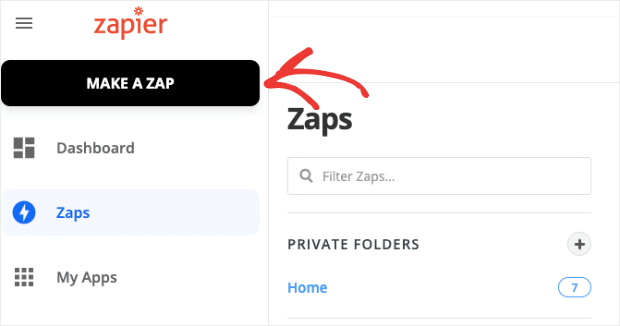
This will redirect you to your Zapier dashboard. In the upper left-hand corner, click Make a Zap:
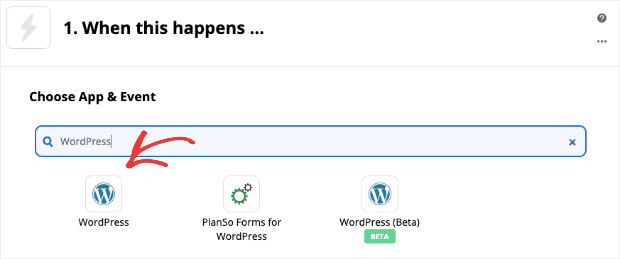
Next, you’ll need to choose an app and event. Search for and click on the WordPress app in Zapier:
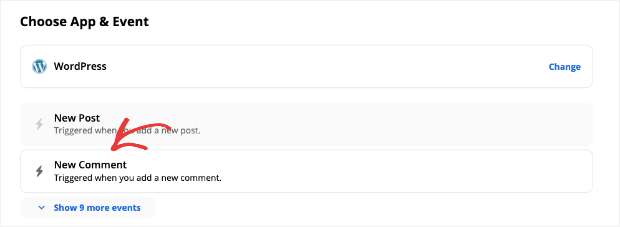
Then you’ll see a list of the options you can use for your Zap. Select New Comment:
After that, you’ll choose what happens when someone leaves a new comment on your WordPress site.
Search for and click the TrustPulse app:
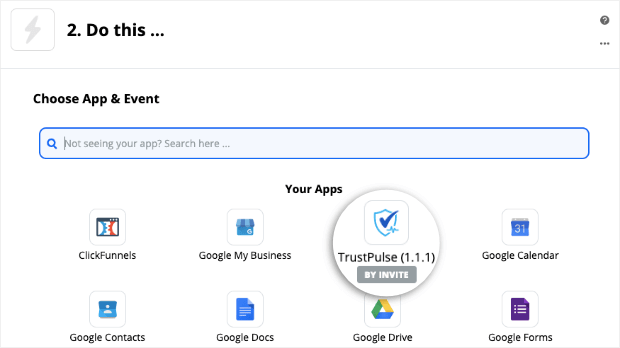
This will create the trigger that makes a notification with your TrustPulse account for your website. Click Continue and then select your TrustPulse account:

Now you’ll need to choose the TrustPulse campaign that you want to display when someone leaves a comment on your blog:
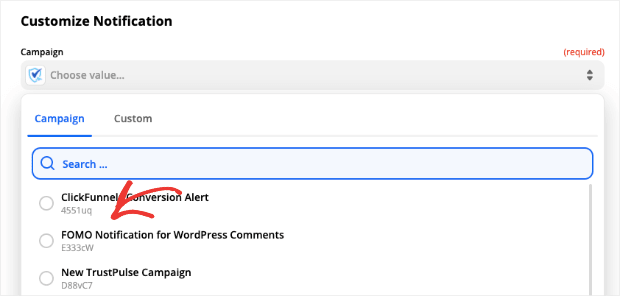
Then insert your email address. This will be the address that is used to generate the notification, but won’t be seen by your site’s traffic:

You may need to sign in to your WordPress account, so Zapier can connect with it. If that’s the case, you’ll be prompted to do so:

Then you’ll be able to choose which type of comments you want to display your notifications for:
- Unapproved
- Approved
- Spam
- Trash
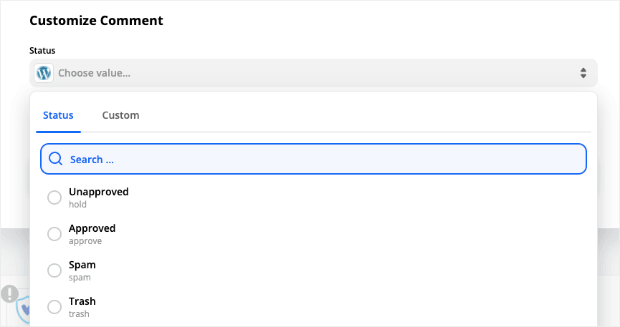
For today’s tutorial, we’ll select Approved.
From there, you can test our your new trigger and make sure everything works properly:

And the last step is to simply turn on your Zap:
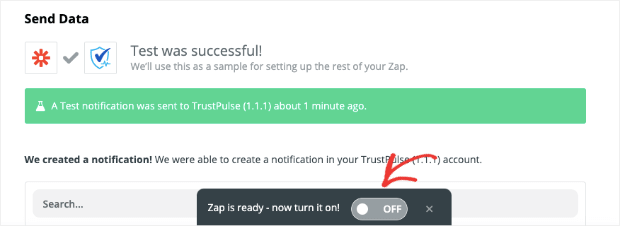
Then head back to your TrustPulse dashboard and click Next Step. That way, you can configure where your FOMO notification will appear.
Step 4: Display Comments Notification on Your Site
Once your Zap is created, it’s time to choose where you’ll display your notification. You’ll see a drop-down menu that says, Where should we display your notifications?:
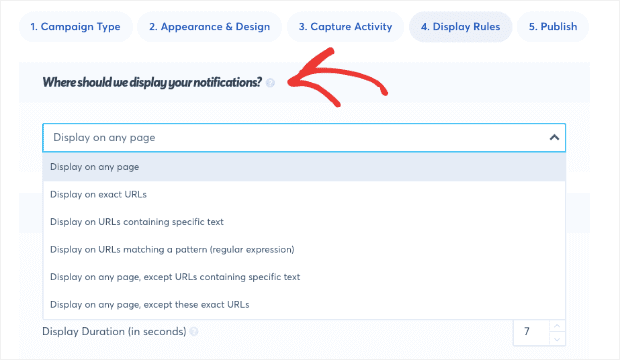
Here, you can choose where your notification will appear. This can be on:
- Any page
- Exact URLs
- URLs with specific text
And more. You can choose exactly where you want your FOMO notification to appear on your site whenever someone comments on your blog.
For this post, we’re going to leave the default setting to display the notification on any page.
Then, we need to choose when you want your notification to appear. You have the option to modify the:
- Delay before showing your first notification
- How long the notification will stay on your visitor’s screen
- Time in between notifications if you have more than one
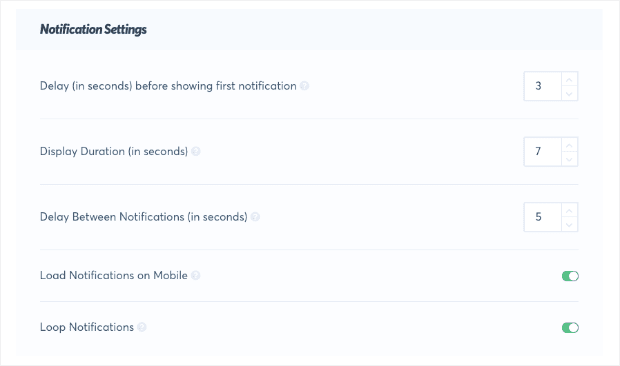
And more.
For today’s tutorial, we’ll simply leave the default settings. We’ve found that these work best for the majority of our users.
But you should know that you can customize when and where your FOMO notification displays on your website.
When you’ve configured your display settings, you can click Next Step.
Step 5: Launch Your FOMO Notification
All that’s left now is to launch your notification. You’ll get the chance to preview your campaign to look for any last-minute changes:
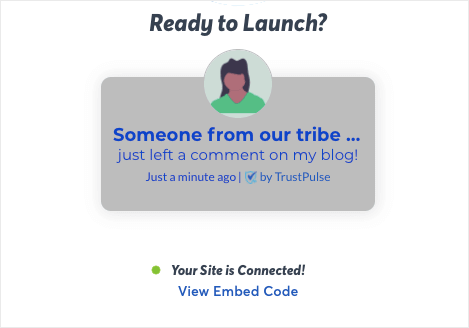
In some cases, you may see that your site isn’t connected to your TrustPulse account. If that’s the case, you see a warning that looks like this:

That means you need to hook up TrustPulse with your WordPress site.
For help with that, check out this article on how to hook up TrustPulse with WordPress.
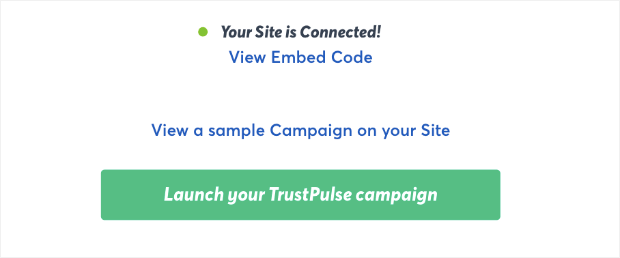
And that’s it! Once you’re ready, just click Launch Your TrustPulse Campaign:
We hope you found this article helpful. If so, you may want to check out these related posts:
- How to Show ClickFunnels Conversions on Your Website
- How to Add a Recent Sales Notification to Your Website
- 9 Tips on How to Get Customers to Trust Your Website
These posts will go a long way to boost the eCommerce side of your WordPress site.
Ready to get started with TrustPulse? Sign up for your FREE account today!
