
Do you want to learn how to create a recent sales notification popup?
Your site’s visitors need to know they aren’t the only ones checking out your products, and the social proof power of recent sales popups can help you achieve that and increase sales instantly.
Stick around because this blog will cover how to use recent sales notification popups to increase your bottom line.
We’ll also show you how to set it up in less than 10 minutes.
What Is a Recent Sales Notification Popup?
A recent sales notification popup is a small popup that appears somewhere on your visitor’s screen whenever another customer purchases a product from your site.
You’re probably familiar with them. They look something like this:

The truth is that many of your site’s visitors are going to be casual browsers. In other words, they know they have a problem, but they’re just “window shopping” for now.
Recent sales notification popups change that. These small popups leverage the marketing tactic called fear of missing out (FOMO).
By showing casual browsers that other customers are actively purchasing what you’re selling, you’ll increase their need for your product. You’ll also build trust with new visitors.
That means you increase conversion rates. And this isn’t just limited to getting more sales, either. You can use these recent sales popups to:
- Increase email subscribers
- Get more webinar registrations
- Collect more feedback, reviews, and testimonials
- Boost page views on popular pages of your site
- And much more…
But recent sales notifications are hands down your best bet for driving more revenue from your online store.
And now that you know what a recent sales notification is and why it’s so valuable, it’s time to take action.
So let’s learn how to create a recent sales popup using TrustPulse in less than 10 minutes.
How To Create Recent Sales Notification Popups on WordPress
For this tutorial, we’ll be using TrustPulse:

TrustPulse is the best social proof app, tool, and software for creating recent sales notification popups.
As you’ll see, you won’t need any coding or technical experience to install TrustPulse and have stunning notifications in minutes.
While TrustPulse is flexible, it’s also one of WordPress’s most popular recent sales notification plugins. Which means installation and notification management are ridiculously simple.
And we’ve seen our customers’ sales increase by 15% by adding this social proof feature to their website. Once you see results like those, you’ll be glad you’ve chosen TrustPulse as your social proof software!
So, this tutorial will be split into two parts:
- Installing the TrustPulse plugin to your site
- Creating a recent sales notification popup
We’ll start with installing the TrustPulse WordPress plugin, but feel free to jump straight to learning how to create a recent sales notification popup if you already have a TrustPulse account.
Please keep in mind that, for today’s tutorial, we’ll add a recent sales notification specifically to WordPress.
If you don’t have a WordPress site, no worries. Just read this article on how to integrate TrustPulse with any site.
If you want a WordPress site but need help figuring out where to start, we’ve got you covered there, too. Check out this guide by WPBeginner on how to create a WordPress website.
Let’s start by installing the world’s #1 sales notification plugin for WordPress: TrustPulse.
Step 1) Install and Activate the TrustPulse Plugin
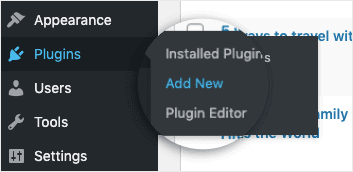
Your first step will be to have the TrustPulse plugin downloaded to your WordPress site. Head over to your WordPress dashboard and find the Plugins » Add New option in the left-hand side menu:
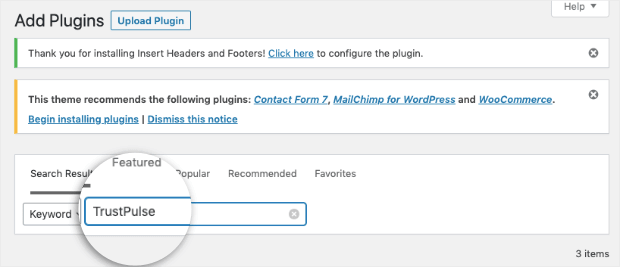
Then type TrustPulse into the search bar:
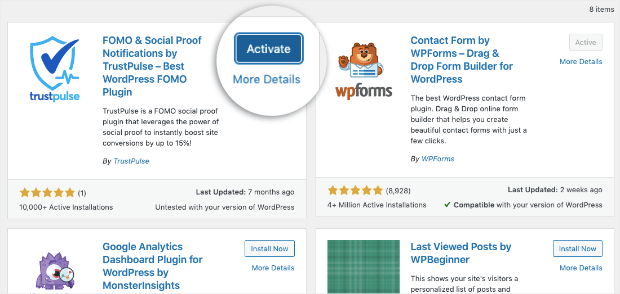
And locate the TrustPulse plugin (it’s the first choice that comes up). Click Install Now:

When the plugin has installed, click Activate:
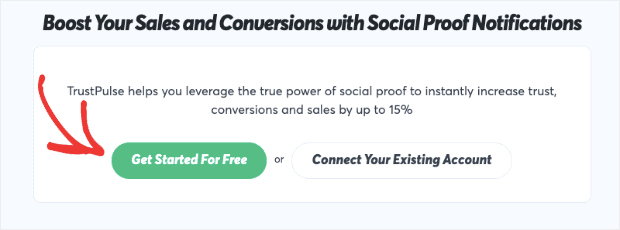
You now have two options: Get Started For Free or Connect to an Existing Account. For today’s tutorial, we’ll use the free version for WordPress and assume you don’t have your account created:
Step 2) Fill Out Your Account and Payment Information
Fill out your new account information and click Get Started Now with TrustPulse:

And enter your payment information:
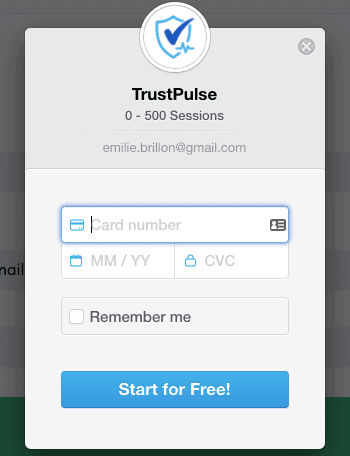
Your card will not be charged for the free version, which gives you up to 500 sessions on your site.
You can (and should) upgrade as you scale your business, especially since paid plans start at only $5/month.
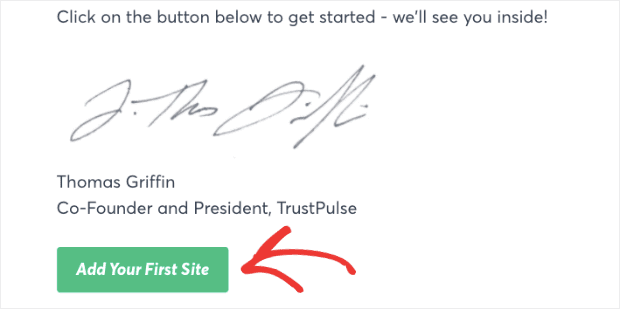
At this point, you’re greeted with a welcome message from our Co-Founder and President, Thomas Griffin. Just beneath his signature, click Add Your First Site:
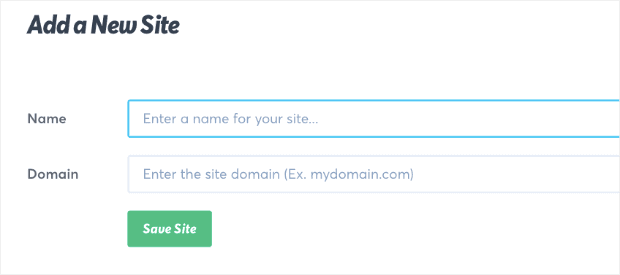
Step 3) Add Your First Site
Enter the name and domain of your site and click Save Site:
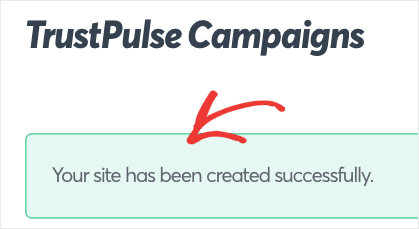
Here you should receive a confirmation message that looks like this:
Now you’re ready to create a recent sales notification popup for WordPress. Let’s take a look at how we do that.
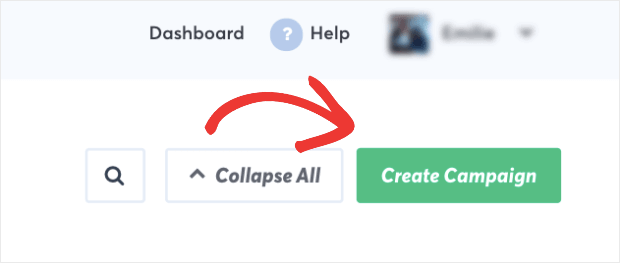
On the same page where you received your confirmation message, click Create Campaign in the upper right corner:
There are five steps to creating your campaign:
- Campaign Type
- Appearance and Design
- Capture User Activity
- Display Rules
- Publish
Let’s start with Campaign Type.
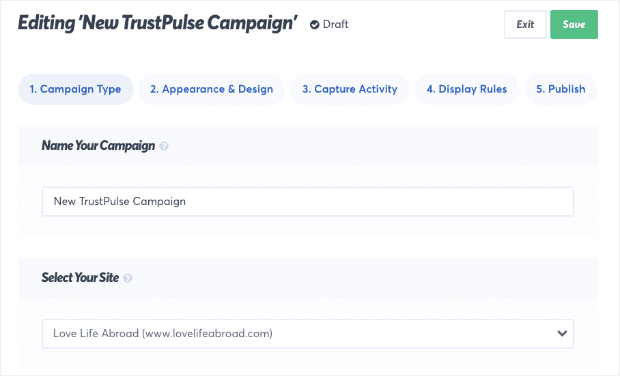
Step 1) Campaign Type
This is where you’ll name your campaign and select your site:
You’ll also choose your campaign type:
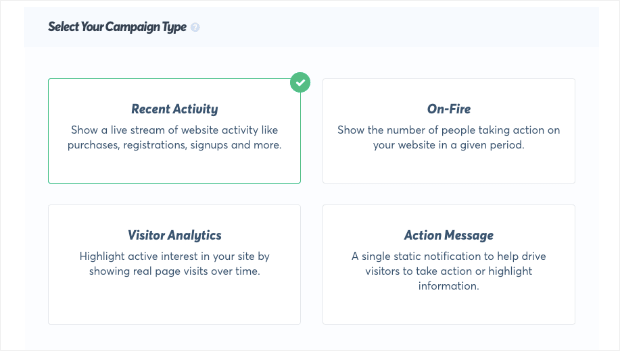
You have four choices for your campaign type:
- Recent Activity: Show a live stream of website activity like purchases, registrations, signups, and more.
- On-Fire: Show the number of people taking action on your website in a given period.
- Visitor Analytics: Highlight active interest in your site by showing real page visits over time.
- Action Message: Display a single static notification to help drive your website visitors to take action or highly information.
For today’s tutorial, we’ll go with Recent Activity to create our recent sales notification popup on WordPress. You can use On-Fire when you know you’ll have lots of activity on your site.
The On-Fire campaign harnesses social proof for larger quantities of sales. This could include a popular flash sale, seasonal promotions, online contests, or any other activity with lots of site wide engagement.
Visitor Analytics and Action Messages are great for leveraging social proof before you have any sales. But those campaigns fall out of this post’s focus.
So, for now, click Recent Activity and hit Next Step in the bottom right corner; this will lead you to the Appearance and Design stage.
Step 2) Appearance and Design
Now you’re ready to design what your recent sales popup looks like in your Appearance and Design dashboard:

You can customize your recent sales popup to look, say, and link to whatever you want. You can personalize your campaign’s:
- Language
- Visitor reference
- Message text
- Message link
- Notification image
- Location on your page
And more.
Plus, you have a live preview of what your recent sales popup will look like on your site:
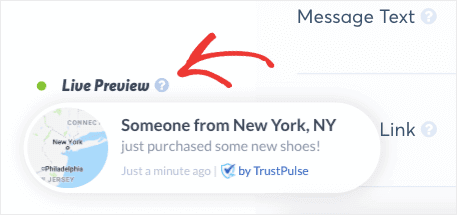
That way, you can see your recent sales notification popup changes in real time. When you’re done modifying how your recent sales popup looks, hit the Next Step:
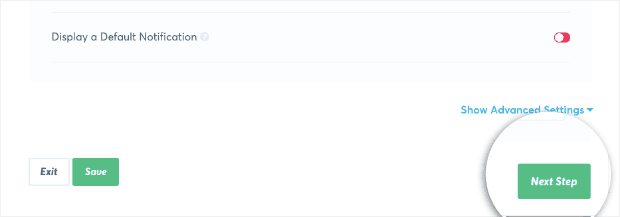
That will take you to the Capture Activity page.
Step 3) Capture User Activity
With TrustPulse, you can create a notification popup on WordPress for any activity and submissions taken with your site. But we’re focusing on how to create a recent sales notification popup, so we need to trigger your campaign when someone makes a purchase.
Fortunately, we make this super easy.
You can choose between 2 types of campaign activities:
- AutoMagic
- Zapier
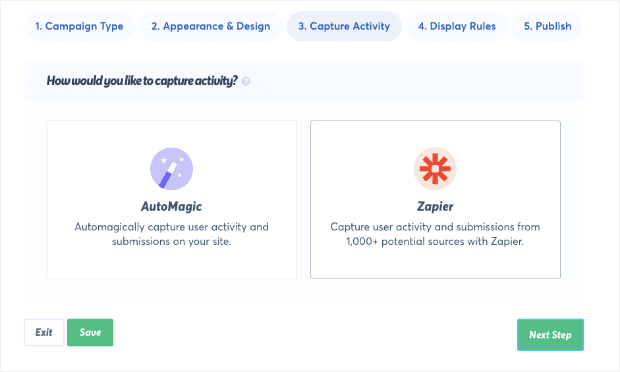
AutoMagic allows you to capture any activities taken on your site easily. Our Zapier integration can create notifications for actions related to your brand but not taken directly on your website. So, for example, you can create a notification whenever someone leaves you a service or product review on Google My Business.
For today’s tutorial, however, we’ll choose AutoMagic:

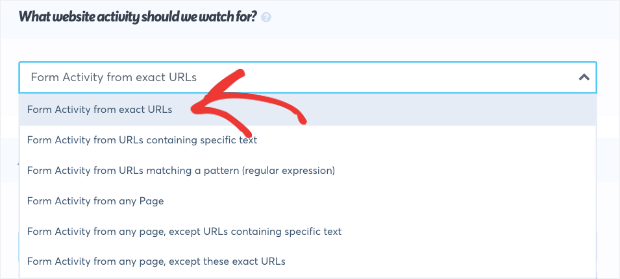
Now you need to set up your trigger for when a sale occurs on your site. You’ll need to track forms from your checkout page to do that.
You’ll see a list of options for What website activity should we watch for? You need to select Form Activity from exact URLs.
It’s the default setting and also the first option in your dropdown list:
Then you need to type in the URL path of your site’s checkout page:
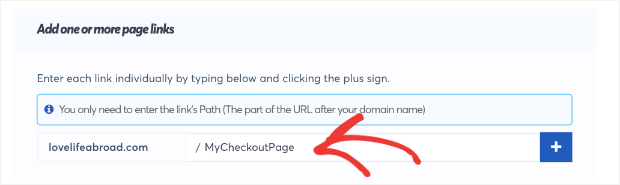
Once you’ve done that, proceed to the next step: Display Rules.
Step 4) Display Rules
Once your campaign is designed with its appropriate trigger, you can set some display rules. The first thing you’ll decide is where your notifications will display:
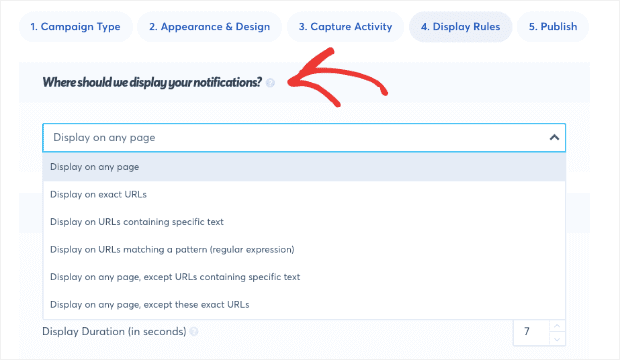
You’re probably best off leaving the default Display on any page setting to display recent sales notifications. But if you want to display your store sales on certain site pages, you can do that, too.
Then, you’re able to modify other display rules, such as:
- Delay before showing notification
- Display duration
- Delay time between notifications
- Load notification on mobile
- Loop notifications
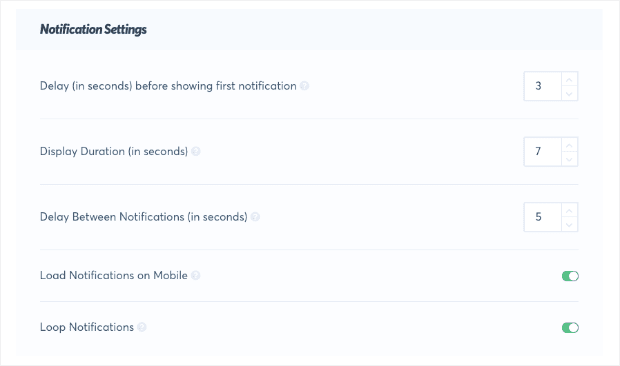
Because they’re fully customizable, your recent sales notification popups are a powerful marketing tool. They can be tailored to your audience and needs.
You can space out your notifications depending on how popular your site is. Or, if you’re starting, you can loop notifications to get the most out of your recent sales popups.
Another great feature we recently added is Order Priority. This lets you schedule the order of your notifications:
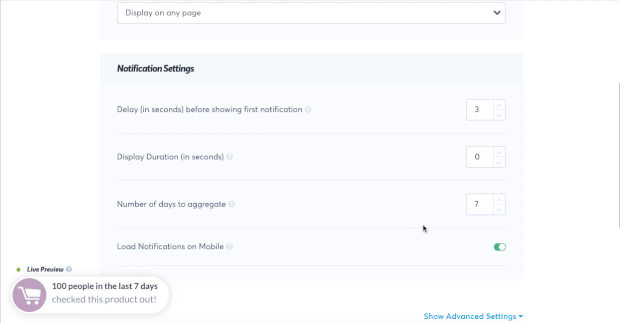
Why does this matter? If you have a popular promotion or a new notification that you want visitors to see, you can make it “skip the line” so to speak.
In other words, you now have 100% control over what order your campaigns appear. That way, you can leverage the most popular social proof notifications to boost engagement with new visitors.
When you’ve configured your display settings, there’s just one more step left.
Step 5) Publish
When it comes time to publish, you should be at this screen:
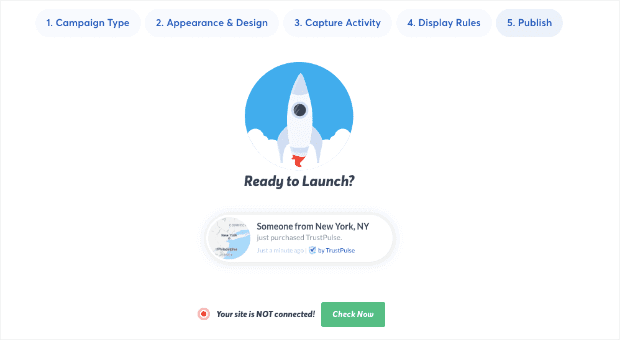
You’ll notice the preview or your recent sales notification popup on WordPress so that you can check for any spelling mistakes or changes needed for your design.
If you’ve been following this tutorial, you’ll see one thing left to do. Under the preview of the recent sales notification popup, it shows that our site isn’t connected yet:

We need to fix that. Scroll down and find the embed code for your TrustPulse account:
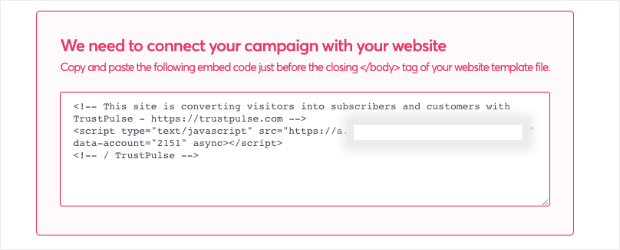
As the instructions indicate, embed this code just before your website template file’s closing </body> tag.
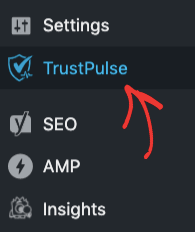
Does that sound confusing? Well, you’re in luck because there’s an easier solution.
Head back to your WordPress Dashboard and locate the TrustPulse plugin in the left-hand side menu:
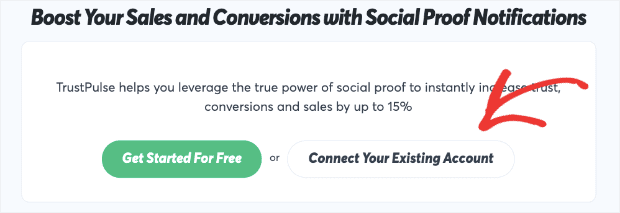
Since you’ve created an account now, you can click Connect to an Existing Account:
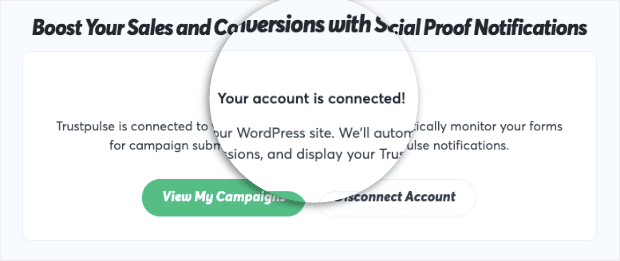
And just like that, you’re account will be connected! You’ll see a confirmation message letting you know:
In your TrustPulse campaign dashboard, you can click Check Now to make sure that your site is connected:

Then you’ll see the following confirmation message:
And that’s it!
You now have a recent sales notification popup on WordPress. Plus, you hooked it up in less time than it took to brew your morning coffee.
Best Practices for Using Recent Sales Notification Popups
To get the most out of your recent sales notification popups, here are some best practices to follow:
- Avoid fake notifications: Don’t display fake notifications, as this can damage your brand’s reputation and reduce trust among potential customers.
- Time and frequency of notifications: Be strategic about when and how often you display notifications. Avoid displaying notifications when traffic is low, and limit the frequency to prevent overwhelming potential customers.
- Choose the right placement on the website: Display notifications in a prominent location on the page, such as the bottom or corner of the screen.
- Testing and measuring the effectiveness of notifications: Businesses should A/B test different designs, messages, and placements to determine the most effective approach for their audience.
We hope this article helped you out, and if you enjoyed this post, you might also want to check out the following resources:
- 7 Best FOMO Alternatives for Adding Social Proof to Your Site
- How to Increase eCommerce Sales Now: 8 Tips You Need to Try
- How to Add a Live Sales Notification to WooCommerce
These posts will have all the information you need to boost credibility with your audience and drive more sales.
