Are you looking for an easy way to redirect WordPress page URLs?
A redirect sends both users and the search engine bots to a different URL from the one they originally wanted to visit. It prevents them from getting lost or landing on 404 pages.
In this post, we’ll show you an easy way to redirect WordPress posts and pages to new URLs on your website.
What is URL Redirect in WordPress?
A redirect informs the web browser to direct the visitors to a new link and prevent them from landing on a 404 page or a broken link.
A redirect is necessary when a page or post gets removed or the old link of the page or post is changed.
The most common types of redirects are 301, 302, and 307 redirects.
Let’s check out the actual steps for redirecting a WordPress page to a new URL.
How to Redirect a Page to a New URL?
Using a redirection plugin is the easiest way to set up WordPress URL redirects.
While there are several plugins available for creating URL redirects, we’ll be using the All in One SEO plugin in this tutorial.
All in One SEO is the best SEO plugin trusted by over 3 million websites. The plugin comes with advanced SEO features that help you optimize your website for search engines.
AIOSEO comes with a Redirection Manager that allows you to add pages or post redirects without coding knowledge.
Let’s have a quick look at the All in One SEO features before we jump into the redirection steps:
- TruSEO: With TruSEO, you can easily optimize your content around a target keyword. Once you select the keyword, you get many SEO suggestions to optimize the page’s on-page SEO score.
- SEO Audit: The SEO Audit feature helps you analyze the website’s SEO and provide you with suggestions to improve the SEO score.
- Link Assistant: Link Assistant scans your website’s internal and external links. You also get recommendations on adding internal links that help improve your SEO score.
- IndexNow: AIOSEO provides access to the IndexNow protocol that helps you index your pages instantly without any delay.
And many more.
Step 1: Install the All in One SEO plugin
The first step is to install the All in One SEO plugin.
The Redirection feature is a part of the Pro plan, so you can access with a Pro or a higher plan.

Once the purchase is complete, you can download the plugin file.
Then, upload the plugin to your website and complete the installation.
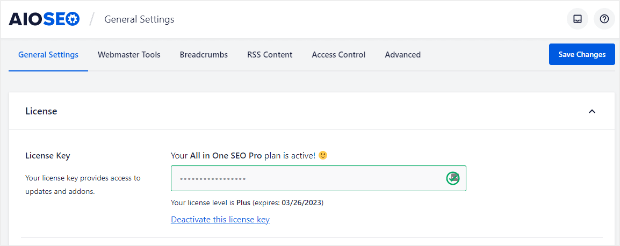
Navigate to All in One SEO » General Settings and enter your license key.

Activate the license key and click on the Save Changes button.
Step 2: Open Redirection Manager
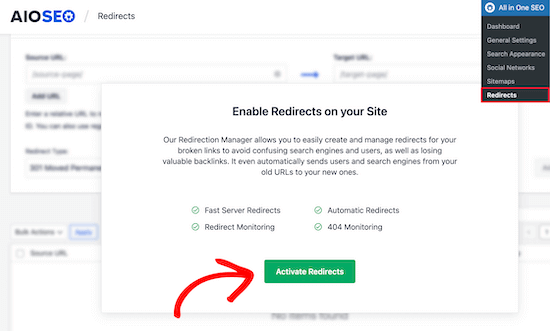
Next, to set up redirects, navigate to All in One SEO » Redirects.
If you’re visiting the Redirects feature for the first time, you’ll see a popup prompting you to activate the Redirects feature.

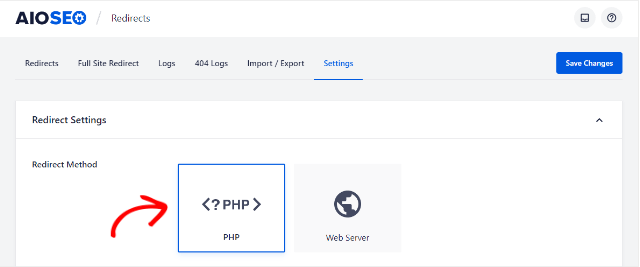
Once you activate it, click the Settings tab from the Redirects menu.
Select PHP from the Redirect Method.

You can also activate the 404 error logs to keep track of the broken links on your website.

Click on the Save Changes button before moving to the redirects step.
Step 3: Add URL Redirects
Switch back to the Redirects tab within the menu.
You’ll see a dialog box for setting up the redirects.

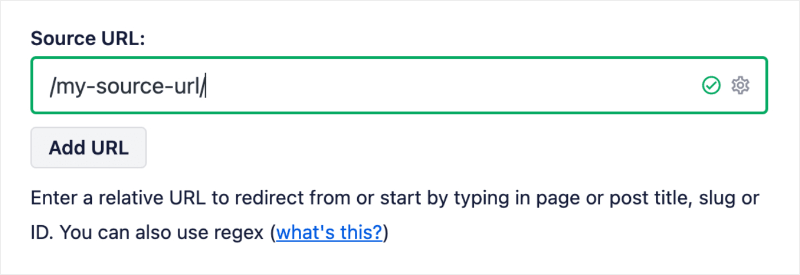
Let’s start by adding the source URL in the first field box. Source URL is the link that needs a redirection.

Next, enter the target URL where you want the requested link to redirect.

Select a Redirect type from the dropdown.

Some of the most commonly used redirects are:
- 301 Moved Permanently: As the name suggests, you can use this option to move the URL permanently.
- 307 Temporary Redirect: You can use this method for temporary redirection.
Once you select the redirect type, click on the Add Redirect button.

The newly added redirect should be visible in the redirects table. You can enable or disable a redirect from the Enabled column at any time.
The Hits column shows the number of visits redirected through the link.

You can also edit or delete the redirect from the table at any time.

That’s all you need to do to redirect a page or a post to a new URL.
We hope this article helped you set up a WordPress redirect with ease. If you liked this post, you might also want to check out:
- 9 Best SEO Plugins for WordPress to Boost Your Rankings
- 35+ Best WordPress Plugins and Tools (Free and Paid)
- The Best Digital Marketing Plugins (That Actually Work)
Want to create a new redirect? Get started with AIOSEO now!
Don’t forget to follow us on Facebook and Twitter for more free WordPress tutorials.

