Do you want to create social proof notifications for your Prestashop eCommerce store, but you’re not sure which software to use?
Social proof notifications can be a powerful addition to your website. They strengthen brand awareness, boost trust with your customers, and drive sales.
That’s why, in this post, we’ll walk you step-by-step on how to set up Prestashop social proof notifications on your website in a matter of minutes.
And the best part? There are zero coding skills required.
But before we start, let’s clarify what social proof notifications are and how they can help your business grow.
What Are Social Proof Notifications?
Social proof notifications are small messages that you show on your website to build trust with your visitors. These notifications display whenever someone positively interacts or engages with your brand.
There are many types of social proof notifications you can use to build trust, including when someone:
- Makes a purchase on your website
- Signs up for a webinar
- Leaves a blog comment
- Writes a review about your company
And much more. You’ve likely seen these types of notifications before, perhaps even while reading this blog. Here’s just one example of what these notifications look like:

Regardless of the type of social proof you set up on your Prestashop storefront, one thing is clear: they work. In fact, we’ve found that websites leveraging social proof saw an instant boost in sales of up to 15%.
So what makes these little messages such a powerful addition to your online store? One word: FOMO (“fear of missing out”).
FOMO is the idea that suggests online consumers–of both products and content–don’t want to miss out on positive experiences. This is especially true when they can tangibly see other people online receiving the benefits they’re missing out on.
When a potential customer is looking at your store and sees other people buying your product or services, they’re instantly more motivated to do the same.
And because they see others engaged with your brand, your company instantly appears more credible. As a result, you boost brand awareness, build trust, and drive sales.
Here’s an example of a social proof notification we built for today’s tutorial:

This notification took less than 3 minutes to create, doesn’t require any code, and embeds seamlessly onto your Prestashop storefront.
Now that you know what social proof notifications are and why they’re so valuable, we’ll show you exactly how to make one for your website.
Add Social Proof Notifications to PrestaShop
For today’s tutorial, we’ll be using TrustPulse:
TrustPulse is the best software for creating social proof notifications on the market. It’s easy to use, highly customizable and looks great on all platforms.
Plus, it’s only a fraction of the cost when compared with our closest competitor.
In fact, our paid plans start at just over $4/month, which is about the same as you’d spend on your morning cup of coffee.
To learn more about TrustPulse’s features and pricing, check out this helpful article: FOMO vs. UseProof vs. TrustPulse: Which Is the Best for Social Proof?
Otherwise, head over and sign up for your free TrustPulse account today!
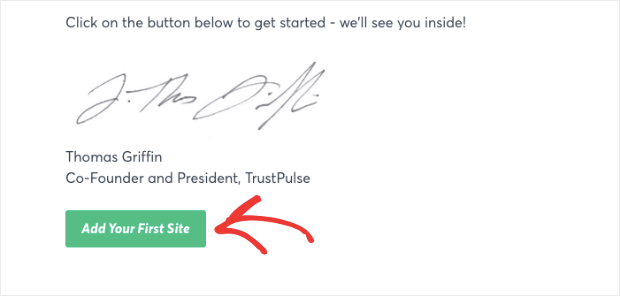
Once you’ve signed up, click Add Your First Site:
Then you’ll enter your site’s name, domain, and click Save Site:
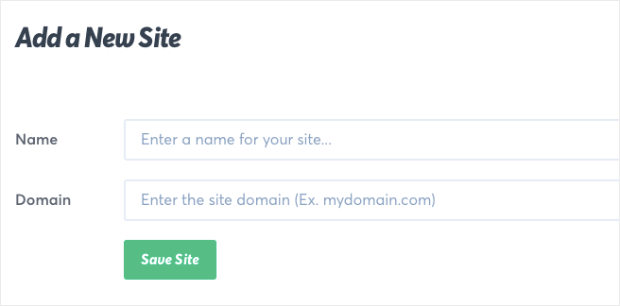
You’ll go to your TrustPulse dashboard where you can make your Prestashop social proof notification.
Step 1: Choose Your Social Proof Notification Type
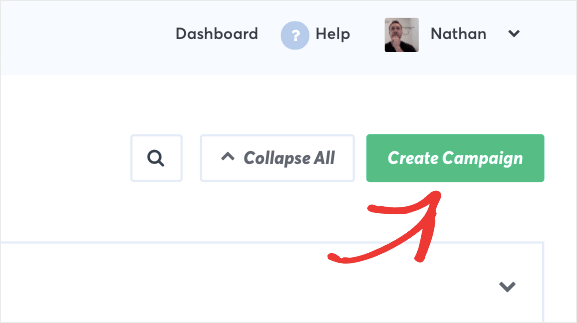
In the top right-hand corner of your TrustPulse dashboard, click Create Campaign:
Now you’ll need to do two things:
- Name your TrustPulse campaign (to keep yourself organized)
- Select the site you want your campaign to appear on (this is the site you used during registration)
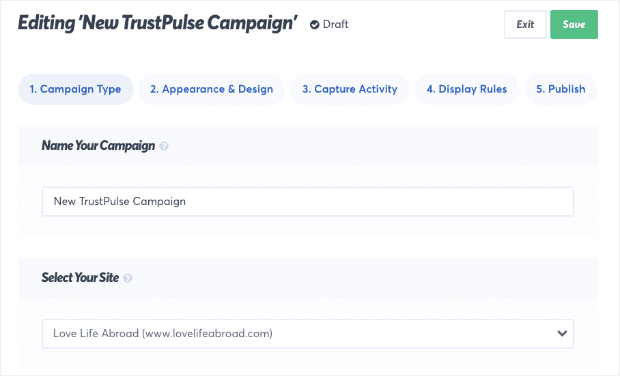
Note that this won’t automatically connect your social proof notification with your Prestashop storefront. We’ll be embedding our campaign later in this tutorial.
Next, you’ll need to decide which type of social proof notification you want to display. With TrustPulse, you have two options:
- Recent Activity
- On-Fire
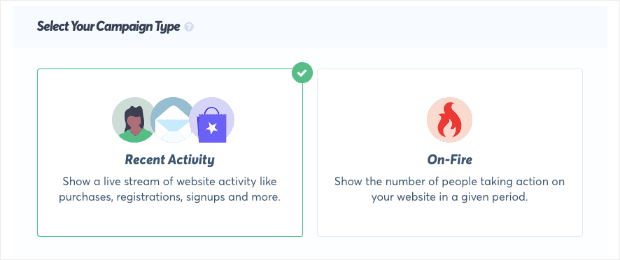
Both of these campaign types work great in the right context. But you’ll need to decide which one to use depending on the goal of your social proof notification.
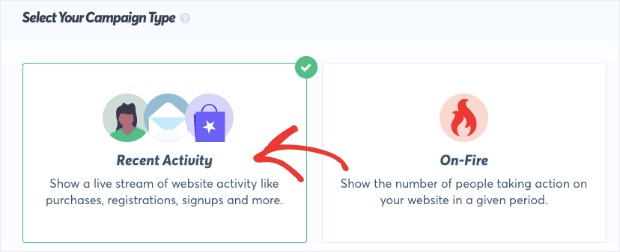
Recent Activity displays a message that shows when an individual person or consumer engaged with your brand online. These notifications look like this:

When the information is available, this notification will refer to users by their first name. If that information isn’t available, you can customize the consumer reference that appears on your campaigns.
In the example below, we changed the visitor name to Someone from our tribe:
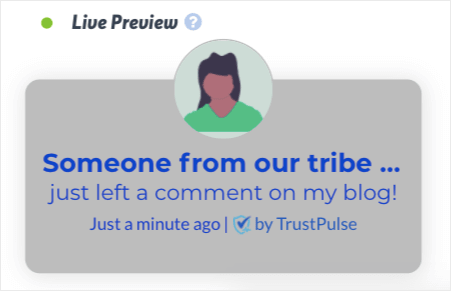
The main thing to remember about Recent Activity campaigns, however, is that they refer to an individual consumer engaging with your brand.
On-Fire campaigns are the opposite. These show the total number of people in a larger group who engaged with your brand in the same way:
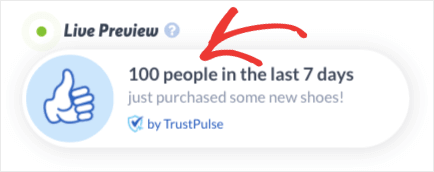
That makes On-Fire campaigns great for capturing more popular interactions on your website. This could be things like:
- Webinar signups
- Event registrations
- Flash sales
And so on. These activities tend to bring in big groups of people, so On-Fire campaigns would be the better fit for that context.
To determine which campaign type you should use, you’ll need to think about what activity you want to capture for your social proof notification. Then, you should decide if that activity is better displayed with an individual consumer or a larger group.
For today, we’ll use a Recent Activity campaign:
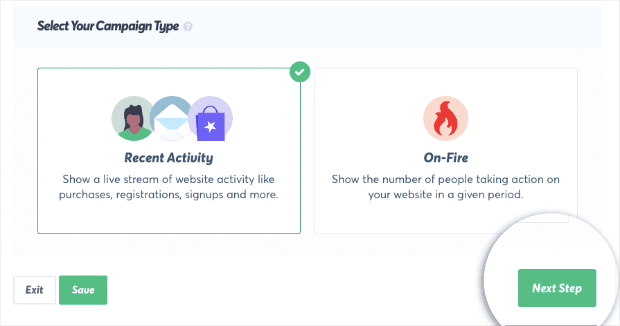
Once you’ve selected the right campaign for your Prestashop storefront, click Next Step:
Step 2: Customize Your Social Proof Notification
When it comes to social proof notifications appearing on your site, you’re looking to strike a balance: your notifications should capture your audience’s attention without distracting them and harming the user experience (UX).
So how can you effectively walk that line? How can you make an effective social proof notification that doesn’t annoy your site’s visitors?
By customizing your notification to match your brand’s style, brand, and message.
In other words, you want to make your social proof notification look and feel like a natural part of your website. And to help you do that, TrustPulse makes modifying your social proof notifications super easy.
You can change your notification’s:
- Language
- Visitor name
- Message text
- Message link
- And more
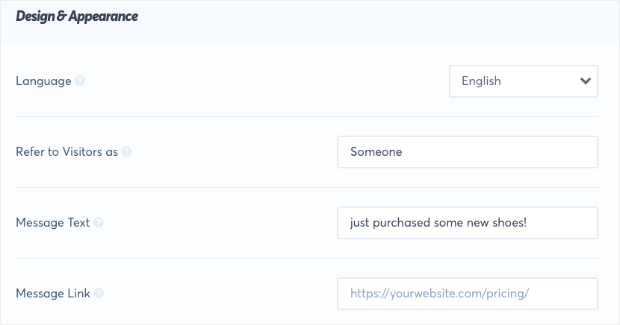
These customization options allow you to create stunning and effective social proof notifications in minutes. And the best part is that there is zero coding required.
That means you can create social proof notifications for your Prestashop storefront, even if you don’t consider yourself “tech-savvy.”
One aspect of your notifications that you’ll want to consider is the image that you use. By default, the image shown on your notification will be a map of the regions where other users are located:
![]()
But we also have pre-made icons you can choose from:
![]()
These work for a wide variety of purposes if you want to make your notifications more visually appealing. Here’s an example of a notification with one of these icons:

Or, you can upload an image that’s totally unique to your campaign. Select Custom Icon from the drop-down menu and click Upload New Image:

Here’s an example of a social proof notification for a virtual race:

The small trophy icon was easily uploaded to TrustPulse and makes the campaign more visually appealing.
Finally, we have loads of Advanced Settings so you can change your campaign’s text, font, background color, and more:
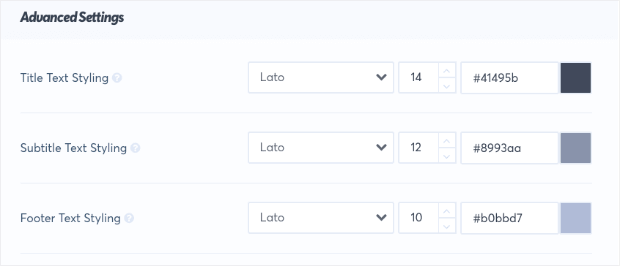
These customization options give you the power to make the perfect social proof notification for your Prestashop store.
And, again, everything can be done in a matter of minutes with zero coding required. Here’s the Prestashop notification we built for today’s demo:

This took us less than 3 minutes to create and syncs seamlessly with our Prestashop site.
When you’re finished making changes to your social proof notification, click Next Step:

Step 3: Determine the Activity You Want to Capture
Your Prestashop social proof notification is totally ready to go. It looks great, will engage your audience, and won’t harm UX on your site.
Now you just need to capture the activity that will trigger your notification to appear.
- AutoMagic
- Zapier
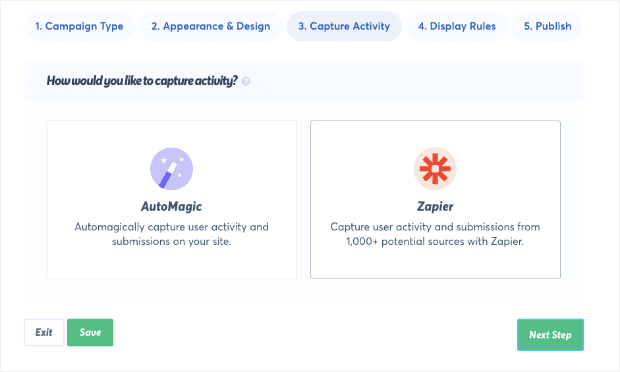
AutoMagic captures activities taken on your actual website. This would be like when someone signs up for your newsletter, registers for a webinar, or makes a purchase in your store.
To do any of these things, your customers fill out a form directly on your site. TrustPulse captures that activity and displays your notification.
But what if you want to show when people engage with your brand apart from your website? That’s where our Zapier integration comes in.
Our Zapier integration captures activity from over 1000 external websites. That means you can show a social proof notification when someone engages with your brand online, even if they aren’t using your website to do so.
An excellent example of this would be when a customer leaves you a comment on 3rd party review sites like Google My Business or Yelp.
This opens up opportunities for you to expand your social proof notification’s functionality, so you can create the perfect message for your audience.
For today’s tutorial, we’re going to use AutoMagic and display when someone makes a purchase in our Prestashop store:
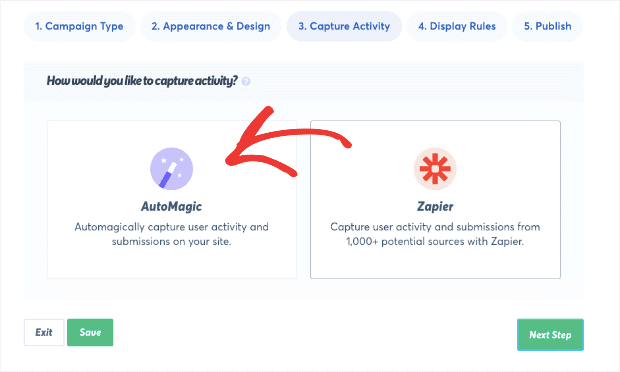
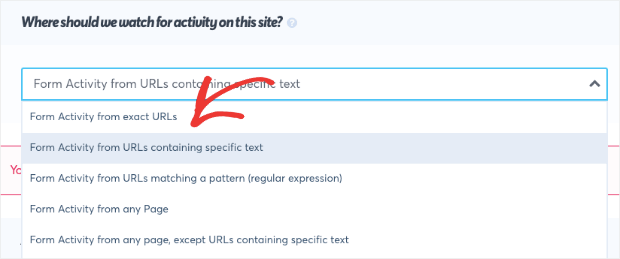
After selecting AutoMagic, scroll down the page. You’ll see the question Where should we watch for activity from this site? followed by a drop-down menu.
Select Form activity from URLs containing specific text:
Then, just below, you’ll see the heading Add one or more page rules. Your Prestashop domain name will be on the left-hand side. Now you need to enter the URL slug associated with your Prestashop’s checkout page:

Once you’ve put the URL slug for your checkout page and created the trigger, you’re ready to determine when, where, and how long your social proof notifications will appear on your site.
To do so, click Next Step:

Step 4: Choose Where Your Notification Will Appear
By default, your social proof notification will appear on every page of your website:
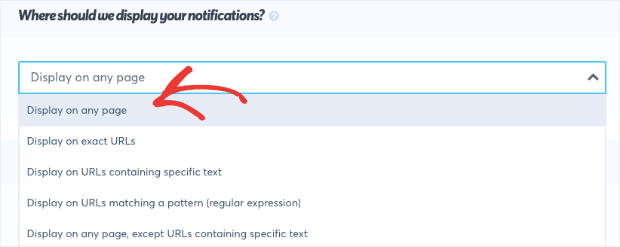
As you can see from the image above, you have other options, too. You can choose to display your social proof notification on:
- Exact URLs
- URLs containing specific text
- URLs matching a pattern
- And much more
Today, we’ll leave the default setting Display on any page. That means our social proof notification will appear on every page of our Prestashop site.
Now, you can customize the Notification Settings, such as:
- The delay between the sale and the notification (in seconds)
- How long your notification will appear on the screen
- The delay between separate notifications (in seconds)
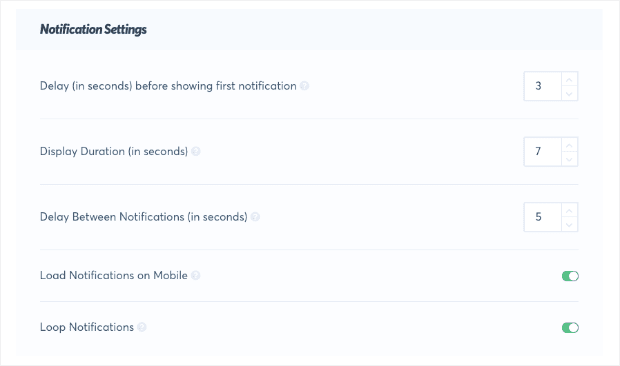
Plus, you have other Advanced Settings that let you:
- Hide anonymous notifications
- Show notifications as anonymous
- Permanently hide notifications when closed
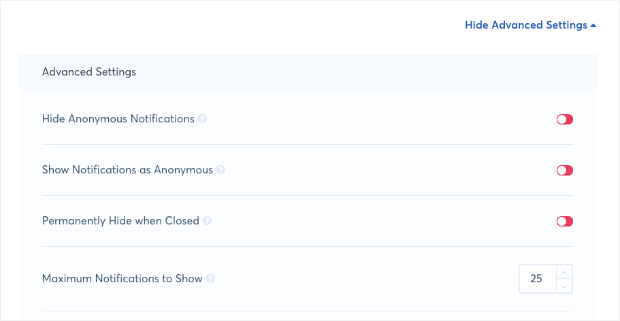
These rules ensure that you’re showing the right social proof at the right time and to the right people. In the end, these notifications let you personalize your social proof to make the biggest impact on your site’s customers.
When you’ve configured your display rules, click Next Step:

Step 5: Launch Your Social Proof Notification
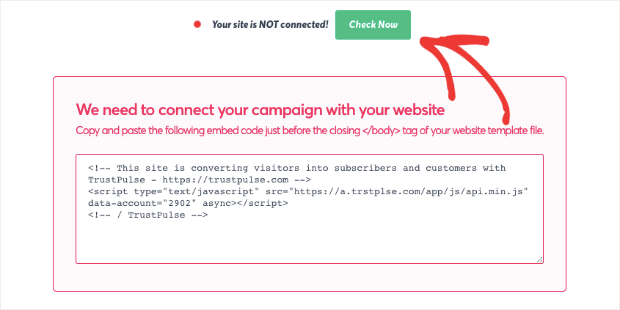
Now we’ve reached the last step: launching your social proof notification. But, as we mentioned earlier, you haven’t connected your campaign to your Prestashop store. To do that, you’ll need your campaign’s embed code.
Scroll down the page until you see the embed code highlighted in red:
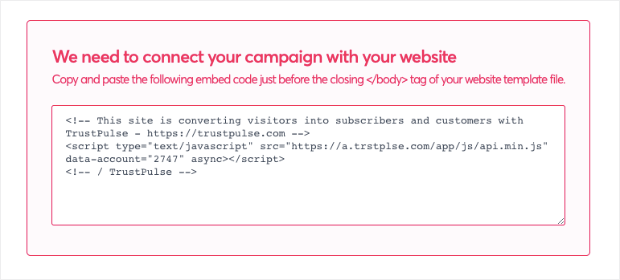
Copy the embed code. Then go to your Prestashop dashboard. In most cases, you’d simply embed this code just before the closing </body> tag in your template file. But unless you’re an experienced coder, this can be difficult with Prestashop.
A better solution is using Prestashop’s addon, Custom HTML Head Tags Module:
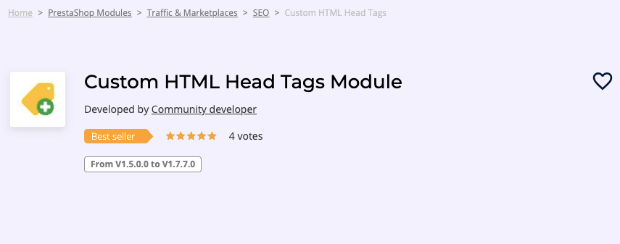
Though this is a paid module, it can save you hours of time and frustration embedding your TrustPulse campaign.
Plus, it makes it easier to embed other tools such as your tracking analytics or pixels.
Once you have the Custom HTML Head Tags Module added to your Prestashop account, you can simply paste your embed code in the header tag:
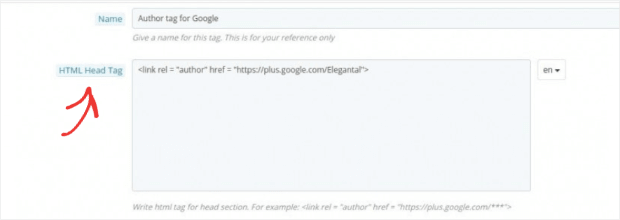
Then you can save your configurations and head back to your TrustPulse account. Go ahead and click Check Now:
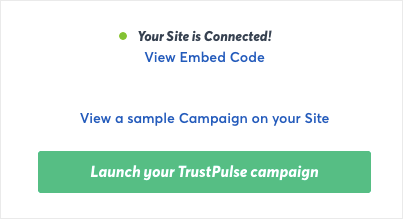
When your site is connected, you’ll get a small confirmation message. Then click Launch Your TrustPulse Campaign:
And that’s it! Your social proof notification is now live on your Prestashop site.
We hope this tutorial helped you get your social proof notification set up. If you enjoyed this post, you’re probably looking for even more ways you can boost sales on your Prestashop site. For that, we recommend the following articles
- 7 Types of Web Notifications to Increase UX and Boost Sales
- Ultimate Guide to Using Trust Badges to Boost Sales and Conversions
- 7 Growth Hacking Strategies to Boost Your Business Now
These articles will help you build instant trust with your audience, improve UX, and drive more profit.
