To get the most out of TrustPulse, we’ve put together the following checklist to guide you through creating your first campaign.
- Create Your First Campaign
- Connect a Zapier Integration (Optional)
- Configure Your Campaign’s Display Settings (Optional)
- Embed Your Campaign on Your Site
Create Your First Campaign
To get started, the first step is to create your first campaign.
Connect a Zapier Integration (Optional)
If you would like to expand the action tracking functionality of your TrustPulse campaigns, you can connect to Zapier. Note that this step is optional and you can still use TrustPulse’s native behavior tracking.
Connect a WooCommerce Store (Optional)
If you would like to expand the action tracking functionality of your TrustPulse campaigns, you can connect directly to your WooCommerce store. Note that this step is optional and you can still use TrustPulse’s native behavior tracking. You can only use this feature if you are on the TrustPulse Pro plan or higher.
Configure Your Campaign’s Display Settings (Optional)
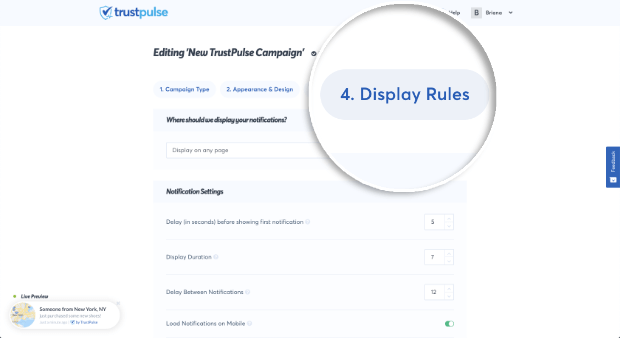
By default, your TrustPulse campaigns will display on every page of your website after a few seconds as well as on mobile devices.
If you would like to adjust the campaign’s display settings, you can go to the Display Rules tab.

Embed Your Campaign on Your Site
When you’re ready to make your campaign live, add your embed code to your website.
Make sure to launch your campaign as well in the Publish tab!
If you’re serious about supercharging your website with social proof then get started with TrustPulse today!