
Wouldn’t you love an automatic strategy for getting MORE sales from your WooCommerce store?
And wouldn’t you love it if that strategy constantly showed your latest, most popular products?
That’s exactly what you get when you create automated dynamic sales notifications.
These small messages can lead to BIG changes for your store. And today, we’ll walk you through how to build this system in 5 easy steps.
But first, let’s get clear on what we mean by “dynamic notifications.”
What Are Dynamic Sales Notifications?
Dynamic sales notifications are small messages that display real purchases from your online store to your site’s visitors.
It’s a form of social proof that has been shown to boost sales instantly by up to 15%.
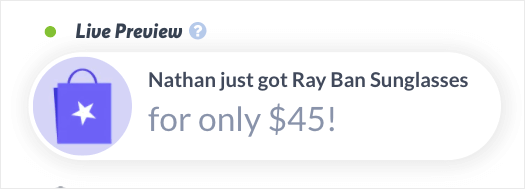
You’ve probably seen live sales notifications while shopping your favorite stores online. They look something like this:

Dynamic notifications look the same, but they get generated differently.
Or, to be more accurate, they get generated automatically.
That means when you set up dynamic WooCommerce sales notifications, you’ll have a fully automated social proof marketing strategy running at all times.
This leads to:
- More time to focus on growing other parts of your business,
- Improved UX as more customers find products they love,
- Increased sales by building more trust in your brand’s products.
But let’s face it: you’re constantly juggling tasks and putting out fires. You don’t have much time to spend setting up technical marketing strategies.
The good news is that everything can be done in a matter of minutes and with zero coding required.
In fact, we’re going to show you how to create dynamic WooCommerce live sales notifications in just 5 EASY steps.
Ready to get started? Let’s dive into the tutorial.
How to Create Dynamic Notifications
For today’s tutorial, we’re going to use TrustPulse:

TrustPulse is hands down the best social proof software on the market. It’s a premium plugin that allows you to quickly and easily create dynamic notifications for your WooCommerce store.
As you’ll see, you’ll be able to build your social proof strategy in only a few short clicks.
From there, you can customize your notifications and your settings to match the look, style, and messaging of your brand.
Before we dive into the tutorial, you’ll need to install and activate the TrustPulse plugin.
You can do this the same way you’d install any plugin on WordPress. Go to your admin menu and click Plugins » Add New.
Then search for TrustPulse in the search bar. When you find it, click Install Now:

Then click Activate:
You can create dynamic WooCommerce sales notifications with any plan, though we highly recommend upgrading to Pro or Growth to unlock the most advanced features.
These plans come with more control over your notification’s layout, faster support, and other useful features to get MORE sales faster.
Still need a bit of help installing TrustPulse? No worries.
Check out this helpful guide: How to Integrate TrustPulse With WordPress.
Once you’ve created your TrustPulse account, you’ll be ready to build your first dynamic campaign.
Step 1) Select Your Campaign Type
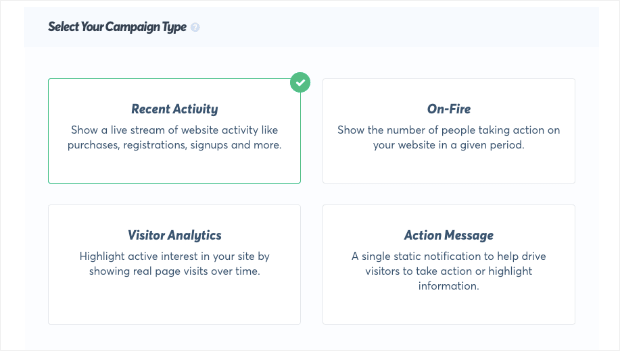
TrustPulse offers you 4 types of campaigns to choose from:
- Recent Activity: Show a live stream of website activity like purchases, registrations, signups, and more.
- On-Fire: Display the number of people taking action on your website in a given period.
- Visitor Analytics: Highlight active interest in your site by showing real page visits over time.
- Action Message: Show a static notification to help drive visitors to take action or highlight information.
These campaign types allow you to use genuine social proof at any stage of your business.
When you start out, you might not have any sales at first. You can use Action Messages to redirect users to their favorite products in a promotional notification.
As traffic increases, Visitor Analytics campaigns let you highlight how many people are visiting popular posts and pages.
The higher that number gets, the more effective your social proof notification will be.
This leads to more sales which you can showcase in Recent Sales Activity and On-Fire campaigns.
While we’ll be using a Recent Sales Activity notification for today’s tutorial, it’s good to know your options.
That way, you can avoid fake social proof while still optimizing your site for higher conversions.
Select Recent Sales Activity:
And move on to step two: adding your dynamic smart tags.
Step 2) Adding Smart Tags to Your Notification
When you connect TrustPulse to your WooCommerce store, you unlock a powerful combination.
That’s because TrustPulse uses Smart Tags that let you create a dynamic message to your customers.
This builds an automated system that shows new and authentic messages to your site’s visitors anytime a customer buys one of your products.
Why is this important? Because in the past, you used to have to create notifications for each product to display them across your site.
But now, you’ll save hours of time by copying and pasting a smart tag into your notifications design.
Here’s a list of the smart tags available:
{{cart_count}}: The number of products in a customer’s cart that they purchased{{product_name}}: The name of the product that was purchased on your site.{{product_image_url}}: The image URL of a purchased product.{{product_price}}: The price of a purchased product without currency symbols.{{product_url}}: The URL to a purchased product.
Now you can copy and paste those smart tags into your Message Text:
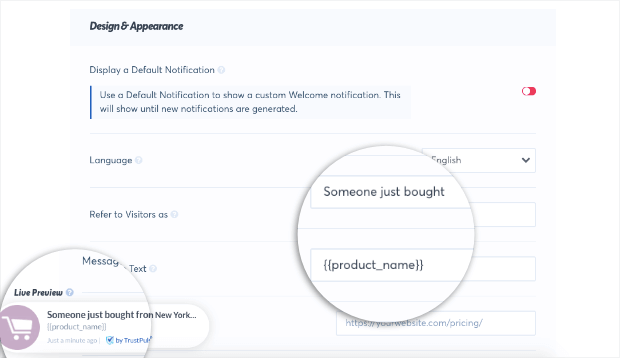
And a live preview will display at the bottom.
In the preview, you’ll see the smart tag written out. But when the notification goes live, it will pull that latest sale from your WooCommerce store and automatically display it to your site’s visitors.
The example above is one of the most popular use cases. That said, you can get creative and show:
- The image of your WooCommerce product
- How many products a single customer purchased in one order
- The name and price of your product
You could even create a message with other smart tags to personalize things further.
For example, you could address customers by their first name, show a dynamic product, AND show how much it cost.
That might look like this in your TrustPulse dashboard:
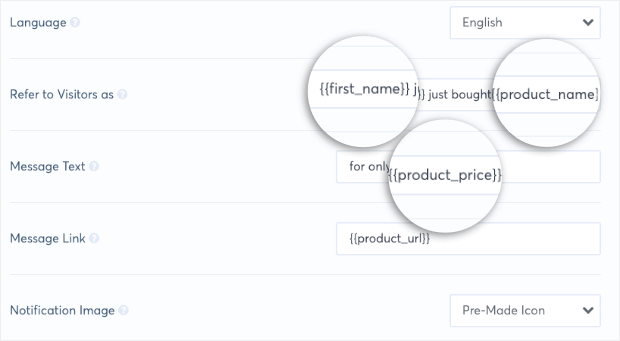
These smart tags would then produce a personalized message that would come out like this:
Then, when someone else purchases another product, another notification will automatically be generated.
But how does this help boost sales? How will customers actually get to the products they’re seeing?
You can add the {{product_url}} smart tag to the Message Link in your TrustPulse dashboard:
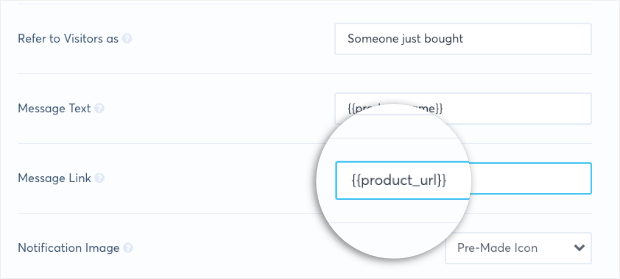
This ensures that when users click your dynamic notification, they’ll be sent directly to the product page.
That makes the customer journey function more smoothly and leads to more sales for your online store.
From here, you can customize the look and feel of your design. You can modify:
- Font
- Font size
- Color
- Background color
- Line height
- Branding logo
- And much more…
The best part is that there is ZERO coding required.
Instead, everything can be done with drop-down menus, entering simple field text, or choosing colors from color wheels.
Next, we’ll need to tell TrustPulse how to capture sales from our WooCommerce store to trigger these notifications.
Step 3) Configure Your Notification Trigger
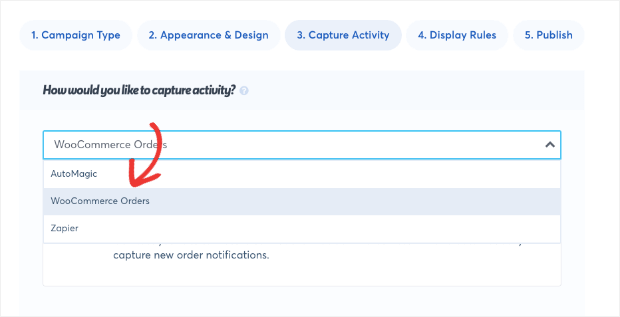
From your TrustPulse dashboard, you should be in the Capture Activity tab.
Find the drop-down menu titled, “How would you like to capture activity?”
Select WooCommerce Orders:
This is where you can officially connect TrustPulse to your WooCommerce store if you haven’t already.
Click Connect TrustPulse to [Your Site’s URL]:
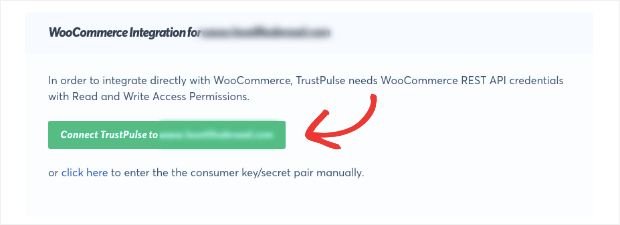
Now a new window will appear where you can approve TrustPulse integrating with your WooCommerce store:
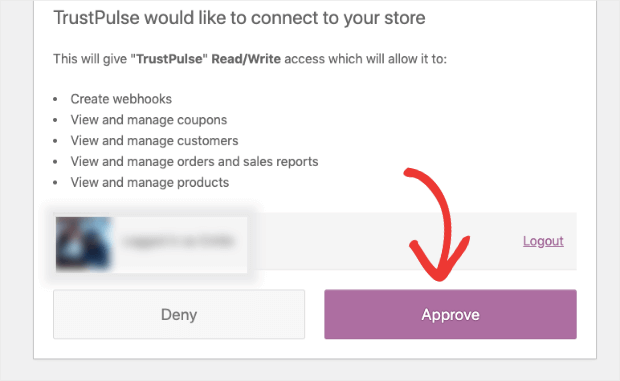
You’ll see a confirmation that the site was successfully connected.
Now you’ll need to make something called a “webhook.” This gives TrustPulse permission to pull the data it needs from your WooCommerce store to automatically generate your notifications.
Click create new webhook:
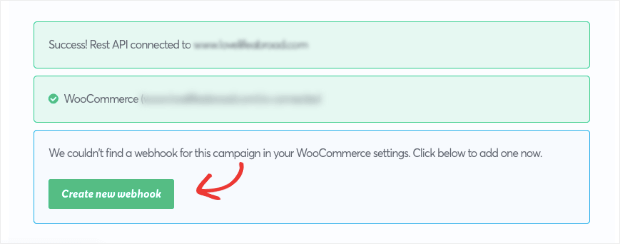
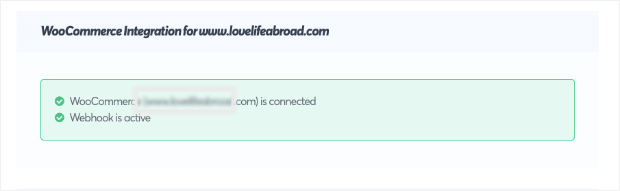
And you’ll see a confirmation message appear once it’s been created:
When you scroll down, you’ll see the message text you created in the previous step.
You can modify it here by adding other smart tags. We also recommend toggling the option On for Use Product Image:
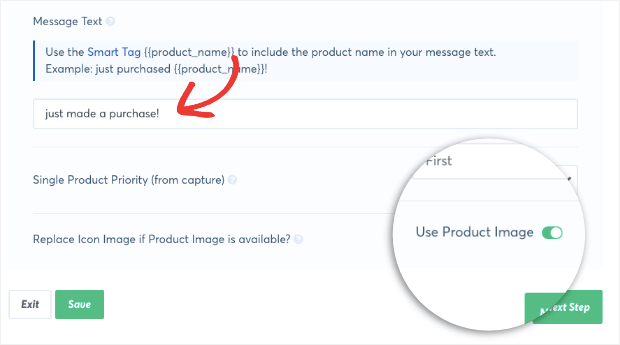
That way, if your product has an image registered with WooCommerce, it will appear with your live sales notification.
When you’re done, click Next Step to set up your display rules.
Step 4) Customize Your Display Settings
In some cases, you might not want to show automated notifications on every page of your site.
Or you might want only target desktop devices and exclude mobile.
Whatever the case may be, TrustPulse allows you to modify these settings in just a few clicks.
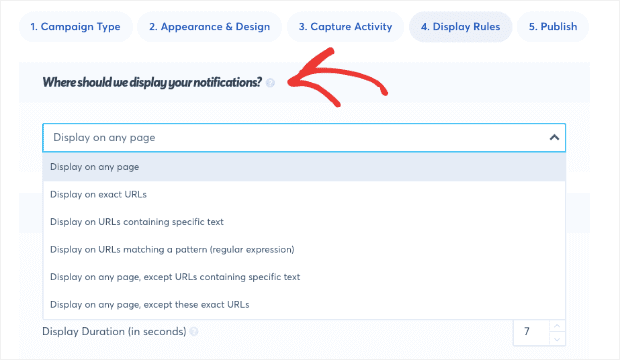
First, you can determine which URLs you want these notifications to display on:
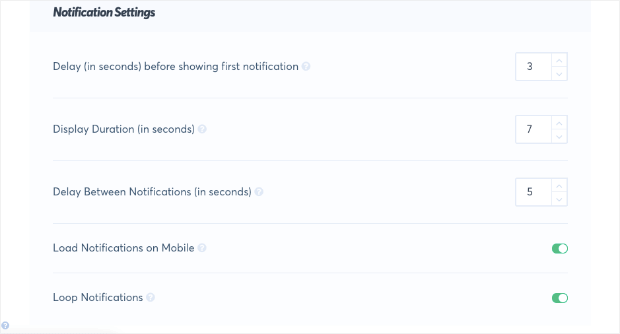
Then you’ll be able to change other settings, such as:
- Delay (in seconds) before showing first notification
- Display duration (in seconds)
- Delay between notification (in seconds)
- Load on mobile
- And more…
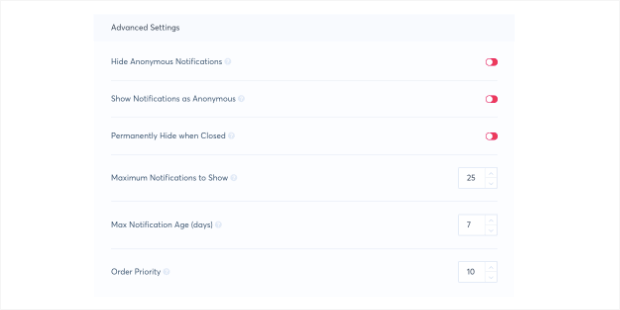
Plus, you have access to advanced targeting rules that will:
- Hide anonymous notifications
- Set the number of notifications that can show
- Determine the length of a notification
- Prioritize certain notifications over others
- And more…
These rules help you build a personalized social proof strategy that builds trust with your audience and drives more sales for your online store.
All that’s left is to publish your campaign.
Step 5) Publish Your Campaign
Under the Publish tab in your TrustPulse account, you’ll see a preview of your notification.
Again, the smart tag will appear in raw form but will display the correct data when live:
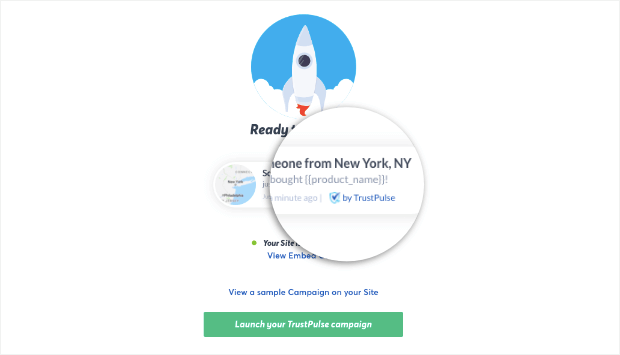
When you’re satisfied with your notification, click Launch Your TrustPulse Campaign:

And there you have it.
You’ve now built an automatic and dynamic WooCommerce social proof notification.
Were you just following along but now you’re ready to dive in?
Get started with your 100% risk-free TrustPulse account today!
We hope you enjoyed this tutorial. If you did, then you’ll definitely want to check out the following resources:
- 7 Best Sales Notification Plugins for WordPress
- How to Increase Online Sales: 7 Tools You Need to Try
- How to Create a Default Notification on Your Site
These posts will help you create even more social proof notifications to drive more profits to your WooCommerce store.
