Do you want to add ClickFunnels conversion alerts to your site so you can increase conversions?
ClickFunnels is one of the most effective software for selling your eCommerce products or services. It provides you with a proven method for obtaining new leads and generating profits from your website or email list.
However, if you want even more profits, then you need to add new strategies to your ClickFunnels system.
And one of the best additions you can make to your site is a ClickFunnels conversion alert.
Today, we’re going to teach you step-by-step how to create a conversion notification for your website. These small alerts will be shown anytime someone makes a purchase in your funnel.
But first, let’s talk about what a conversion alert is and why they’re so powerful.
What Is a ClickFunnels Conversion Alert?
A ClickFunnels conversion alert is a small notification that appears on your ClickFunnels website any time one of your visitors has made a purchase. The notification lets your visitors know that your products are being purchased by real customers and in real-time.
And you’ve likely seen these conversion alerts before. Here’s the one we’ll be building today for ClickFunnels:
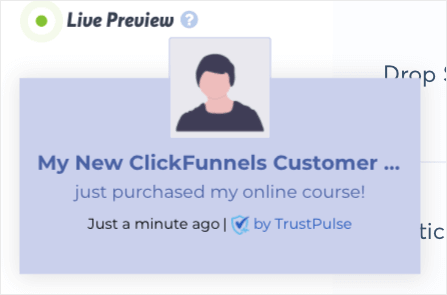
These are really powerful.
Showing your users that live purchases are being made on your site leverages FOMO (fear of missing out). It makes people wonder if they’re missing out on benefits other consumers are getting with your product. This motivates them to buy that product for themselves.
As a result, you get more sales.
In fact, TrustPulse has been proven to increase sales by up to 15%. That’s a big boost for such a small change to your website.
So now that we’re clear on what conversion notifications are and why they’re effective, let’s look at how to make a ClickFunnel conversion alert for your website.
Create a ClickFunnels Conversion Alert
The first thing you need to do is sign up for a TrustPulse account. It’s totally free to get started and gives you up to 500 free sessions per month.
Plus, when you choose to upgrade, it’s literally 1/8th the cost of our competitors. For more information, check out this review of FOMO vs. UseProof vs. TrustPulse.
After you’ve signed up, you’ll be ready to get started.
Step 1: Choose Your Conversion Campaign Type
Once you’re in your TrustPulse dashboard, you’ll need to name your ClickFunnels conversion campaign and assign it to your website:
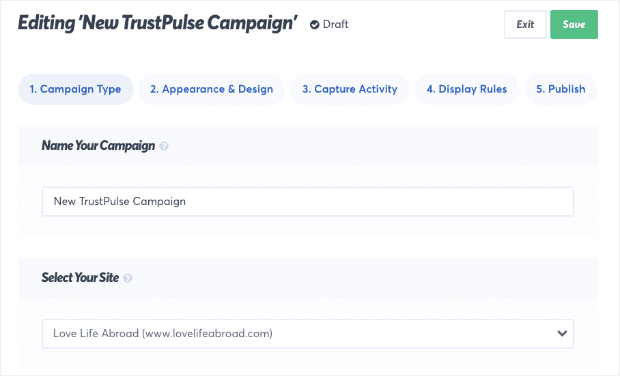
Then it’s time to choose your campaign type. You have 2 options here:
- Recent Activity
- On-Fire
Both of these campaigns are super effective in the right context.
Recent Activity will show when an individual conversion took place on your website. When possible, it displays the name of the person who converted. If the customer’s name is unavailable, though, you’ll have the chance to decide how you want to refer to them:

Recent Activity campaigns are perfect for everyday sales that occur on your site.
On-Fire campaigns, on the other hand, will show you the number of people who converted on your website. These notifications look something like this:
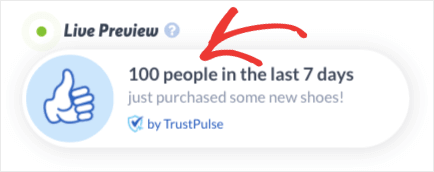
These work well when you have popular products, pre-orders, or flash sales, and you expect a large number of customers in a short amount of time.
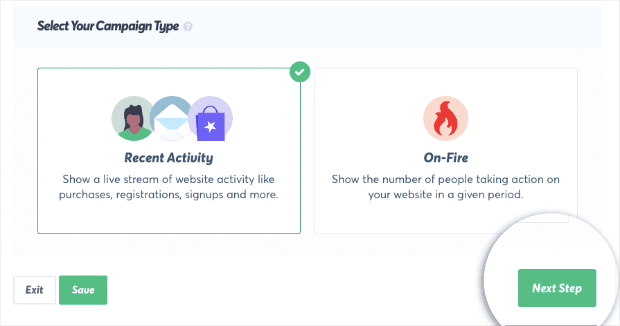
For our ClickFunnels conversion alert, we’ll choose a Recent Activity campaign. Once you’ve done that, click Next Step:
Step 2: Design Your ClickFunnels Conversion Alert
Now it’s time to design how your ClickFunnels conversion notification will appear to your site’s visitors. TrustPulse lets you customize your conversion notifications to the last detail, so you can make it fit your voice and brand.
Plus, everything can be done with drop-down menus, a bit of text, or flipping a toggle switch. No coding required!
You can modify your ClickFunnel conversion alert’s:
- Language
- Visitor reference (when your customer’s name is unavailable)
- Message text
- Message link
And more.
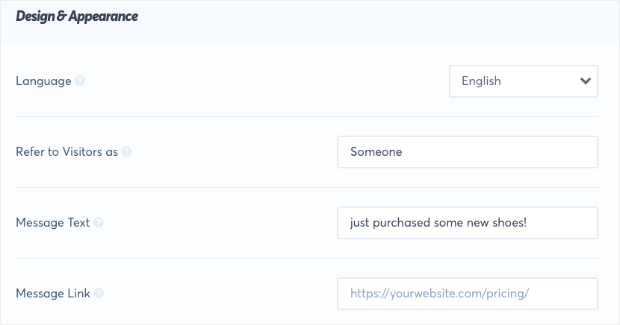
The message link is particularly important. You can link your conversion notification to the product that customers are actively purchasing. That way, your site’s visitors can have easy access when they decide they want to buy the product, too.
Then you have a variety of advanced options that let you change your campaign’s:
- Title text
- Subtitle text
- Footer text
And more.
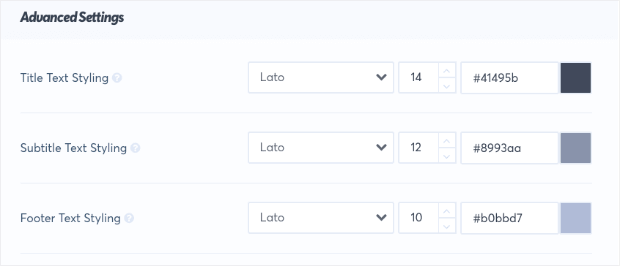
You can even change the colors to make sure everything matches your website. To give you an idea of the quick changes you can make, here’s a look at the default ClickFunnels conversion alert we showed earlier:

And in just under 2 minutes, here are the changes we made to the same campaign:

Again, the way you customize your conversion notification is totally up to you. Once you’ve designed a notification that has the look you’re going for, click Next Step.
Step 3: Capture ClickFunnels Conversions
Now it’s time to trigger your ClickFunnels conversion alert. By that, we mean that you need to set up your notification to appear any time someone makes a purchase.
The good news is that this is super easy!
To capture site activity, you have 2 options:
- AutoMagic
- Zapier
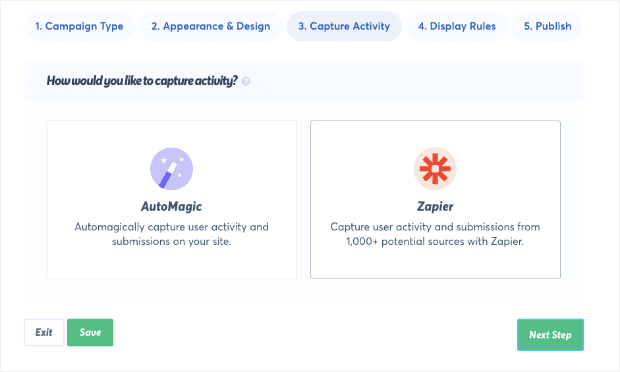
AutoMagic will capture activities taken directly on your website. But the Zapier integration captures activities outside of your website from over 1,000 different sources.
So, for example, you could show a notification any time someone leaves you a review on sites like Google My Business or Yelp. Even though nothing happened on your actual site, Zapier lets you capture that activity.
For today, we need to use the Zapier integration for our ClickFunnels conversion notification. Click Zapier and then click Connect with Zapier:
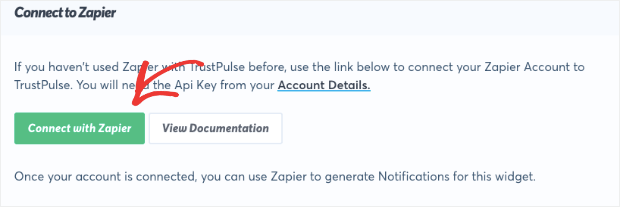
If you don’t have a Zapier account yet, don’t worry. It’s free and easy to use. You can sign up here.
Once you click Connect with Zapier, a new window will open, inviting you to combine TrustPulse and Zapier:
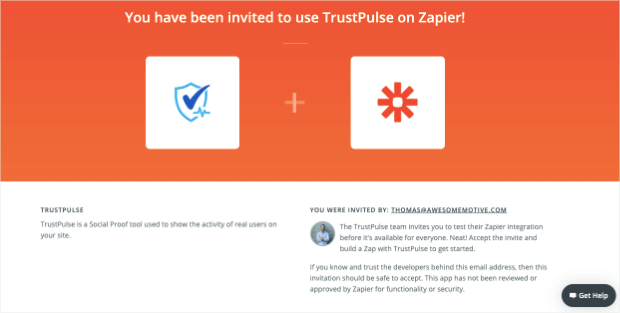
Scroll down and click Accept Invitation & Build a Zap:

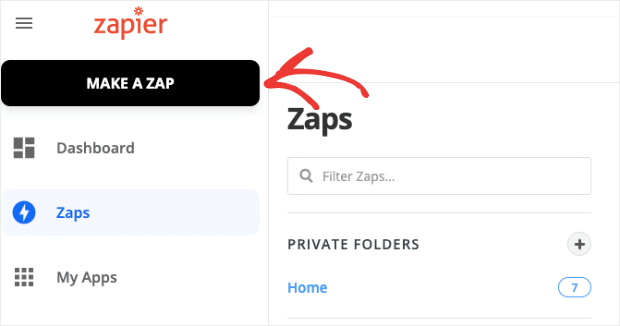
Once you’re in your dashboard, click Make a Zap:
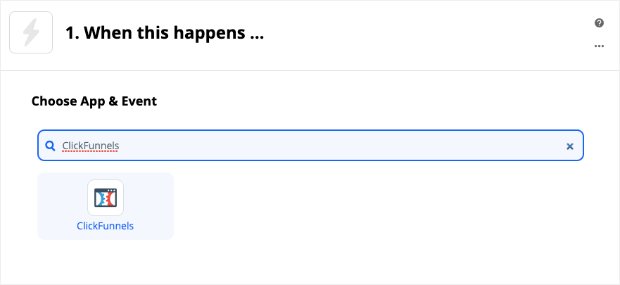
On the next page, type “ClickFunnels” in the search bar to find their integration with Zapier. Once you have, click on their app:
Now you can select which type of conversion you would like to show. Though there are 3 activities to choose from, only 2 would be considered conversions:
- New Contact Activity (when someone signs up to your email list, webinar event, and so on)
- New Successful Purchase (when someone makes a purchase in your funnel)
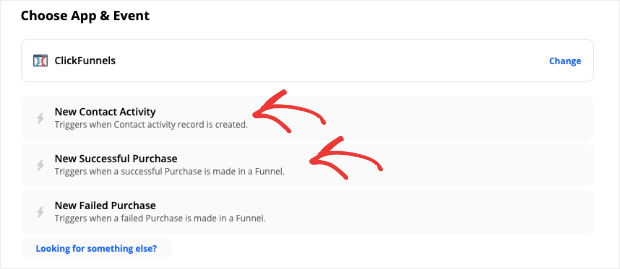
You can choose whichever type of conversion notification you would like for your website. For today’s tutorial, however, we’re going to choose New Successful Purchase to let users know when someone has made a purchase on your website.
Click Continue, and you’ll be taken to the next phase, where you need to sign in to your ClickFunnels account:

Once you’ve signed in, click Continue. Now you can select which purchase you would like to track and from which step in your funnel:
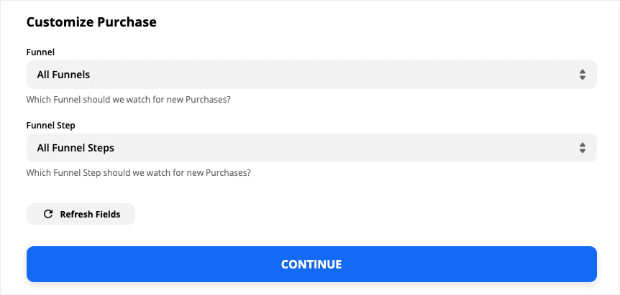
At this point, you can test your trigger to make sure it works or simply choose to skip the test. Once you’re satisfied that your ClickFunnels purchase trigger works, click Continue to hook it up with TrustPulse.
You’ll see a list of your Zapier apps. Click on TrustPulse:
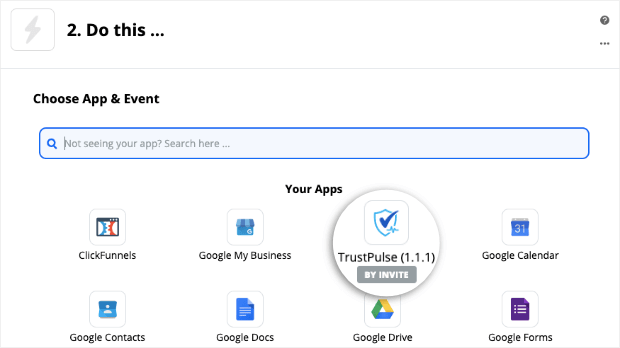
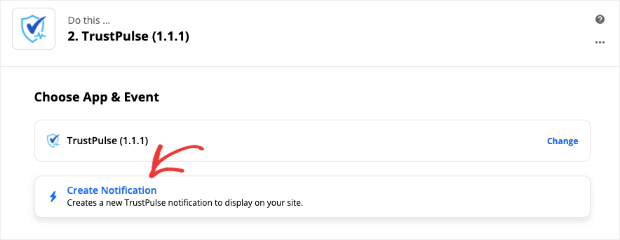
Now choose which action you want TrustPulse to take. This is easy because there’s only one choice: Create Notification:
Click Continue and then select your TrustPulse account from the drop-down menu:
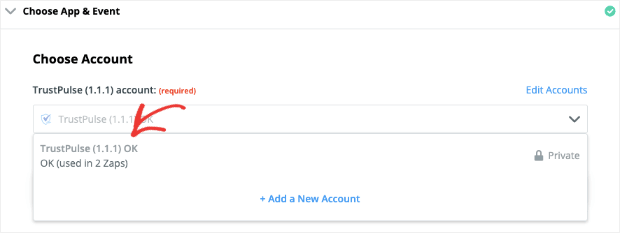
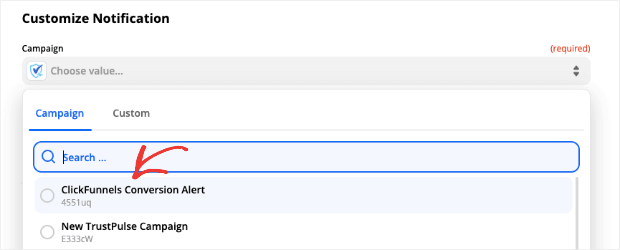
Click Continue. Now you’ll be asked to select which notification you want to appear from your TrustPulse account. Choose your ClickFunnels conversion alert:
And enter the email address from your TrustPulse account:

This will be the email address that generates the notification, but your website visitors won’t see it.
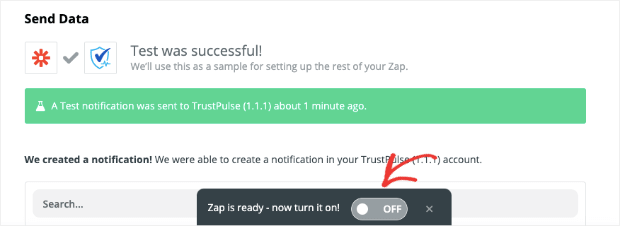
When you’re done, click Continue. You’ll now have the chance to test & review your conversion alert trigger. If it’s successful, you’ll see the following confirmation message:

Finally, you’ll be able to flip a toggle switch to activate your Zap:
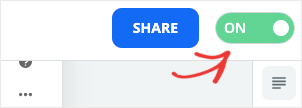
You’ll see the status of your Zap as On in your dashboard:
Now it’s time to head back to your TrustPulse dashboard and set your conversion notification’s display rules.
Step 4: Display Your ClickFunnels Conversion Alert
At this point, you’ve made your campaign look how you want it to. And you’ve also connected it to capture recent purchases on your ClickFunnels website.
It’s time to determine when and where your notification will appear on your site.
You can choose from the drop-down menu under the question, Where should we display your notifications? By default, your conversion alert will appear on any page:
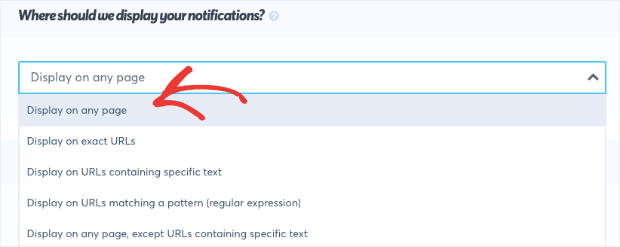
And while we’ll keep the default setting for this tutorial, it’s important you know that you can change this if needed.
With just a few clicks, you can target specific pages of your website for the conversion alert to appear on.
You can also change your notification’s display settings, including:
- Delay before showing the first notification
- How long your notification will appear (in seconds)
- Delay between notifications
And more.
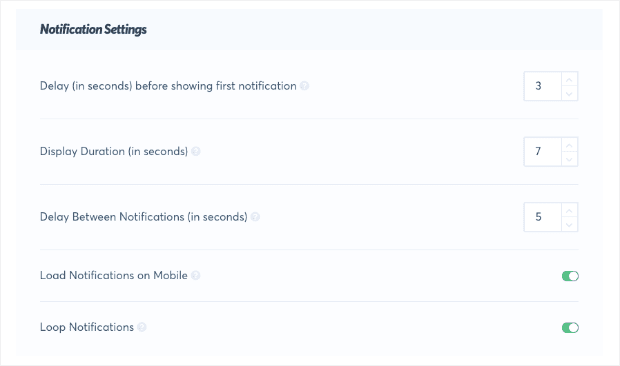
TrustPulse allows you to easily determine when and where your conversion notifications appear on your site. That way, you can target your ClickFunnels conversion alerts to be the most effective. Ultimately, that means more sales for you.
Once you’ve configured your display settings, click Next Step.
Step 5: Publish Your Conversion Notification
Now it’s time to publish your campaign. You’ll get to see a live preview of your campaign before launching it. That way, you can find any last-minute changes that need to be made:
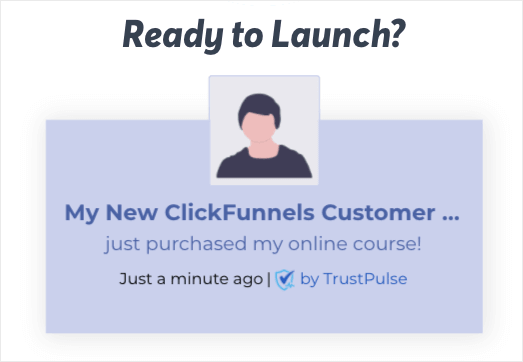
In some cases, your site may not be connected yet. If so, you’ll see this notification:

Hooking up TrustPulse to your website is super easy. If you need help, check out whichever of these articles applies to your website’s platform:
Once your site is connected, simply click Launch Your TrustPulse Campaign:
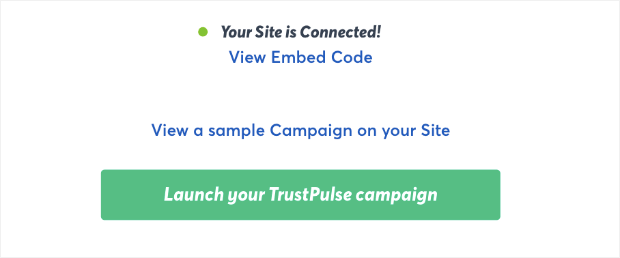
And that’s it! Your ClickFunnels conversion alerts are ready to go.
If you found this article interesting, you’d definitely benefit from checking out the following posts:
- What Is a Good Conversion Rate? (The Ultimate Guide)
- How to Increase eCommerce Sales Now: 8 Ideas You Need to Try
- How to Create a Tripwire Funnel (and Why You Should)
- 36 Best Lead Generation Tools to Get More Targeted Leads
These resources are a great place to level up your eCommerce game, get more leads, and increase sales.
Ready to get started? Sign up from TrustPulse today, totally free!
