Do you want to track and improve mobile conversion rates for your eCommerce store?
By tracking conversions, you can see which paid and organic channels are performing well. This lets you focus on the channels that are converting your visitors and adding to the success of your online store.
That’s why, in this post, we’ll show you how to track mobile eCommerce conversions. We’ll also show you how to optimize mobile conversion rate.
But before diving in, let’s get clear on why it’s crucial to track mobile eCommerce conversions in the first place.
Why Track Mobile eCommerce Conversion Rates?
Technology is advancing so fast that it’s become easier for people to shop on their mobiles from anywhere at any time. In fact, the share of “mCommerce” (eCommerce from mobile devices) in all e-commerce is quickly rising to 72.9%.
So if your store isn’t optimized for mobile, you could be losing a lot of potential sales.
To see how well your store performs on mobile, you’ll want to first check mobile conversion rates.
This will show you how many people are shopping from their phones and how many actually bought something. Plus, tracking mobile conversions allows you to:
- Identify areas of improvement to make mobile shopping easier
- Find and remove obstacles preventing people from buying on mobile
- Find which paid and organic channels are driving conversions
- Determine whether your marketing and advertising investments are worthwhile
With this information, you’ll be in a better position to make data-driven decisions that will help you move forward in your business.
Check out these latest eCommerce Trends You Should Know to stay ahead of the competition and boost your eCommerce business sales.
Determining Mobile eCommerce Conversion Rates
At TrustPulse, we’re often asked ‘how would you determine the mobile eCommerce conversion rates?’
Today, we’re going to show you how to track mobile conversions in just a few clicks using Google Analytics. If you don’t already have a Google Analytics account, you’ll need to sign up for one.
You can follow our guide on how to add Google Analytics to set it up.
Keep in mind, to link your website to Google Analytics, you’ll need to edit your website’s files and add a tracking code. If all that’s too technical and risky for you, a better way to do it is using MonsterInsights.
Simply install MonsterInsights on your WordPress site. Then launch the setup wizard to connect your website to Google Analytics in a few clicks.

Once you’ve synced your website, you can follow the steps below to track mobile conversions in Google Analytics.
We’ll show you 2 ways to do this, and you can use the one that suits you best:
Let’s take a quick look at our first method.
Method 1: Track Mobile Audience Data
In this method, you’ll first track your mobile audience data and then filter paid channels to see your eCommerce conversions on mobile.
Step 1: View Mobile Audience Details
In your Google Analytics account, navigate to the Audience » Mobile » Overview tab in the left-hand side column.
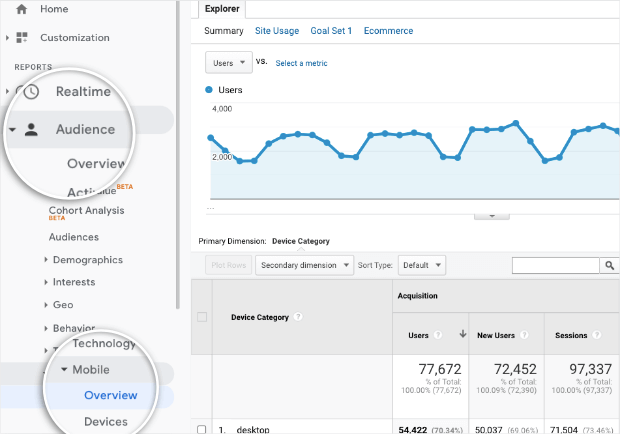
In this tab, you’ll see analytics for different devices such as desktop, mobile, and tablet.

Some of the data that’s available on this page includes:
- number of users
- sessions
- bounce rate
- page sessions
- average session duration
This gives you an overall view of how your website performs on different devices. Next, we’ll access the eCommerce data to see revenue and conversions.
Step 2: View eCommerce Mobile Data
To view eCommerce-specific data for mobile devices, switch to the eCommerce tab under the ‘Explorer’ header.
If you haven’t activated eCommerce tracking, you’ll want to do that now. Follow this guide to enable Enhanced eCommerce tracking in just a few steps.
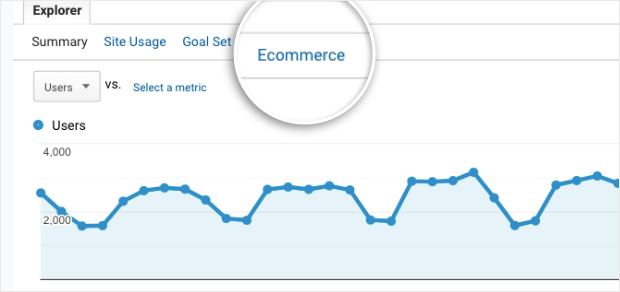
Now, along with the regular data, you’ll also see more statistics that include:
- Revenue
- Transactions
- Average order value
- Per session value
- eCommerce conversion rates

The eCommerce conversion rate shows you a percentage of sessions that resulted in an eCommerce transaction.
Step 3: Filter Paid Channel Conversions
You can filter different channels to narrow down your data to see what is actually driving conversions. To do this, use the Secondary Dimension menu, to select the channel you want to track.
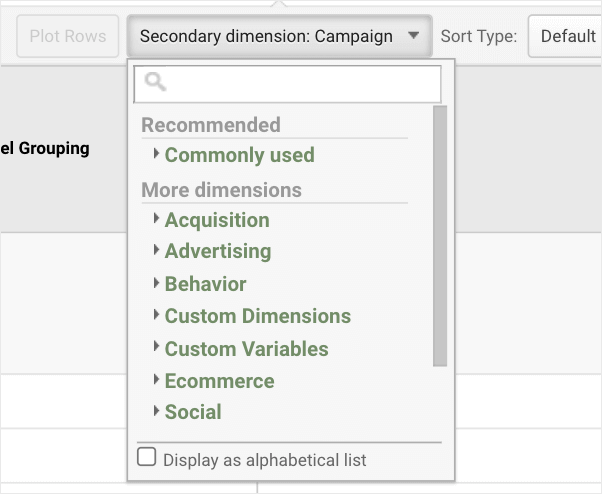
- Acquisition
- Advertising
- Behavior
- Custom Dimensions
- Custom Variables
- eCommerce
- Social
- Time
- Users
We’re going to view data for our Google Ads campaigns under the ‘Advertising’ tab. We’ll also set the date at the top of the page to view last month’s data.

Now we can see a list of Google Ads campaign IDs, whether they were displayed on mobile, along with the revenue and conversion rate for each one.
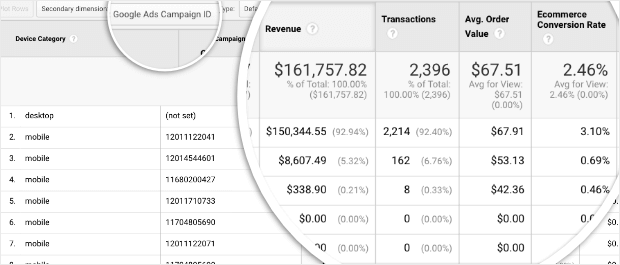
In this way, you can track all your paid and organic channels.
Next, we’ll show you how to get similar data in Google Analytics using the Acquisition channel.
Method 2: Track Paid Acquisition Data
In this method, you’ll first track a paid channel and then filter by device to see the eCommerce conversion rate only for mobile users.
Step 1: View Acquisition Channel Data
In your Google Analytics account, navigate to the Acquisition » All Traffic » Channels tab.
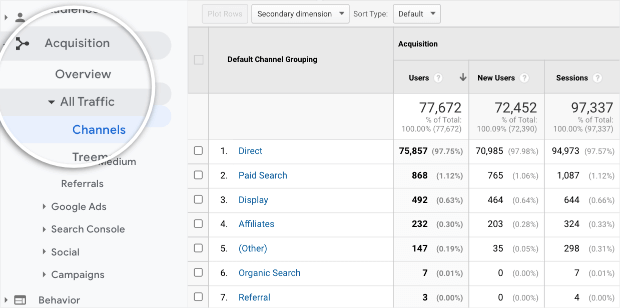
Here, depending on what traffic sources you have, you’ll see data for channels like:
- Direct
- Paid
- Affiliates
- Organic
- Referral traffic
You can click on Paid Search to filter the data and view only your PPC (pay per click) campaigns.
Step 2: View eCommerce Paid Search Data
To view eCommerce-specific data for paid sources, you’ll want to switch to the eCommerce tab under the ‘Explorer’ header.

In addition to users and sessions, you’ll also see the revenue generated and eCommerce conversion rates.
Step 3: View Mobile Stats for Paid Channels
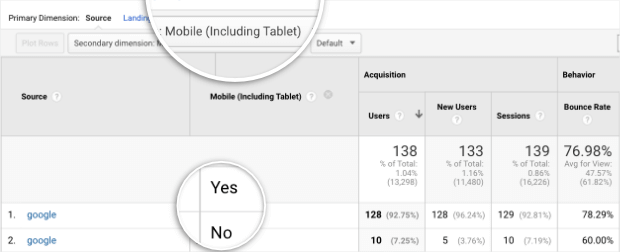
You can add a secondary dimension to filter mobile users in Google Analytics. Using the secondary dimension drop-down menu, select the Users tab.
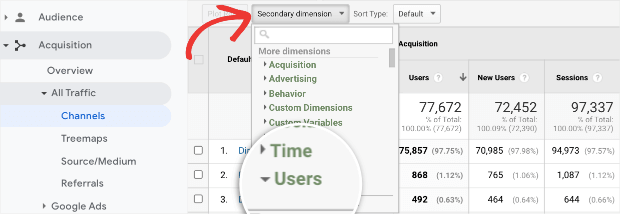
Then choose Mobile (including Tablet) option.
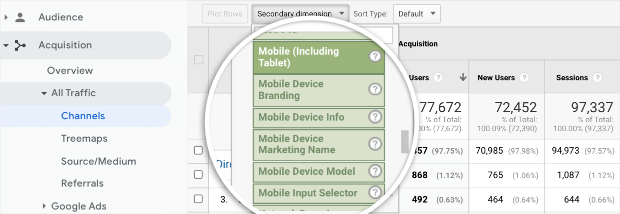
Now an extra column named ‘Mobile (including tablet)’ will be added to the report. It will have a ‘yes’ or ‘no’ against the paid search data to show you whether it is for mobile or not.
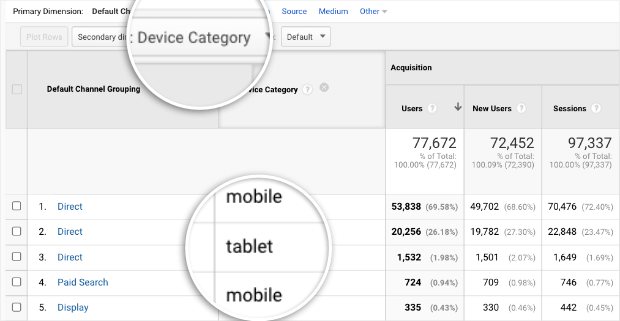
Also, you can choose ‘Device Category’ under the Secondary Dimension menu and it will display whether the data is for mobile or desktop.
That’s it! You’ve successfully learned how to track mobile conversions in Google Analytics.
Up next, we’ll show you how to improve your mobile conversions.
Improving Mobile eCommerce Conversion Rates
There are plenty of ways to improve mobile conversions, but they don’t always work for everyone. Today, we want to give you a sure-fire way to get more people on mobile to take action on your site.
To do this, we’ll be using our conversion-optimization tool, TrustPulse.
TrustPulse is the best social proof app on the market that’s proven to instantly boost conversions by up to 15%.
It works by capturing activity on your site and displaying it in non-intrusive popups like this:

With TrustPulse, you can create real-time sales notifications and recent activity popups. It also lets you create your own action messages to notify customers about sales, low stock products, back-in-stock items, and even ask them for feedback.

It also helps you instill trust and confidence in shoppers by showing them what others are doing on your site. So when they see that others love and trust your brand, they’ll feel more comfortable buying from you.
Ready to improve mobile conversions on your site? Sign up for your 100% risk-free TrustPulse account now!
Now we’ll show you how to use TrustPulse to instantly boost mobile conversions.
Step 1: Setting Up a TrustPulse Account
The first thing you’ll want to do is sign up for TrustPulse. Our tool works with any website.
If you’re using WordPress, there’s a TrustPulse plugin that you can install on your site.
For all other sites, follow our guide to add TrustPulse to any site.
Step 2: Creating a TrustPulse Campaign
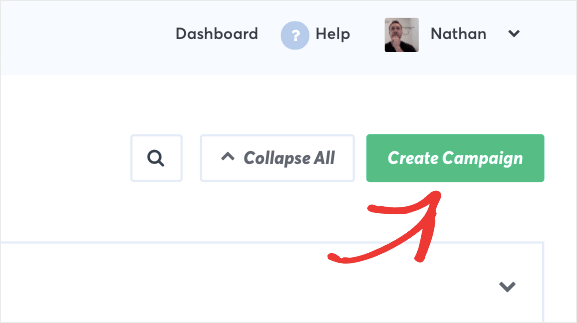
When you log into the TrustPulse dashboard, you’ll see an option to ‘Create Campaign’.
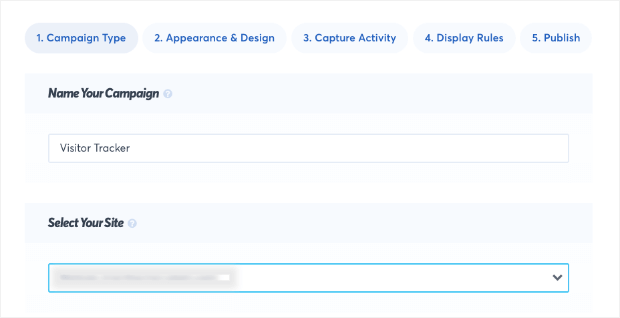
Below that, you’ll see 4 campaign types:
- Recent Activity – Show a live stream of website activity like purchases, registrations, signups and more.
- On-Fire – Show the number of people taking action on your website in a given period.
- Visitor Analytics – Highlight active interest in your site by showing real page visits over time.
- Action Message – A single static notification to help drive visitors to take action or highlight information.
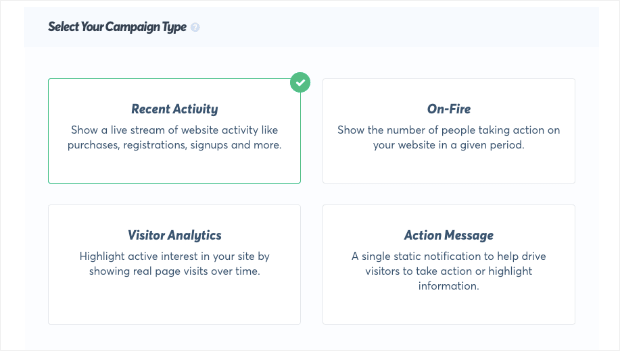
Each of these campaigns helps you boost conversions in its own way. For this tutorial, we’ll select Recent Activity to capture visitors’ actions on your site.
Then click on the ‘Next Step’ button to start building your campaign.
Step 3: Customizing the Recent Activity Campaign
In the next page, you’ll get options to customize the campaign to match the activity you want to capture.
TrustPulse will automatically capture the name of your customer and display it in the popup. If it can’t identify the user, it will refer to them as ‘Someone’. You can change this to anything you like.
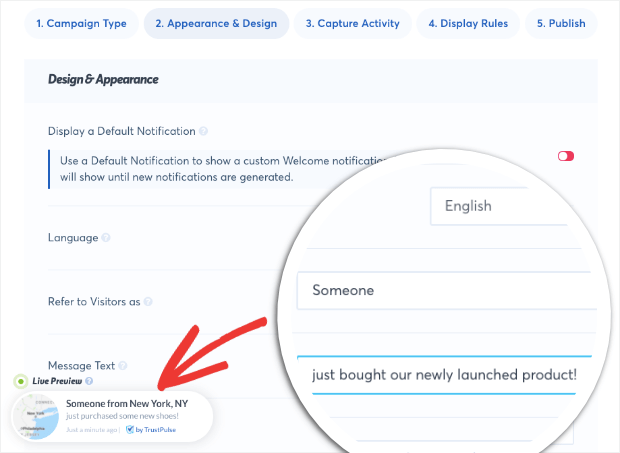
Next, you’ll want to change the message text. By default, the message says ‘just purchased some new shoes!’.
You can type in your own text to match your product.
Next, you can add a link to where you would like to direct a visitor if they click on the popup.
This is perfect for recent sales notifications, as it allows you to send your site’s traffic directly to a product or signup page.

After that, you can change the image in the popup to match your campaign. You can choose a pre-built icon or upload your own image.
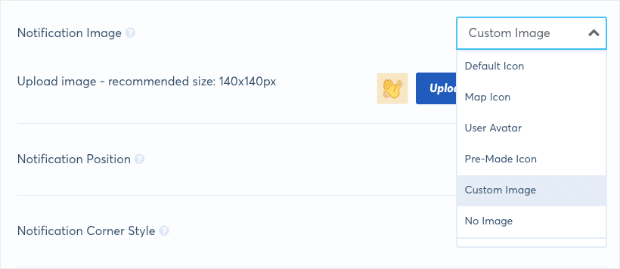
Next, you’ll see options to change the shape and position of the popup.
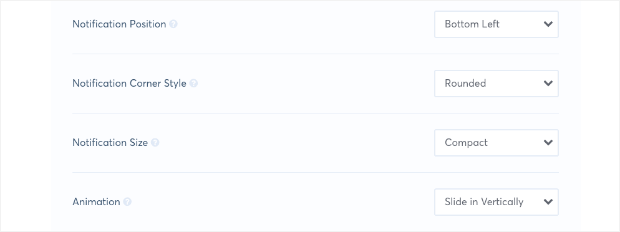
And if you want to change the color and font, you’ll find options to do that under the Advanced Settings menu.
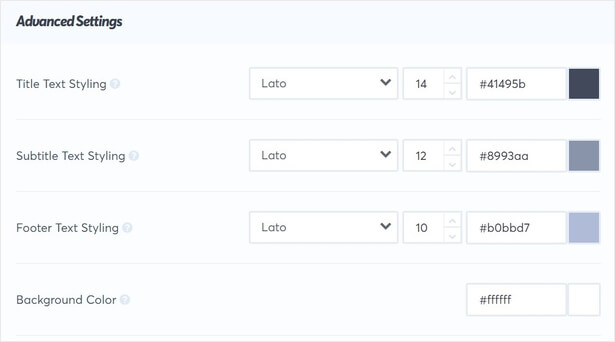
Now that your popup design is ready, you can tell TrustPulse where to capture the activity from.
Step 4: Capturing Recent Activity
To control what activity is showcased, switch to the ‘Capture Activity’ tab.
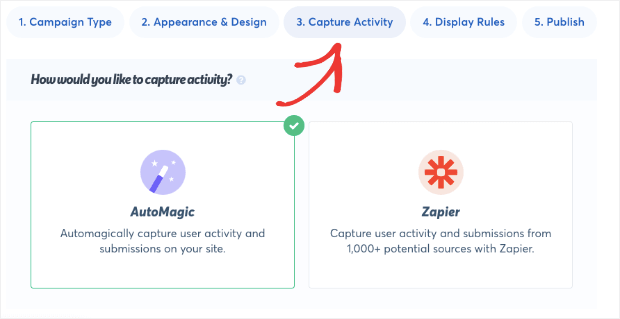
TrustPulse lets you capture activity on your website using its AutoMagic feature. If you want to capture activity from 3rd-party sites like Google or Yelp, you can connect your campaign to Zapier.
Today, we’ll capture activity using AutoMagic.
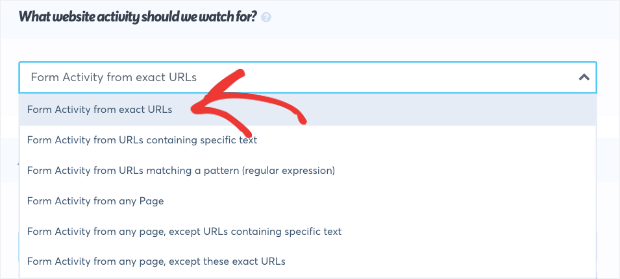
In the section that says ‘Where should we watch for activity on this site?”, we’ll choose ‘Activity from exact URLs’.
Then, we’ll add a page rule to capture recent sales on the checkout page.
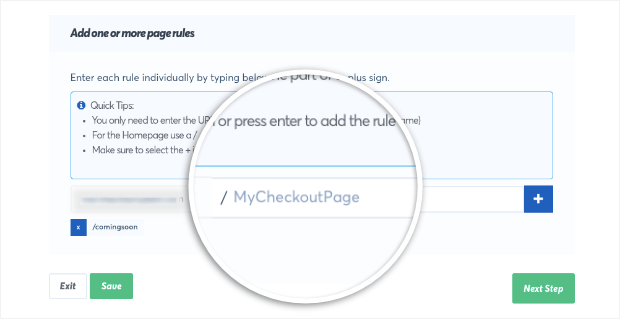
Now TrustPulse will capture all activity from the checkout page. So when someone buys a product, a new popup notification will appear on your site.
Step 5: Setting Up Display Rules for Mobile
TrustPulse lets you control where your popup appears, for how long, and how often.
To set up these controls, switch to the Display Rules tab.
Here you’ll see options to display the popups on all pages, exact URLs, or filter URLs text and patterns.

Next, you can set the display duration and time gap between notifications.
TrustPulse gives you an option here to Load Notifications on Mobile. When you switch this option ON, your mobile users will see the recent activity popups.
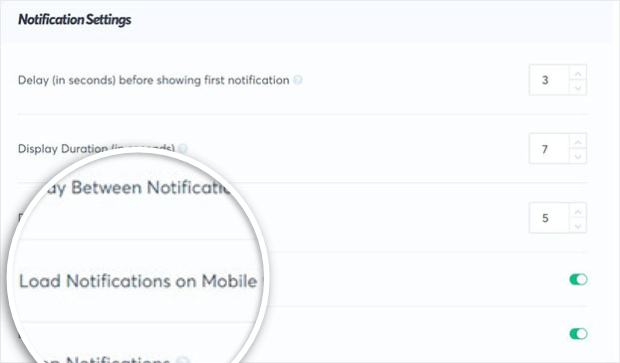
And don’t worry, the popups are responsive so they’ll appear nicely on mobile devices without you having to tweak any code and make design adjustments.
Now that your campaign design is ready and rules are set, you can go ahead and publish it.
Step 6: Publishing the Recent Activity Mobile Campaign
To publish the recent activity campaign, switch to the Publish tab. Here you’ll see a preview of your campaign. All you have to do is click on the ‘Launch Your TrustPulse Campaign’ button.
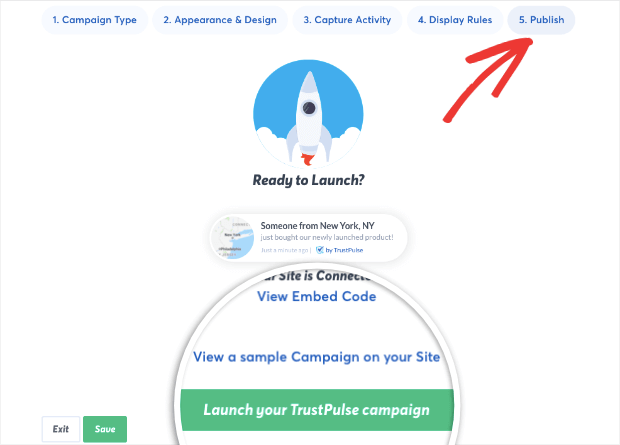
And that’s it! TrustPulse will now capture recent activity on your site and display them for others to see. And with the mobile settings turned on, this will help you target mobile users to instantly boost conversions.
If you haven’t signed up for 100% risk-free TrustPulse account yet, what are you waiting for? Join TrustPulse now!
We hope you liked this post. If you’re looking to increase conversions even more, check out these posts:
- What Is a Good Conversion Rate? (The Ultimate Guide)
- How to Increase Online Sales: 7 Proven Methods (+ Tools You Need)
- FOMO Marketing: Everything You Need to Know About Fear of Missing Out
- 31 Growth Hacking WordPress Plugins and Tools
The 3 posts we’ve picked will help take your marketing efforts to the next level to find new opportunities to skyrocket sales and grow your business.


