
Do you want to learn how to create a live sales notification for WooCommerce?
WooCommerce live sales notification tells your visitors about all the real-time sales happening on your online store. They’re a highly effective form of social proof that can increase your eCommerce store sales by up to 15%.
This article will teach you how to add WooCommerce live sales notifications on WordPress.
Before we jump to our main topic, let’s talk more about live sales notifications and why they’re so effective.
What Are Live Sales Notifications and Why Are They So Effective?
A live or recent sales notification is a small popup that displays to your site’s visitors any time someone has made a purchase on your website.
You’ve likely seen these before. They look something like this:

They’re an effective way of building your brand’s credibility online and give your marketing strategy the following benefits:
- Better UX for your customers
- More Credibility for your brand
- Higher Conversions for your business
- More Profit for you
Why are live sales notifications so effective? Because they show your site’s visitors that people are buying your products.
This instills a sense of FOMO (fear of missing out) among your other guests and motivates them to take action.
And since others have completed their purchases first, your new customers will feel more confident doing business with you.
Do they work? TrustPulse users have seen instant boosts in sales by up to 15%!
For this tutorial, we’ll use TrustPulse, which is hands down the best live sales notification WordPress plugin for WooCommerce.
This WooCommerce plugin is for showing on-site sales notifications to encourage customers to purchase.
With the TrustPulse: live sales Notification for WooCommerce plugin, you can show recent sales alerts, including the product purchased and how long the purchase was made.
As you’ll see, it allows you to create various social proof notifications that increase conversions and sales across your site.
Plus, it doesn’t require coding skills to install, design, and embed custom notifications for your online store.
With the help of the TrustPulse tool, anyone can create and add live sales notifications on their website in minutes.
These WooCommerce recent sales popup notifications are a surefire way of building more trust and creating a sense of urgency for generating more revenue.
If you’re ready to boost your sales and conversions right away, join TrustPulse today.
Bonus content:Best WordPress Popup Plugins to Grow Conversions
How To Create Live Sales Notifications for WooCommerce
Here’s a step-by-step tutorial on how to set up live sales notifications for WooCommerce (or any WordPress site).
Step 1: Sign Up for TrustPulse
TrustPulse, a live sales notification plugin for WooCommerce, has free and paid plans.
For this tutorial, we’re using TrustPulse paid plan. But you can use either, and the process is the same starting with step 2.
To sign up for TrustPulse, go to the website and click Get TrustPulse Now:

On the next page, select which plan you’d like and click on Get Started under that plan:

Next, fill out your account and payment information and click the Complete Checkout button:

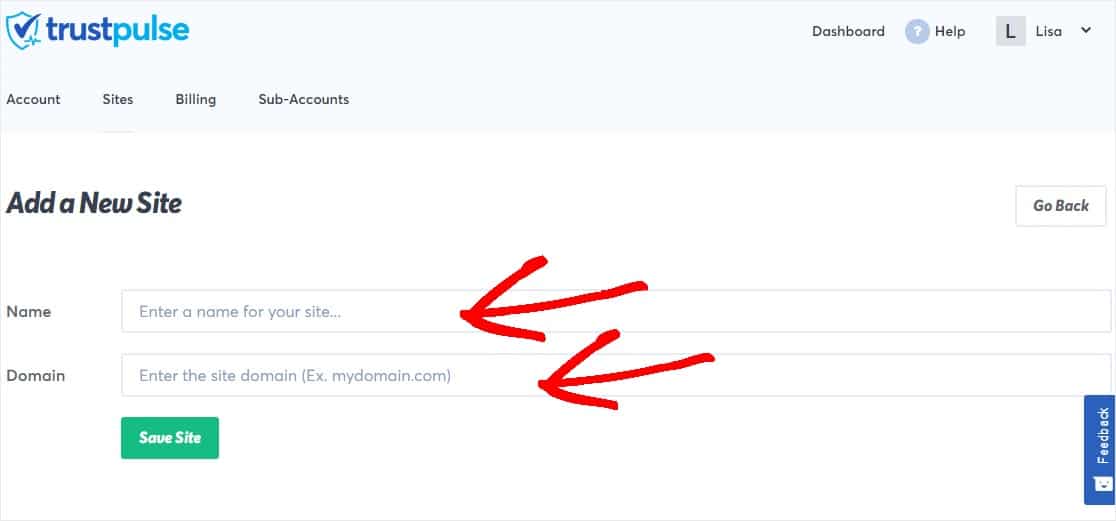
Step 2: Add Your Website
Next, you’ll be prompted to enter your website’s Name and Domain name.
You can give any name for your website, but you’ll need to enter the actual domain name, such as http://www.example.com.
Once you fill out these details, click on Save Site:
Step 3: Create Your Live Sales Notification Campaign
Click Create Campaign in the top right corner of your dashboard:

On the first campaign creation page, name your campaign whatever you’d like, like Live Sale Notification.
There are 5 steps to creating your live sales notification for WooCommerce:

- Campaign Type
- Appearance & Design
- Capture Activity
- Display Rules
- Publish
Let’s begin with Campaign Type.
Step 4: Select Your Campaign Type
For your campaign type, you have four options:
- Recent Activity: Display the recently purchased products from your WooCommerce store with a clickable link to the product page.
- On-Fire: Show the number of people taking action on your website in a given period.
- Visitor Analytics: Highlight active interest in your site by showing real page visits over time.
- Action Message: Display a single static notification to help drive visitors to take action or highlight information.

Each of these campaigns helps you accomplish a different purpose.
On-Fire campaigns, for example, are great for running popular promotions like flash sales or seasonal offers.
Visitor Analytics and Action Messages are also great solutions for leveraging social proof before you’ve made any sales.
These let you show popular pages on your site or redirect users to dedicated landing pages that are more likely to lead to a purchase.
For today’s tutorial, though, we’ll choose Recent Activity.
These are the best campaigns for creating a live sales notification for WooCommerce.
Now it’s time to customize the look of your message.
Step 5: Customize Your Campaign’s Appearance & Design
At this stage, you’ll make your live sales notification look and say exactly what you want it to:

You can change your campaign’s:
- Language
- User display name (for the rare cases when we can’t identify a buyer’s name)
- Message text
- Message link
- Notification image
And more. That last one (notification image) is an awesome resource to modify for products to be shown.
If you’re selling a specific item, such as shoes, you can change the image from its default map setting to display a particular product:

This visual cue can reinforce the popularity of that product and convert hesitant buyers.
Also, under Advanced Settings, you can change the fonts and color scheme of your campaign to make it match your branding:

At TrustPulse, we allow users to customize every aspect of their campaigns.
Once you’ve designed the perfect live sales notification on WordPress for your WooCommerce store, it’s time to set up when the sales notification displays.
In this case, that will be any time someone makes a purchase in your WooCommerce shop.
Step 6: Capture Sales Activity
Here, you have two options to capture activity for your campaign:
- AutoMagic
- Zapier

AutoMagic captures activity taken exclusively on your site. This can include users signing up for your monthly newsletter, making a purchase, and more.
Everything is contained to actions taken on your specific domain name.
Zapier can display actions related to your brand but taken on different websites. You could display a campaign whenever someone leaves you a new Google My Business review.
To create our WordPress live sales notification for WooCommerce, we’ll choose AutoMagic:

And the next step is where we’ll be prompted to show which activity we want to capture for our live sales notification.
You’ll see the question What website activity should we watch for? And a dropdown field box of options:

You have many options to choose from, including Form Activity from:
- Exact URLs
- URLs containing specific text
- URLs matching a pattern (regular expression)
- Any page
And more.
For this tutorial, we’re going to keep the default setting Form Activity from exact URLs:

Then just below this dropdown menu, you can enter the exact URL you want to track. For your WooCommerce store, this will be your checkout page where your customers make their purchases.
Most WooCommerce stores have the following URL formula for their checkout page:
www.mystore.com/checkout
Here’s an example from The Good Batch, a New York-based bakery that uses WooCommerce to sell its products:

So, in most cases, tracking live sales notifications for your WooCommerce store is a matter of leaving the default setting Form Activity from exact URLs and adding the word checkout to your domain in the field below:

After that, it’s time to choose your display rules.
Step 7: Decide Where To Show the Sales Notification
Once you’ve captured sales activity for your WooCommerce site, you’ll need to decide where and when your notification should be displayed.
You have tons of options for this, including customizing the Display on:
- Any page
- Exact URLs
- URLs containing specific text
- URLs matching a pattern

And more. With TrustPulse, you can display live sales alerts anywhere on your site that you find most effective for increasing sales.
Then, you can customize your settings to include display duration, the time between notifications, whether or not your notifications should appear on mobile devices, and so on:

All these decisions will depend on your products, your brand, where your users are shopping from most (desktop, tablet, and mobile), and other variables unique to your WooCommerce store.
We recommend starting with the default settings if you’re unsure where to begin.
Then, you can test minor changes over time to see if they enhance sales until you’ve created the perfect system for your unique online store.
Now, in the same tab, you’ll also see Advanced Settings, where you can explore more options:

One of the standout features here is Order Priority which lets you prioritize your campaigns.
For instance, you may want to set up a new campaign for a flash sale and want these notifications to take priority for the duration of the sale.
This lets you decide the order in which your campaigns are displayed.
Now there’s just one step left: publish!
Step 8: Publish Your Live Sales Notification Campaign
At this final stage, you’ll see a preview of your campaign so you can see it before going live:

You’ll also get a warning message if your site isn’t connected to TrustPulse yet:

If not, you’ll have to get your site connected with TrustPulse. Fortunately, doing so is super easy. Just follow this guide on how to add TrustPulse to any website.
When you’re ready, all you need to do is hit Launch your TrustPulse Campaign:

And that’s it! You now have created and published a live sales notification for WooCommerce, all in just a few easy steps. If needed, you can go back and modify your campaign at any time.
With TrustPulse, you can create a recent sales notification for WordPress or any other platform you use for your website.
It’s also your best option if you’re looking for a WooCommerce notification plugin for live sales because it’s easy to use, highly customizable, and has a killer reputation.
We can’t emphasize that last point enough.
That’s because there are tons of fake sales notification plugins and software on the market. But when your customers learn that your live sales feed is fake, you’ll have difficulty earning back their trust.
But with TrustPulse, our live sales notifications for WooCommerce are 100% genuine, credible, and trustworthy so that you can maximize sales on your site.
Ready to get started? Sign up for your 100% risk-free TrustPulse account today!
