Would you like to know how to make 1 small change to your website that can lead to a 15% boost in sales for your Magento store?
Well, we’ve got the answer for you: recent sales notifications.
If you run your online store with Magento, recent sales notifications are a quick, easy way to increase your sales revenue. And, today, we’re going to teach you how to set these notifications up in 5 simple steps.
But before we dive into the “how,” let’s cover the “what” and the “why.” In other words, let’s get clear on what recent sales notifications are.
What Are Recent Sales Notifications?
Recent sales notifications are small campaigns displayed whenever users make a purchase on your site. They’re a form of social proof that lets other users know your products are credible, reliable, and (most importantly) popular.
Plus, these small notifications lead to big changes. We’ve seen them increase eCommerce sales by up to 15%! But what makes these forms of social proof so effective?
A phenomenon in the marketing world known as fear of missing out (FOMO).
FOMO is a very powerful tool for marketers. When your site’s casual browsers see that other people are actively making purchases on your site, they get the sensation that they’re missing some kind of benefits your product has to offer.
They come in all shapes and sizes, but typically look something like this:

These campaigns are a big motivator for getting your site’s visitors to buy your products. And the best part is that recent sales notifications are ridiculously simple to set up when you use TrustPulse:

TrustPulse is the world’s leading social proof app. It creates custom activity notifications that aren’t just limited to sales. With TrustPulse, you can boost your:
- Email sign ups
- Comments on blogs or 3rd party sites (like Yelp or Google My Business)
- Product pre-orders
And more. Plus, with TrustPulse, your visitors never have to worry that you’re showing them fake social proof like so many other software on the market.
Since we pride ourselves on only showing genuine activity with your business, we’re not only trusted by our customers, but we’re trusted by our customers’ customers, too.
As a result, you can rest assured that your TrustPulse campaigns will carry the most influence with your audience. So, now, let’s look at who you would set up a Magento recent sales notification with TrustPulse.
How to Show Magento Recent Sales Notifications
Setting up your Magento recent sales notifications is an easy 5-step process and takes just a few minutes.
But before anything, you’ll need to sign up for TrustPulse, the leading social proof app. The best part is that you can get started totally free! This lets you test out the software with no risk.
Now, let’s get started.
Step 1: Choose a Recent Sales Notification Campaign
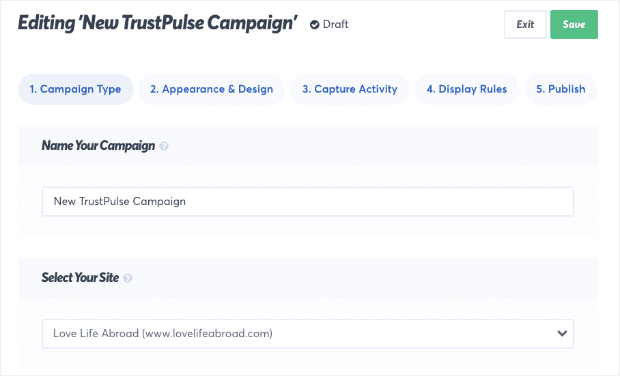
The first thing to do is name your campaign and select the site you want to attach your campaign to. In this case, that would be your Magento store:
Then choose 1 of the 2 campaign types offered by TrustPulse:
- Recent Activity
- OnFire
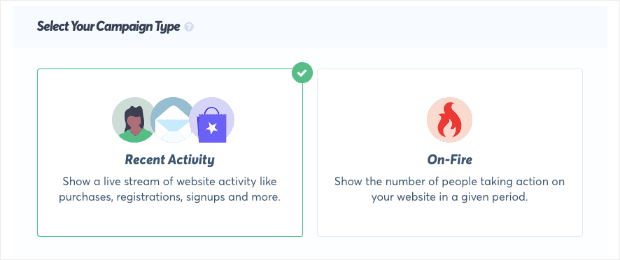
Both of these campaigns are incredibly effective in the right context. Recent Activity displays the name of the buyer directly on your Magento recent sales notification:
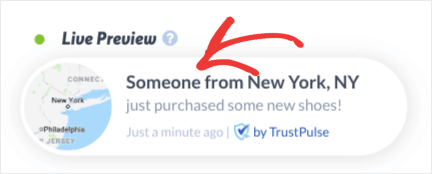
This is a more powerful way of using social proof to increase everyday sales. When users see that your business is getting lots of attention from real customers around the world, it leverages FOMO to motivate them to take action.
OnFire is the perfect campaign for situations where you have lots of users taking the same action on your site. That’s because it shows the number of people who’ve taken action, rather than an individual’s name:
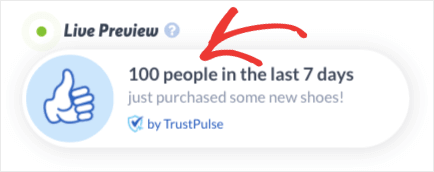
This type of campaign is great for flash sales, pre-orders, or activities that get lots of attention on your site.
For today’s tutorial, we’ll choose Recent Activity:
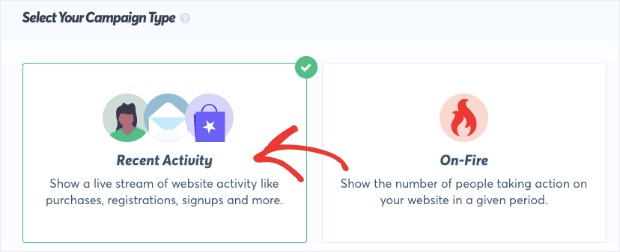
Like we said, this is better for everyday sales, so it’s exactly what you need for your Magento recent sales notification.
Once you’ve selected Recent Activity, click Next Step:
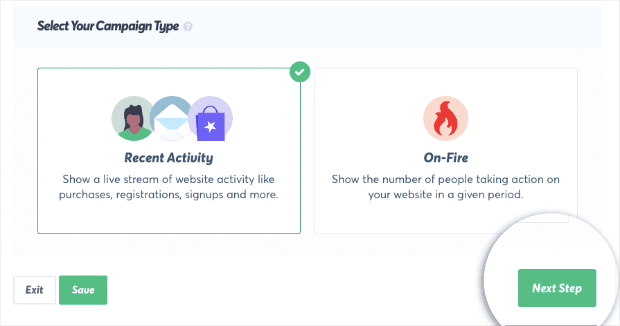
Step 2: Customize Your Magento Sales Notification
Now you need to decide how your campaign will look. For that, TrustPulse gives you many options.
You can customize your recent sales notification’s:
- Language
- Visitor name
- Message text
- Message link
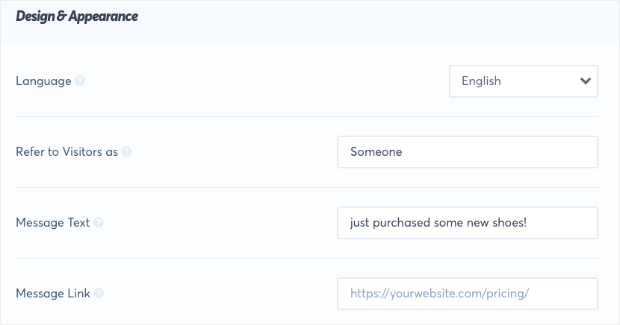
That last one is particularly important. To improve user experience, you want to give your window shoppers direct access to the product another customer recently purchased. This is a great way to customize their shopping experiences.
When your casual site traffic sees someone bought a product, your message link helps them take the same action by redirecting them to a product page.
If you’re selling just one product on your site, you can add an image or logo by changing your notification image.
But if you have a large variety of products, you can change your notification image to a map icon (showing where the purchase took place):
![]()
Use a pre-made icon:
![]()
Or upload a custom image:

You could also set up a campaign for each product on your Magento site and add an image of the product to each individual campaign.
In other words, you can use TrustPulse to personalize your recent sales notifications however you want in order to get the biggest increase in sales!
Finally, you have a ton of Advanced Settings that allow you to change the text, font, color of your campaign, and more:
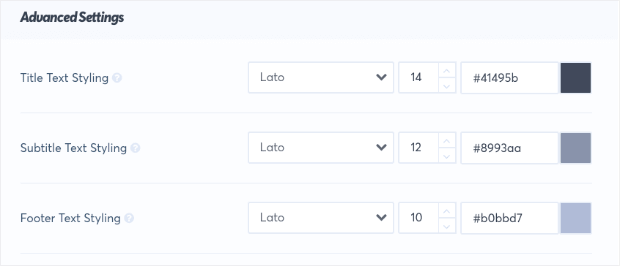
Once you’ve designed the right campaign for your site, go ahead and click Next Step:

Step 3: Capture Activity on Your Magento Store
Now it’s time to capture the activity that will trigger your Magento recent sales notification. You have 2 options for capturing activity on your store:
- AutoMagic
- Zapier
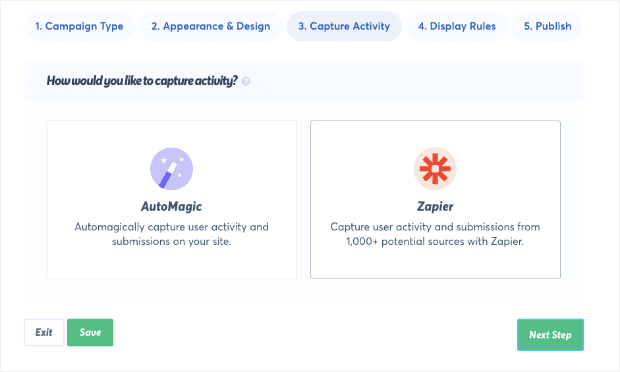
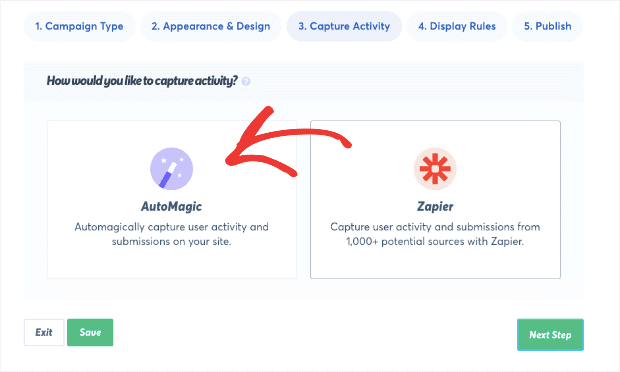
AutoMagic captures all the activity that happens directly on your site. This would include things like newsletter signups, pre-orders, or live sales.
Zapier captures activity with your brand or business that happens in thousands of places outside of your site. So, for example, you could set up a campaign to display any time someone leaves you a review on Google My Business.
Even though the review wasn’t left on your site, the Zapier integration will create a unique trigger to let your site’s visitors see that the action occurred.
For today’s tutorial, we need to use AutoMagic because the sales notification will be triggered from your Magento store.
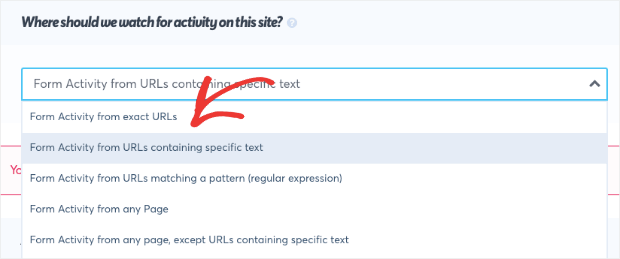
Under the question, Where should we watch for activity from this site?, you’ll see a drop-down menu. Select the option Form activity from URLs containing specific text:
This will bring up a small reminder that you need to create a rule to let TrustPulse know what specific text to look out for. Under the heading Add one or more page rules, you’ll see your domain name with a field box next to it on the right:

In that field box, type the word “checkout”:
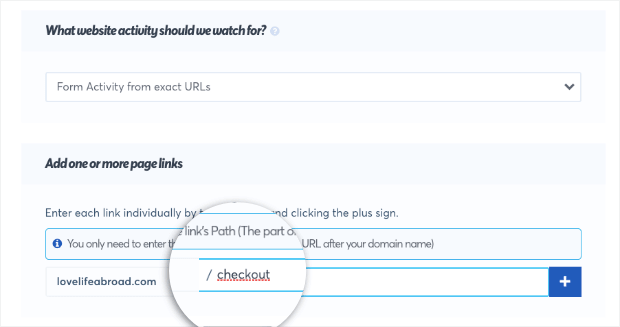
You’re doing this because you want to capture activity from your site when someone makes a purchase. On Magento sites, all of that happens at the checkout process. When users are there, the URL contains the word “checkout” in the slug.
Here’s an example from a popular Magento store’s checkout:

When users finish their checkout process, TrustPulse will display your campaign on your site. The only question you need to decide now, though, is where.
To do so, click Next Step:

Step 4: Determine Where to Display Sales Notification
You need to determine where you want your Magento recent sales notification to be displayed on your site.
By default, your recent sales notification will display on every page:
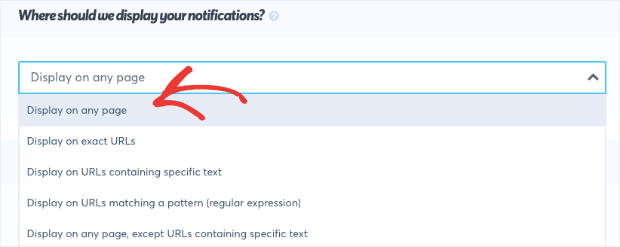
But you can change that setting with the drop-down menu.
Sometimes you may want to set up specific product campaigns for certain pages on your site to make each campaign more personal. Today, though, we’ll keep our notification displayed across all pages.
Now you can change the Notification Settings, including:
- Delay between the sale and the notification (in seconds)
- How long your notification will appear on the screen
- Delay between separate notifications (in seconds)
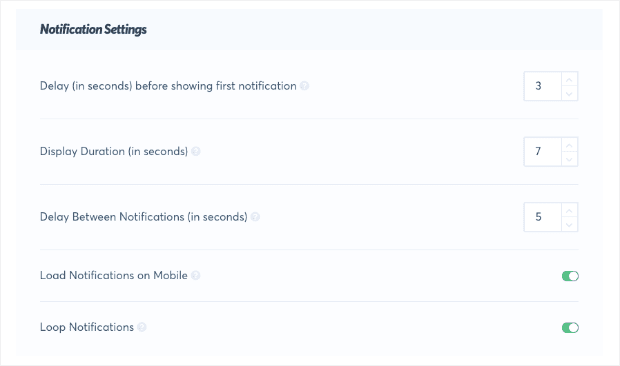
You also have Advanced Settings that allow you to:
- Hide anonymous notifications
- Show notifications as anonymous
- Permanently hide notifications when closed
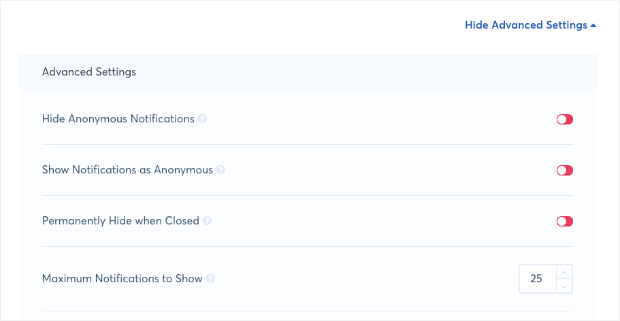
These display rules let you tailor your notification messages specifically to certain viewers. That way, you can ensure you’re displaying the campaigns to the right person at the right time.
This lets you feel confident about getting the most significant boost in sales from your recent sales notifications.
When your display rules are set up, click Next Step:

Step 5: Publish Your Sales Notification
This is the last step in creating your Magento recent sales notification. It’s also the most fun:
Publish!
Review your campaign to make sure it’s exactly how you want it to look. When you’re satisfied, click Launch Your TrustPulse Campaign:
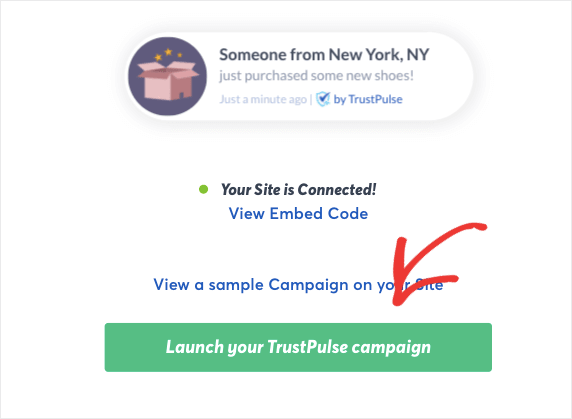
In some cases, you may get a warning that shows your TrustPulse account isn’t connected to your site:

If you’re working with WordPress, check out this article on how to integrate TrustPulse with WordPress.
Otherwise, you can read this resource on how to connect TrustPulse to any site. Once you’re connected, it’s just a matter of going back and publishing your site campaign.
That’s it!
You’ve now created a recent sales notification for your Magento store. And if you enjoyed this post, then you’re likely savvy enough to know just how important these forms of social proof are.
But you also know that recent sales notifications aren’t the only kind of social proof you can use.
That means you should really go read this post on the 12 types of trust badges you need for your site.
This resource has everything you need to leverage social proof to see an instant boost in sales.
