Do you want to add a social proof notification to your Weebly site to instantly boost trust?
Business owners face an interesting dilemma. When a customer visits your online store for the first time, they may not trust your site enough to make a purchase. But if they leave, they’re statistically unlikely to come back.
So how can you get people to trust your website enough to take the actions you want them to? The answer may be more simple than you think:
Social proof notifications.
That’s why, in today’s article, we’re going to teach you how to set up a social proof notification on your Weebly site. That way, all your site’s traffic will know that your website–and your business–are totally trustworthy.
But before we dive into the tutorial, let’s make sure we’re clear on what a social proof notification is.
Why You Need Social Proof Notifications on Weebly
A social proof notification is a small popup message that lets other customers see when someone has taken an action with your brand.
This could be something done on your Weebly site, such as someone signing up for a webinar or making a purchase. Or, this could be an action taken off your site, like when someone leaves you a review on Google My Business or Yelp.
Regardless of where the action takes place, the result is the same: when people see that others are positively interacting with your business, they’ll trust your brand even more.
And the more people trust your brand, the more likely they are to buy your products. In the end, these small social proof notifications on your Weebly site can have a big impact on your overall profits.
You’ve likely seen social proof notifications before. Here’s the one we built for today’s demo:
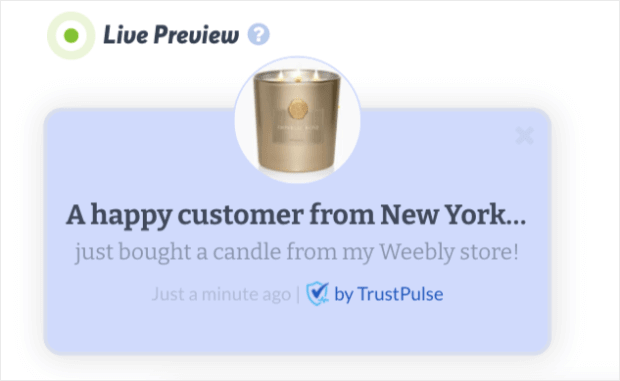
And while this looks large in the image above, it’s much smaller on your customer’s browser:
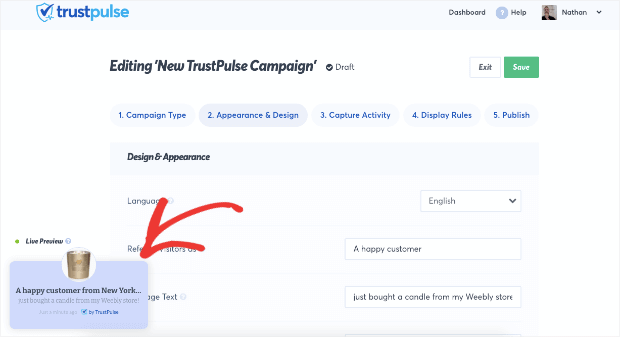
Social proof notifications, just like this one, have been proven to boost sales by up to 15%. And as you’ll see in a moment, they’re super easy to create.
Plus, when you use TrustPulse, you can add these social proof notifications to your website totally free for the first 500 sessions of traffic. After that, our paid plans start at around $4/month, or about the same cost as a cup of coffee.
To learn more about how TrustPulse plans compare with similar software, read this review of FOMO vs. UseProof vs. TrustPulse.
Otherwise, sign up for your free TrustPulse account today!
Adding Social Proof Notifications to Weebly
Once you sign up for your account, you’ll immediately be able to build your social proof notification. Then, once you’re ready to publish, you’ll get an embed code for your Weebly site.
We’ll start this tutorial by creating your social proof notification. Then, we’ll show you how to integrate your campaign with Weebly in the last step.
Step 1: Choose Your Social Proof Notification Type
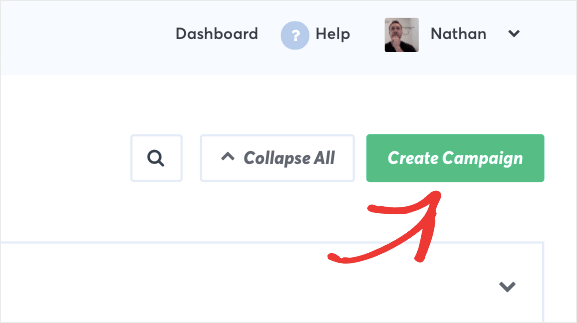
After you’ve signed up for TrustPuse, you’ll be taken to your dashboard. In the top right-hand corner, click Create Campaign:
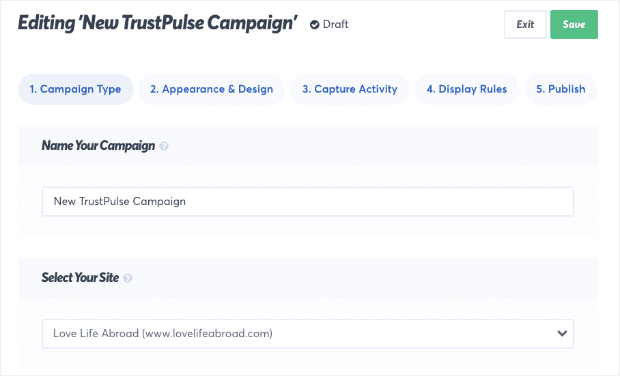
Then you’ll need to give your social proof campaign a name and select your Weebly site. This is the URL that you’ll have entered during the registration process:
If your Weebly site isn’t connected yet, no worries. We’ll show you how to integrate Weebly with TrustPulse in just a bit.
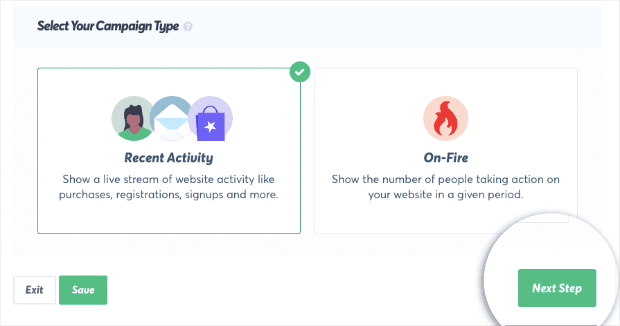
Now you’ll need to decide your social proof notification type. With TrustPulse, you have 2 options:
- Recent Activity
- On-Fire
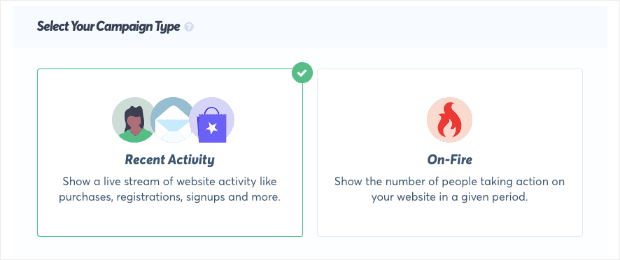
Both of these campaigns do a great job building trust with your website, but they should be used in different contexts.
Recent Activity, for example, will show you when an individual took a specific action on your site. When possible, it will even refer to the customer by name:

If you don’t have your customer’s name, that’s not a problem. You’ll be able to reference your visitors however you’d like as you build your social proof notification:
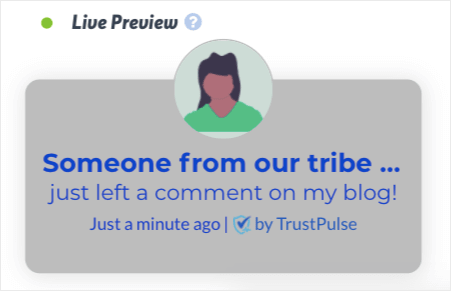
The point is that Recent Activity campaigns refer to an individual taking some action on your site.
On-Fire campaigns work a little differently. Rather than refer to an individual, these campaigns will show how many total people have interacted with your brand:
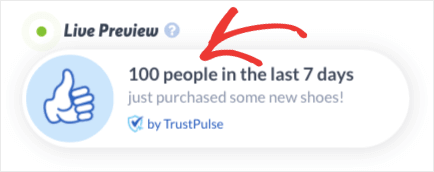
You’d want to use On-Fire campaigns for situations where you know lots of people will take the same action on your site. This could be good for webinar sign-ups, flash sales, popular limited time offers, or other activities that have a lot of participation.
We’ll use a Recent Activity campaign for today’s tutorial:
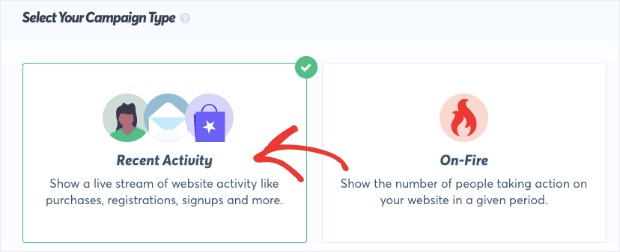
Again, both types of social proof notifications work well. But Recent Activity is better for everyday kinds of interactions with your website.
Once you’ve selected Recent Activity, click Next Step:
Step 2: Customize Your Social Proof Notification on Weebly
We made sure that our social proof notifications look great out-of-the-box. Our goal was to make your campaign easy to modify and look stunning even for people who don’t have any coding or web design experience.
That way, you can get all the benefits of social proof notifications with a fraction of the time and energy.
You can change your social proof notification’s:
- Language
- Visitor name
- Message text
- Message link
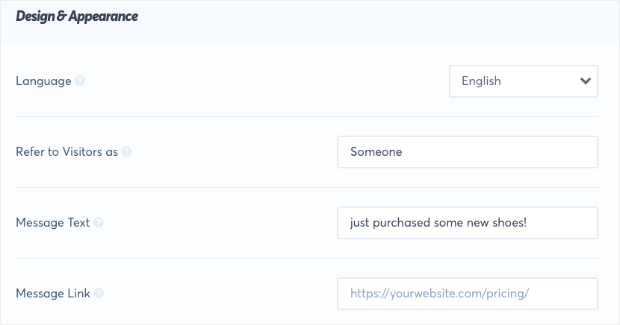
And much more.
You can also change the image that goes along with your campaign. This can be helpful if you’re selling a specific product or want an icon to make your social proof notification stand out. Our default image shows what region of the world your customer is from:
![]()
But we also have pre-made icons you can choose from:
![]()
Or, you can upload an image yourself so your social proof notification is totally unique:

These small modifications are easy to make and can be done in a matter of minutes. We even offer a variety of Advanced Settings so you can change the color, font, and size of your campaign’s text:
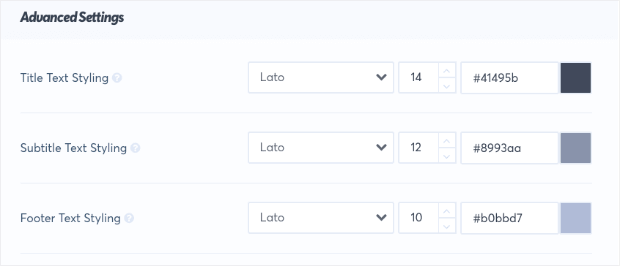
That way, you can make your social proof notification match the style, message, and look of your Weebly site.
Again, here’s the social proof notification we designed for today’s tutorial in less than 2 minutes:

Once you’ve designed the right campaign for your Weebly site, click Next Step:

Step 3: Decide the Activity You Want to Capture
At this point, you’ve chosen your campaign type and designed how it looks. Now, you need to decide what will trigger your social proof notification. There are 2 options here:
- AutoMagic
- Zapier
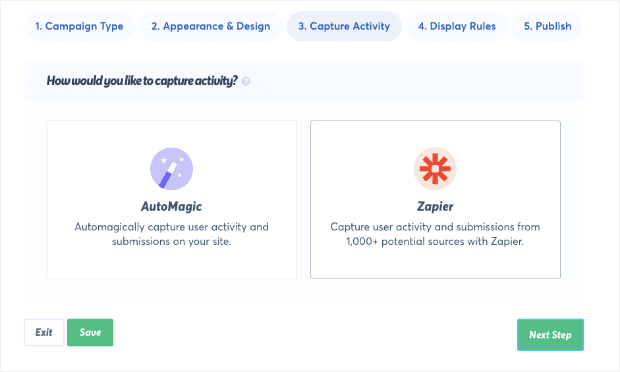
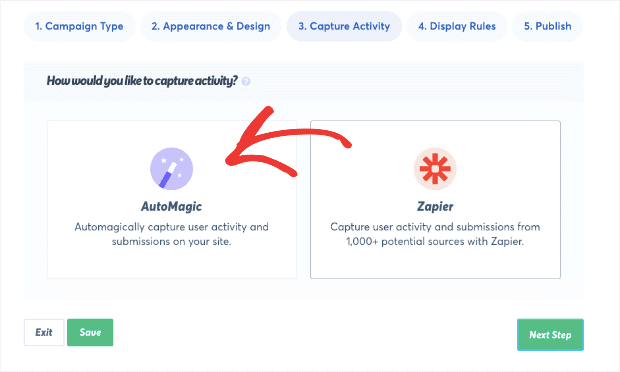
AutoMagic lets you show a social proof notification for any action that was taken on your site. This would be things like when a customer makes a purchase, subscribes to a newsletter, signs up for a webinar, and more.
But there are times when you want to show how customers are interacting with your brand that isn’t necessarily on your website. For that, you’d want to use our Zapier integration.
Zapier makes a trigger for when people engage with your brand on 3rd-party sites. This would be like when someone leaves you a review on Google My Business, for example. With our Zapier integration, you can capture activities taken with your brand from over 1,000 different external sites.
For today’s tutorial, though, we’ll be making a social proof notification for when someone makes a purchase on our Weebly eCommerce store. For that, we’ll use AutoMagic:
Scroll down until you see the question Where should we watch for activity from this site?. Below will be a drop-down menu where you need to select Form activity from URLs containing specific text:
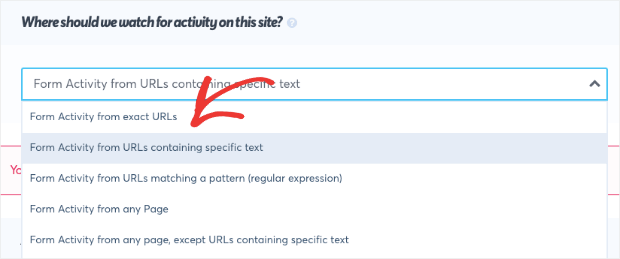
This will let you capture activity from your checkout page to trigger your social proof notification for when someone makes a purchase.
Next, find the heading called Add one or more page rules. You’ll see your site’s domain name on the left-hand side where you can enter the URL slug of your Weebly site’s checkout page:

The exact URL slug may depend on which payment gateway you use for your Weebly site. For example, this Weebly site’s checkout page has the unique URL slug: store/checkout#/payment
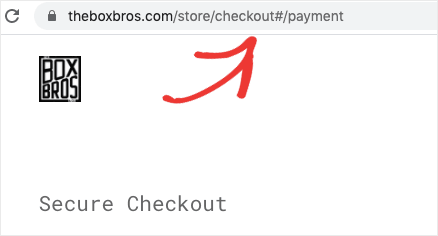
You’ll want to verify the URL slug you’ve set up for your own checkout page for this step.
That way, when users go through with checkout using this unique URL, TrustPulse will create a social proof notification on your website to show everyone when a purchase has been made.
But before TrustPulse can do that, you’ll want to determine what parts of your website you want your social proof notification to appear on.
For that, click Next Step:

Step 4: Choose Where to Display Your Notification
Now you’re almost done adding your social proof notification to Weebly. All that’s left is deciding where on your website your campaign will appear.
By default, your social proof notification will appear on every page of your website:
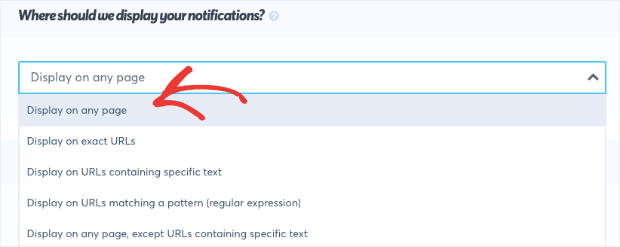
But you can modify this by selecting any other option from the drop-down menu. You can display your campaign on:
- Exact URLs
- URLs containing specific text
- URLs matching a pattern
And much more. For today’s tutorial, we’ll leave the default setting Display on any page. This will make sure all of your site’s traffic see your social proof notification and will help you build trust with a wider audience.
After that, you can personalize the Notification Settings, such as:
- Delay between the sale and the notification (in seconds)
- How long your notification will appear on the screen
- Delay between separate notifications (in seconds)
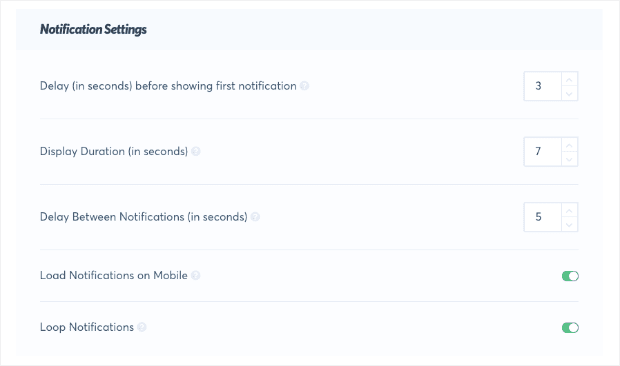
Then you have even more Advanced Settings that allow you to:
- Hide anonymous notifications
- Show notifications as anonymous
- Permanently hide notifications when closed
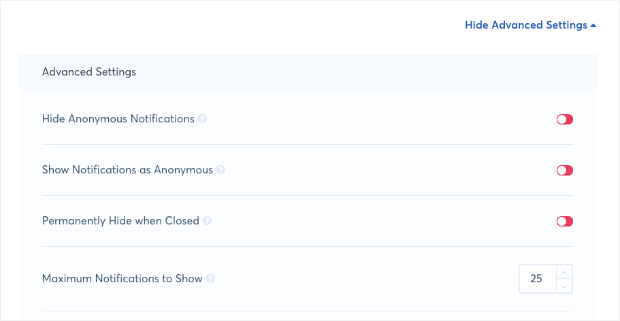
All of these rules let you decide when, where, and how long you display your social proof notifications on Weebly. And, again, these options can be configured with zero coding experience.
Everything can be done in a matter of minutes, so you have more time to focus on other areas of your business.
After you’ve set up your display rules, click Next Step:

Step 5: Launch Your Live Sales Notification
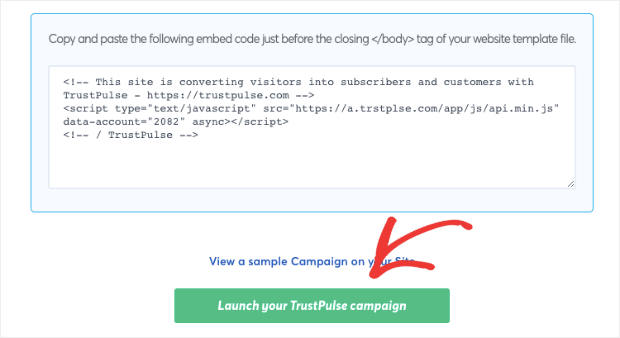
Now all that’s left is to embed your campaign’s code into your Weebly site and click Launch Your TrustPulse Campaign.
At this step, scroll down to find the embed code for your social proof notification:
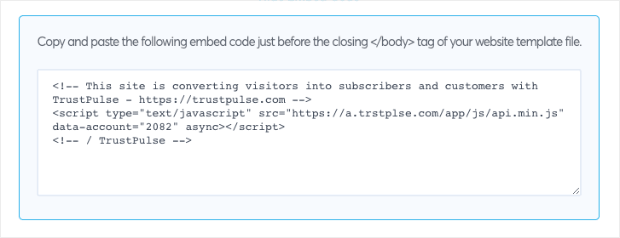
On your Weebly site, navigate to the Build tab. Scroll to the bottom of the page and add an Embed Code block. Then paste your TrustPulse embed code in your Weebly site’s Embed Code block:

Now head back to your TrustPulse account and make sure your Weebly site is connected. You’ll need to click Check Now to do so:
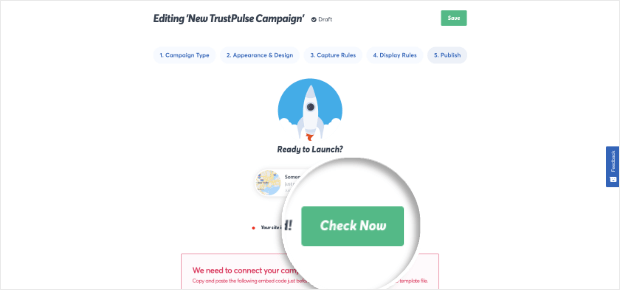
When you know that your site is connected, go ahead and click Launch Your TrustPulse Campaign:
And that’s it! Your social proof notification is now live on your Weebly site.
If you need any more help integrating TrustPulse to your website, no worries. Just read this guide on how to sync TrustPulse with Weebly.
We hope this tutorial helped you get your social proof notification set up. If you enjoyed this post, you might want to learn more about how to build credibility and trust with your site’s traffic. For that, we recommend reading the following articles:
- 10 Steps to an Awesome Customer Feedback Strategy
- Ultimate Guide to Using Trust Badges to Boost Sales and Conversions
These articles have everything you need to foster more trust with your customers.
