
Do you want to add social proof notifications to your site to see an increase in sales?
Social proof notifications are a powerful tool for building credibility with your customers. Because when people trust your brand, they’re much more likely to buy your products.
That’s why, today, we’ll show you how to create a social proof notification that you can use to generate more profits from hesitant buyers.
But first, let’s make sure we understand what social proof notifications are and why they’re so effective.
What Are Social Proof Notifications?
Social proof notifications are small popups in the corner of your browser screen. They display how other customers are interacting with your site. You’ve likely seen them before. They look something like this:

When a casual browser is looking through your products or blog, social notifications show them how popular your brand is.
This creates a sense of FOMO (fear of missing out) which is a proven marketing tactic that boosts sales.
When people see other consumers getting benefits from a product, they want those benefits too. Social proof notifications can take your FOMO marketing plan to the next level. But let’s be clear: you shouldn’t confuse social proof with social proof notifications.
Here’s why:
Social proof can be anything that helps potential customers trust your site
Some good examples of social proof would be:
- Testimonials or reviews that people leave on 3rd party platforms (like Yelp or Twitter)
- The number of customers you’ve had in the past
- The status of well-known clients you’ve had in the past
- Publications that have featured your website or product
And more.
These are the types of social proof that are invaluable to growing your business. Here’s some social proof from OptinMonster’s homepage:
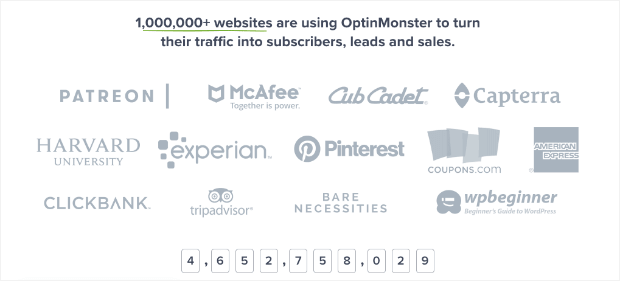
This shows the name of famous clients OptinMonster has worked with and the number of websites they serve on a daily basis.
But displaying these forms of social proof is NOT what we mean by the term “social proof notifications.”
Those are a bit different.
Yes, social proof notifications do you help build instant trust with your customers. And yes, they’ll also lead to a boost in sales.
But social proof notifications have 2 distinct advantages over generic social proof:
- Versatile: They can display different types of social proof with the same tool
- Dynamic: You can bring these notifications to your visitor on any page of your site
These differences lead to a huge impact. A lot of social proof can really help your business, but only if people see it.
If your website traffic lands directly on a blog post, for example, they’ll miss all the social proof resting on other static pages of your site.
Social proof notifications give you all the power of displaying social proof with a lot more flexibility.
Plus, there are several types of social proof notifications you can use to encourage people to take action on your site. You can display your notifications whenever someone:
- Makes a purchase
- Signs up for your newsletter
- Leaves a comment on your blog
Or any other kind of customer engagement you’d like to display.
Now that we know what social proof notifications are, we’re going to show you how to create these notifications for your site. Today, we’ll specifically make a notification for when people make a purchase on your eCommerce store.
Let’s get started.
Adding Social Proof Notifications to Your Site
In today’s tutorial, we’ll be using TrustPulse, the best social proof software on the market. If you don’t have a TrustPulse account, no worries.
You can get started totally free! With TrustPulse, you can display social proof notifications for up to 500 sessions per month.
And when you want to upgrade, TrustPulse is literally 1/8th the cost of our closest competitor. Check out this review on FOMO vs. UseProof vs. TrustPulse for a full breakdown in pricing.
Or to just get started, sign up for your free TrustPulse account today.
Adding social proof notifications to your site is an easy 5-step process:
- Campaign Type
- Appearance & Design
- Capture Activity
- Display Rules
- Publish
Let’s look at each phase individually.
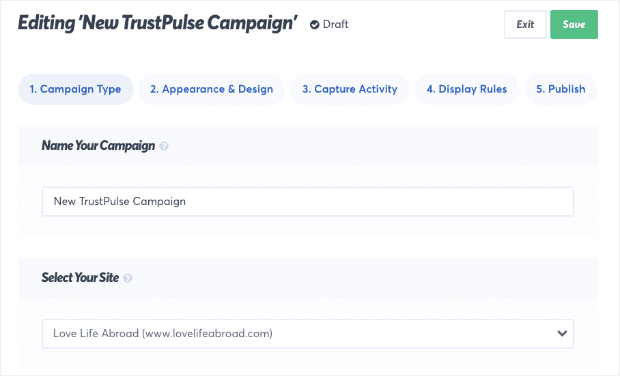
Step 1: Campaign Type
The first step is giving your campaign a name to keep yourself organized. Then assign it to your website:
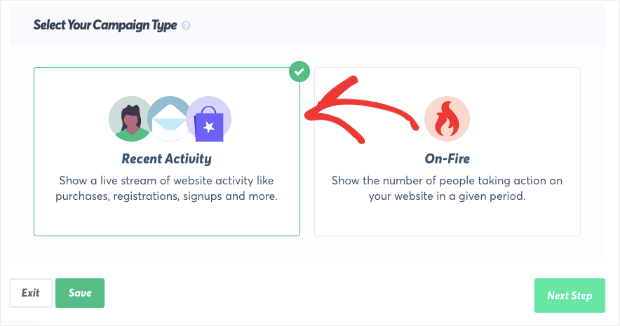
Now you need to select your campaign type. You have 2 choices:
- Recent Activity
- On Fire
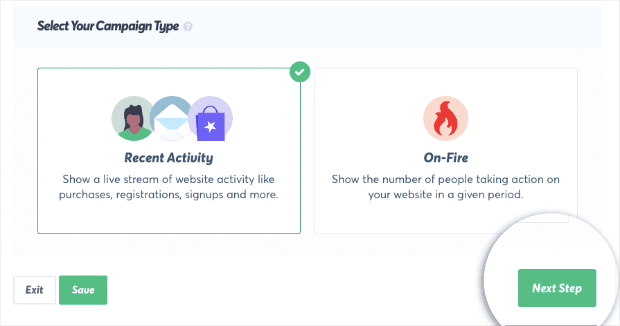
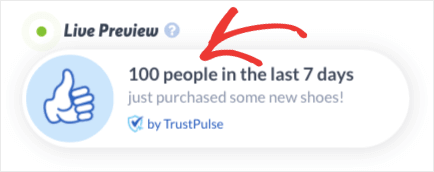
Recent Activity will show individuals who are taking action with your website or brand. This social proof notification will refer to customers by name if that information is available. Otherwise, you’ll be able to choose how you want to refer to them.
These notifications look something like this:

They’re great for displaying things like live sales, newsletter signups, or other actions taken by individuals.
On Fire campaigns are different. These show the number of people taking action, rather than referring to an individual. These notifications look like this:
These are best used for situations where you expect a high volume of customers to take the same action. Good examples would be flash sales, webinar registrations, pre-orders for popular products, and more.
You can decide which type of campaign is best for the social proof notification you want to build. For today, we’ll use Recent Activity:
When you’re done, click Next Step.
Step 2: Design Your Social Proof Notification
Now you need to design your social proof notification. Doing so is easy! You have some basic customization options that you can change, including:
- Language
- How you refer to your visitor
- Message text
- Message link
- Notification image
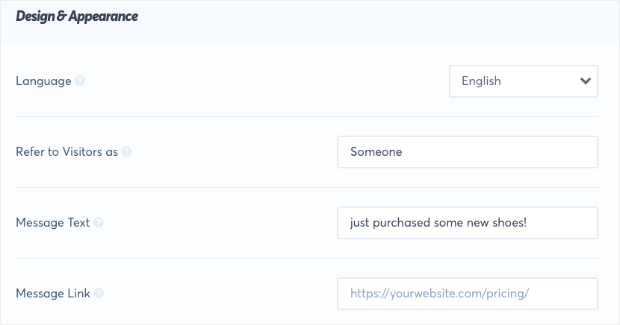
And more. The exact changes you make will depend on the type of social proof you want to display. For instance, today we’ll make the following notification for selling sunglasses:

But you would want to change this if you’re going to show something like a new review from Yelp:

Again, it’s totally up to you how you want your social proof notification to appear. All of our display options are created with simple text input or drop-down menus.
That makes TrustPulse one of the most user-friendly social proof software on the market.
You also have a ton of Advanced Settings to style your text, background, border, and more:
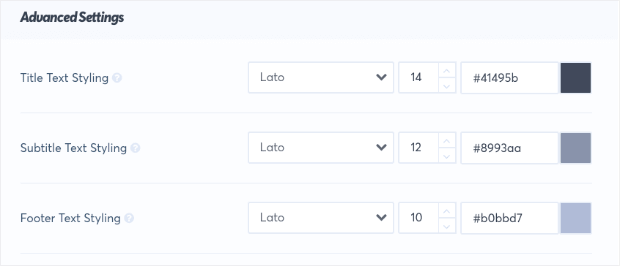
That way, your social proof notification can totally match your brand’s look.
Once you’ve created the perfect notification, hit Next Step.
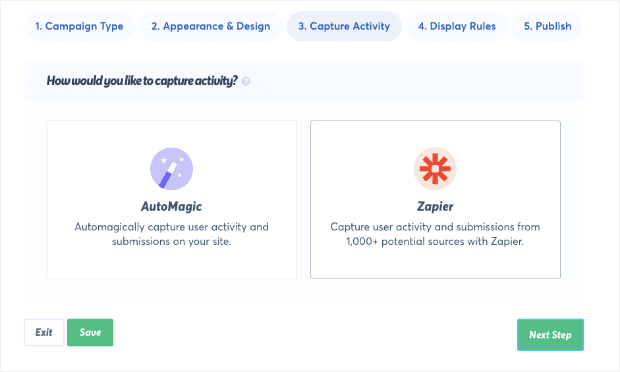
Step 3: Capture Activity for Your Notification
Now you have the look of your campaign, but you need the trigger. By trigger, we mean the action that will make your social proof notification display.
You’ve got 2 options for setting up this trigger:
- AutoMagic
- Zapier
AutoMagic will capture all the activities taken on your site. That would be things like live sales, email signups, or anything that requires a form on your website.
Zapier allows you to create triggers on activities taken outside of your site. Zapier has over 1,000 possible sources that you can draw from.
So when people leave you a review on Yelp or Google My Business, for example, you can create social proof notifications. It doesn’t matter that nothing took place on your site.
This one little integration unlocks so much potential for your social proof notifications.
Today, though, we’ll be creating a recent sales popup to show when a customer has made a purchase.
To do that, select AutoMagic:

Then go to the drop-down menu to select which form you would like to capture. For sales notifications, the easiest way is to choose Form Activity from URLs containing specific text:
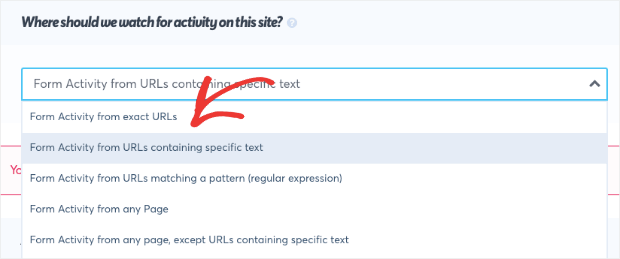
You’ll see your website URL below:
You need to enter whatever unique term goes with your checkout page. This can vary from website to website.
Shopify stores, for example, use the unique term checkouts (in the plural form), and WooCommerce uses the term checkout (in the singular form).
Check with your eCommerce platform to see what unique term is used on your checkout page. Here are a few helpful guides for creating live sales notifications on the biggest eCommerce platforms around. They teach you how to:
And if you really want help boosting profits, read this in-depth guide on eCommerce optimization.
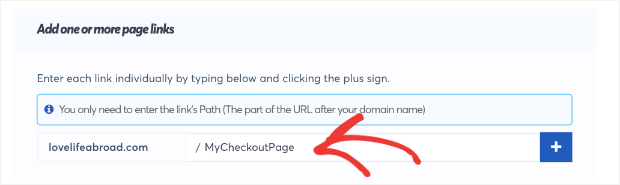
Once you’ve identified the unique term in your checkout URL, enter that word into the URL path:
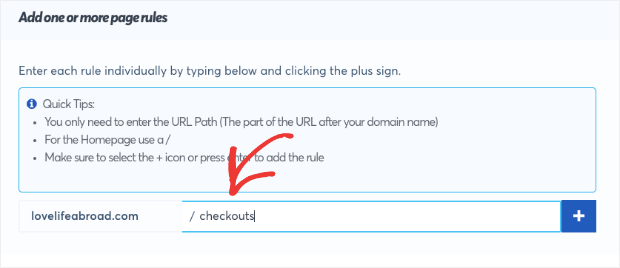
This will create a new trigger for anytime someone fills out the form on your checkout page.
When you’ve finished, hit Next Step.
Step 4: Display Your Social Proof Notification
Now you need to decide when and where you’d like to display your social proof notification on your site.
This part is just as easy as creating and designing your campaign. You have several options in the drop-down menu that you can change.
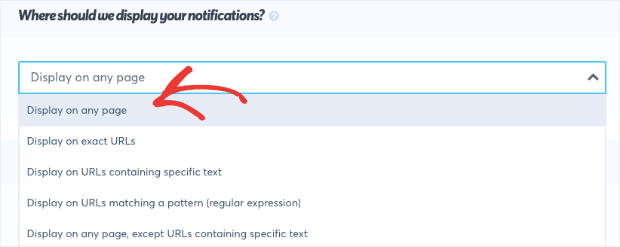
This allows you to show your notification wherever you think it will be the most effective.
You’re also able to create other settings such as:
- How long before your notification appears
- Display duration
- Length of time between notifications
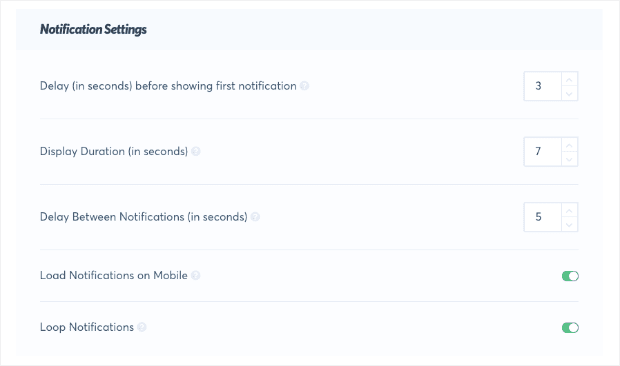
And more. TrustPulse makes it easy for you to be in charge of every aspect of your social proof notifications. That’s because no one knows your audience as well as you do.
That means you should be able to determine when, where, and to whom your notifications display.
For today’s tutorial, we’ll leave the default setting Display on any page. We made the default settings work for the larget amount of people so they could get started going out-of-the-box.
When you’ve configured your personal display settings, hit Next Step.
Step 5: Publish Your Social Proof Notification
In this last step, you’ll be able to preview your notification before it goes live. That way, you can make any last-minute changes while you’re still in your dashboard.
If this is your first time using TrustPulse, your site may not be connected yet. If so, you’ll see a warning message like this:

Fortunately, this is a quick fix.
Check out this tutorial to learn how to connect TrustPulse to a WordPress site.
Not on WordPress? No worries. TrustPulse can work with any website platform you have. Read this guide on how to connect TrustPulse to any site.
Once you’re connected, all you need to do is hit Launch your TrustPulse campaign:
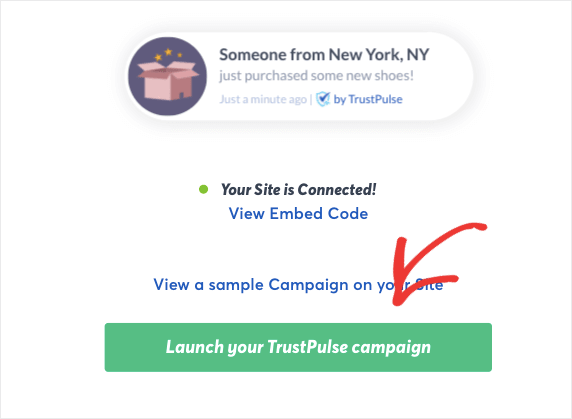
And that’s it. You now have a social proof notification ready to go.
In this tutorial, we made a notification based on sales from our website. But, again, this is just one of the many types of social proof you can display.
You can set up many other kinds of social proof notifications to boost sales.
If you liked this article, you may also enjoy learning about how to use trust badges on your site to build even more trust with your visitors.
That article goes through 12 types of trust badges that build more credibility for your brand.
Ready to get started using social proof notifications to boost sales? Sign up for TrustPulse today for free!
