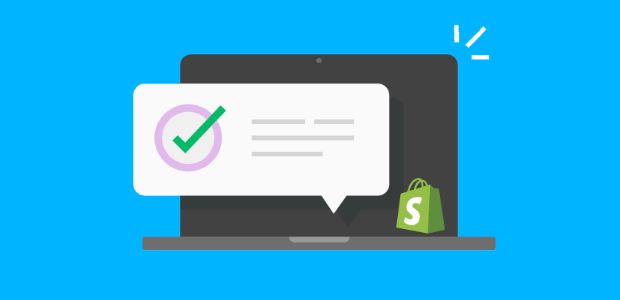
Do you want to learn how to add live sales notifications for Shopify to boost sales?
Visitors who visit your Shopify website for the first time can be hesitant to purchase. Fortunately, you can change that by adding live sale notifications for Shopify.
In this blog, we’ll teach you how to add a live sales notification for Shopify in 5 easy steps.
But first, let’s clarify what live sales notifications are and why they work so well.
What Is a Live Sales Notification?
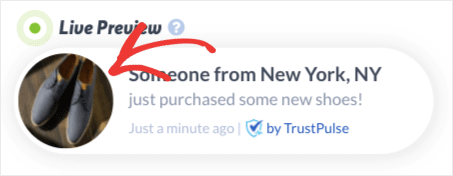
A live sales notification is a small popup message showing your site’s visitors when other people have made a recent purchase. In other words, they’re a live sales popup that displays recent sales.
You’ve likely seen these ‘someone just bought’ sales popups before, maybe even while reading this post:
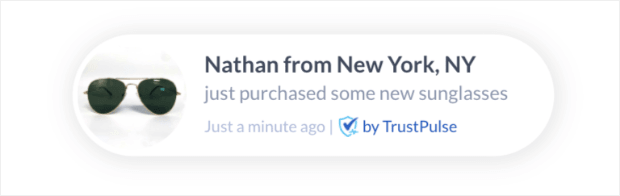
These small recent sale notifications can lead to big increases in your sales. What makes them work so well?
Two words: Social Proof.
When people look through your website, they might need more time to be ready to purchase on their first visit. This is where social proof comes in to save the day.
When your site’s visitors see that other people are actively shopping with you, two things happen
- They instantly feel that your site is more credible
- They get hit with a dose of FOMO (fear of missing out)
Both of these lead to more sales for you.
People who can trust your site are more likely to make a purchase. When they see others buying from you, that makes their buying decision easy.
How do we know that live sales notifications work so well? Because we’ve seen them regularly increase sales by 15% for online store owners like you.
These sales are accomplished through upsells, product recommendations, or simply displaying what someone just bought.
Therefore, we’ll teach you five easy steps to add a live sales notification for your Shopify store.
Resources:
- What Is the Difference Between Upselling and Cross-Selling?
- How to Use Trust Badges to Boost Sales and Conversions
How To Add a Live Sales Notification for Shopify?
For this tutorial, we’ll use TrustPulse:
TrustPulse is the best Shopify sales notification app on the market. This is especially true for Shopify users who usually have limited coding knowledge and want to see sales fast.
With TrustPulse, you can build live sales notifications in minutes. You have 100% control over your campaigns’ design, messaging, and style.
Then you can target specific pages or areas of your website to get the highest conversion rate possible.
And with our new Order Priority feature, you can let some notifications “jump the line.”
That means if you have a popular promotion or urgent notification, you can make sure this is the first message your site’s visitors see.
Want to try it out for yourself? Sign up for your 100% risk-free TrustPulse account to get started.
Now let’s dive into our tutorial.
Step 1: Choose a Campaign Type for the Shopify Notification
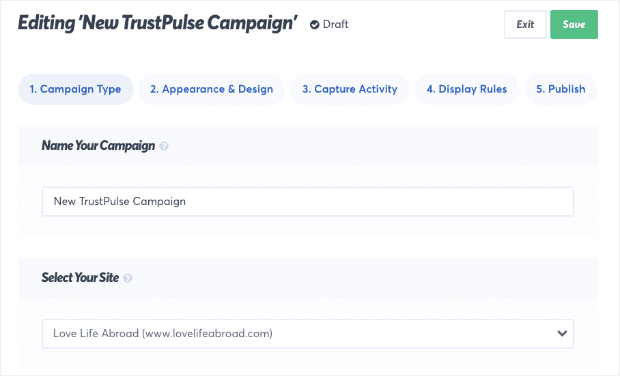
First, you must sign up for TrustPulse, the leading Shopify sale notification app. TrustPulse easily adds a live sales popup to your Shopify store.
Once you’ve signed up, log into your TrustPulse account and create a new live sales notification for Shopify. Name your new campaign and assign it to your Shopify store:
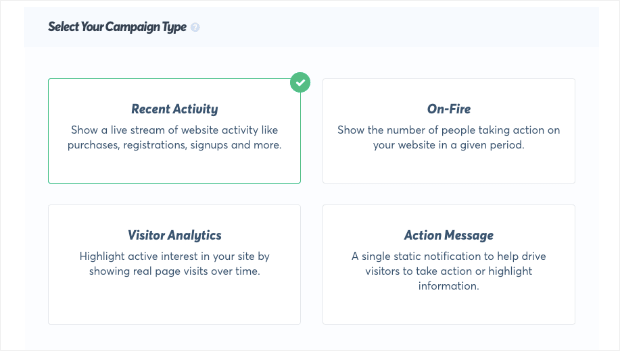
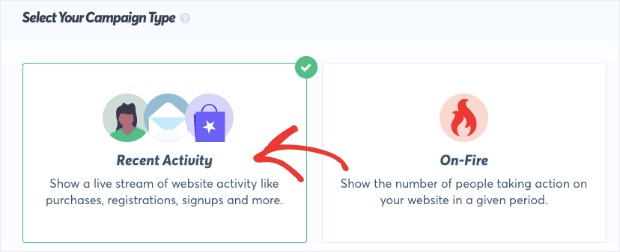
Then select your campaign type. You have four choices here:
- Recent Activity
- On-Fire
- Visitor Analytics
- Action Message
Both campaigns are incredibly effective when used in the right situation.
Recent Activity is perfect for showing daily notifications for actions taken on your Shopify store. They display an individual purchaser:
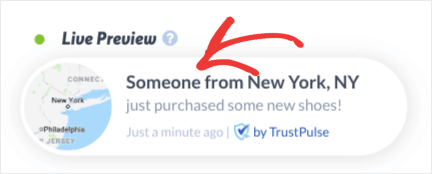
These work for things like showing customers when someone just bought something, signed up for a newsletter, or left a comment on a blog post.
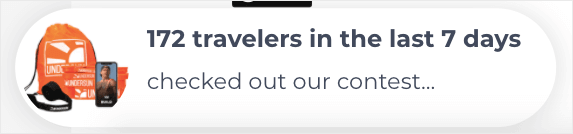
On-Fire works best when you expect large amounts of people to take a specific action in a short amount of time. That’s because they show the number of customers who took action on your Shopify website:
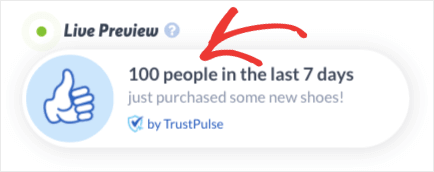
These campaigns work well for flash sales, site wide contests, or any other promotion that generates a lot of participants.
Visitor Analytics captures the number of unique visits to individual pages over a while. You can track all pages on your site or specific URLs or categories of URLs.
You can show visitors how popular posts and pages are to convert them into customers and subscribers. This works great for blog posts, contest pages, webinar signups, and popular product pages.
Action Messages let you create a static Shopify message for your visitors. You can welcome visitors, ask them to signup, let them know they can chat with you, or alert them about sales.

With this campaign type, you can send any message to your visitors on Shopify.
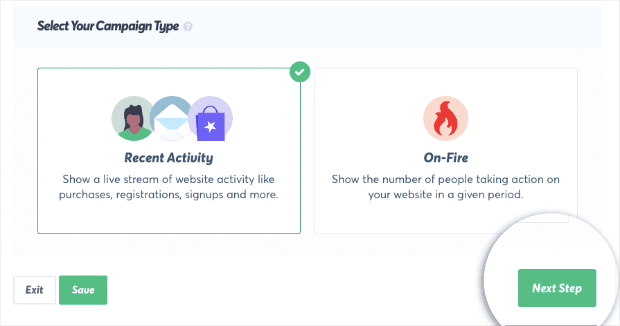
For today’s live sales notification for your Shopify store, we’ll go with Recent Activity:
Then, click Next Step:
Step 2: Customize the Appearance & Design
Now, you’re going to modify the appearance and design of your sales notification. With TrustPulse, you have 100% control over your campaign’s customization.
You have many options to tailor your campaign to your brand and promotion. You can change your popup notification’s:
- Language
- Visitor name
- Message text
- Message link
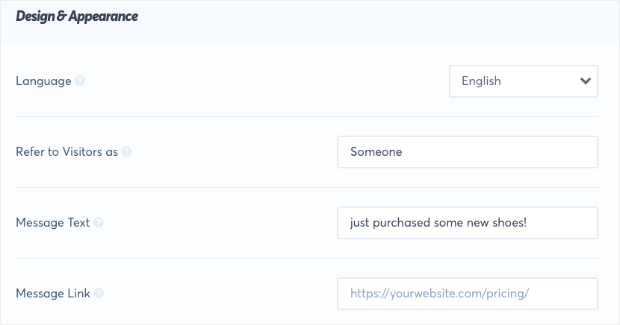
And more.
The last option, Message Link, is especially important:
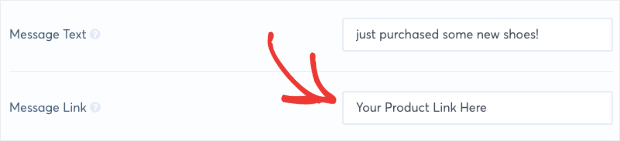
When users see your Shopify sales notification display, you’ll want to give them easy access to check out what another customer recently purchased. That can include a link to:
- A specific product
- Categories within your Shopify store
- Product reviews
Or any other link that will help you convert casual website visitors into paying customers.
Another change if you’re running a Shopify sales notification for a specific product is displaying a photo of the item in the sales popup.
You can do that by clicking the drop-down menu next to Notification Image, selecting Custom Icon, and clicking Upload New Image:

Then upload a photo of your product, and users will see what other customers have purchased:
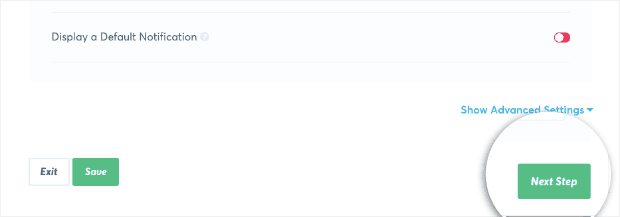
It would help if you spent some time making your live Shopify sales notification as personalized as possible. Once you’ve tailored your campaign to your brand, voice, and style, click Next Step:
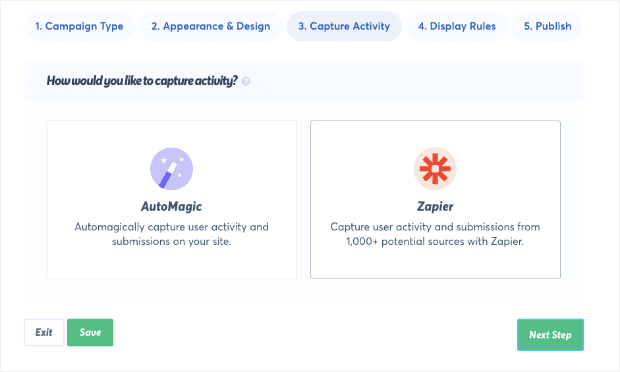
Step 3: Capture Activity on Your Shopify Store
In this step, you’ll set what action you want to trigger your Shopify sales notification. You have two options for capturing engagement with your online store:
- AutoMagic
- Zapier
AutoMagic is perfect for capturing real-time activity on your website. This includes newsletter signups, contest participants, or recent sales notifications.
Zapier is an integration that allows you to display a notification when people engage with your brand somewhere other than your website. You could display a notification when someone leaves you a review on Google My Business.
Even though they didn’t take action on your Shopify store, our Zapier integration will allow you to create a triggered campaign for that event.
For today, we need to choose AutoMagic since the sales will occur in your online store:

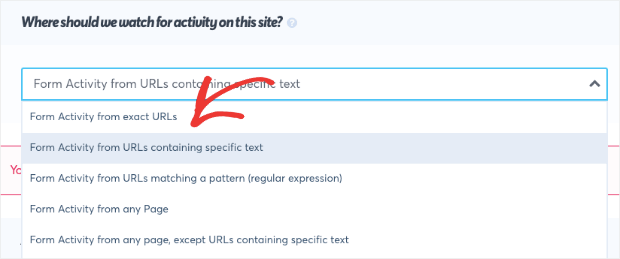
Then, you can select which activity on your site will trigger your sales notification.
In the drop-down menu under Where should we watch for activity on this site?, select Form Activity from URLs containing specific text:
Below that, you need to locate Add one or more page rules and add the word checkouts to the URL of your Shopify store:
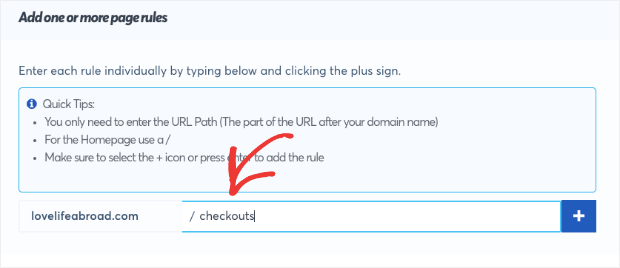
Then click the + icon:
![]()
You’re creating this rule because you want to show when a sale has occurred on your site.
You need to capture any activity on your checkout page when people pay. Shopify store URLs use the unique term checkouts (note that the word is plural) when people pay for an item:

With this campaign rule, you’ll show other users whenever someone has taken action on your checkout page, which displays when customers make a purchase.
Now it’s time to customize where and when your live Shopify sales notification will display your site’s recent order by clicking Next Step.
Step 4: Choose Display Rules for Your Notification
You’ll need to decide which pages to show your Shopify sales notifications on. You can easily choose any page or category on your site, including:
- Any page
- Exact URLs
- URLs containing specific text
- URLs matching a pattern
And more. The most common use for a sales notification is our default setting, Display on any page:
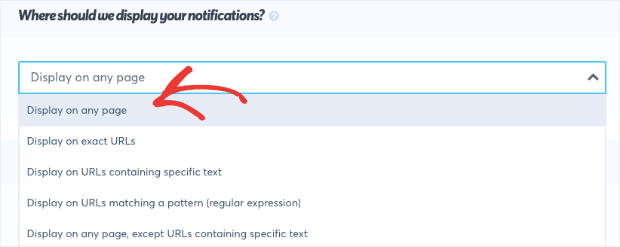
This will show your Shopify sales notification on all pages of your site. That way, most of your online store’s traffic will see your campaign.
From there, you can choose some notification settings, such as:
- Delay between the sale and the notification (in seconds)
- How long your notification will appear on the screen
- Delay between separate notifications (in seconds)
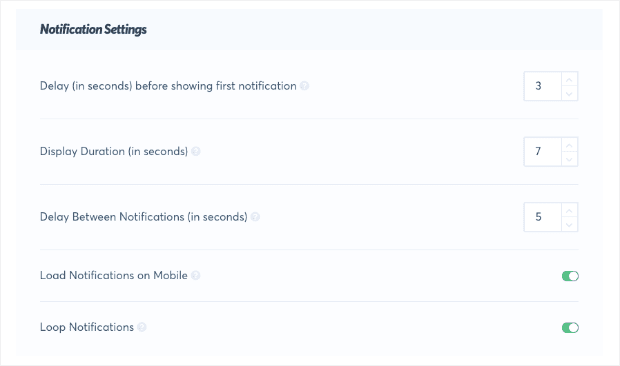
And other display settings that allow you to decide exactly when and where your Shopify live sales notifications will appear.
Once you’ve determined what display settings will work best for your campaign, click the Next button to make your notification live.
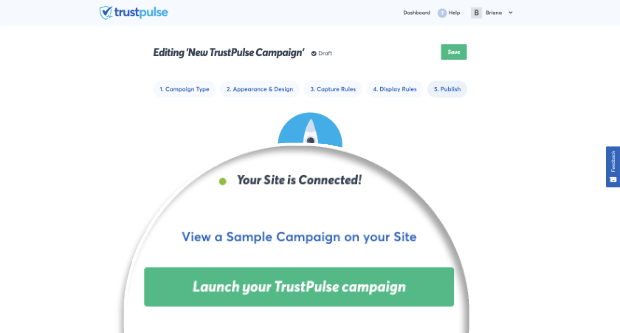
Step 5: Publish Your Live Sales Notification
Now comes the easy part. Review your campaign to make sure that it matches what you want your users to see:
Then click Launch your TrustPulse Campaign:
Sometimes, your Shopify website may not be connected to your TrustPulse account yet. If that happens, you’ll receive a small warning:
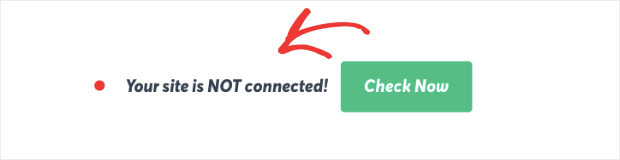
If you’re using WordPress, you can connect your website from your WordPress dashboard.
Are you not using WordPress? If that’s the case, check out this helpful guide on how to add TrustPulse to any website. That resource will walk you step-by-step through getting TrustPulse connected to your website.
And that’s it!
You have now added live sales notifications showing users when someone buys a product on your Shopify store.
You can use these to improve UX on your site, reduce cart abandonment, and boost conversions and sales across your site.
Which Shopify Sales Notification App is Right for You?
If you’re looking for a cost-effective way to increase sales and conversion rates for your Shopify store, you should get started with TrustPulse.
TrustPulse is the #1 live sales notification app in the world. We recommend using TrustPulse to create Shopify sales notifications and grow your eCommerce business.
Ready to get started? Sign up for your risk-free TrustPulse account today!
If you liked this article, also check out: How To Add Live Sales Notification for WooCommerce
