Do want to create a dedicated page to capture leads on your WordPress site?
With a lead capture page, you’ll have a single signup location to send people from any channel, whether it’s another web page, email, or social media.
This helps you streamline your leads and grow your email list faster.
In this article, we’ll show you the best way to set up an optimized lead capture page.
Before we start, though, let’s quickly see what a lead capture page is and what it can do for your business.
What Is a Lead Capture Page?
A lead capture page is a landing page that includes a signup form or CTA (call to action) button for visitors to join your mailing list, sign up for webinars or events, or subscribe to any campaign.
To make the page successful and maximize subscribers, you can add:
- Discounts and offers
- Lead magnets such as a free eBook or checklist
- Reviews
- Testimonials
- Trust badges and seals
This will make it worthwhile for the visitor, and they’ll be more willing to give you their email address in exchange for your offer.
Now that you know what a lead capture page is, let’s take a look at the best way to build a lead page that actually converts so you can start to collect leads now!
How to Create a Lead Capture Page in WordPress
For today’s tutorial, we’ll be using SeedProd to create a lead capture page:
SeedProd is the #1 landing page builder plugin for WordPress, and we’ve chosen it today because it comes with:
- 100+ stunning templates and access to 2+ million stock photos
- Responsive designs that look great on all devices
- Advanced blocks and elements to add optin forms, countdown timers, and more
- Pages that load at lightning speeds
- Built-in coming soon and maintenance mode pages
- Subscriber management tools
- Email marketing integrations
Plus, SeedProd makes it easy to create beautiful pages without any coding knowledge or design skills.
Before we head to the tutorial, we want to draw your focus to the purpose of this page. A lead capture page is set up to get more people to become subscribers or customers.
But if visitors aren’t convinced about your brand’s credibility, they’ll likely leave the page without signing up. To gain visitors’ trust and nudge them to sign up, you’ll need a powerful social proof tool like TrustPulse.
TrustPulse is the best social proof app for WordPress. It lets you capture signup activity on your site and display it in non-intrusive popups on your site.

These social proof popups work in 2 ways:
- Creates a sense of FOMO (Fear of missing out) – When people see others signing up, a natural instinct kicks in that urges them to do the same or they feel they’d be missing out. As a result, more people will be motivated to join your mailing list.
- Builds trust and confidence – When visitors first come to your page, they have no reason to trust you. When they see that others love and trust your brand, they’ll be more comfortable giving you their email address.
Ready to instantly boost conversions on your WordPress site by up to 15%? Sign up for your 100% risk-free TrustPulse account today!
Now, let’s get started with building a beautiful lead capture page for your WordPress site. Here’s a sample of the page we’ll be creating.

Keep in mind that SeedProd has tons of templates and options to customize your own page.
Step 1: Installing the SeedProd Landing Page Builder
The first thing you’ll need to do is sign up for SeedProd. When you do, you’ll get a license key and a plugin file to download.
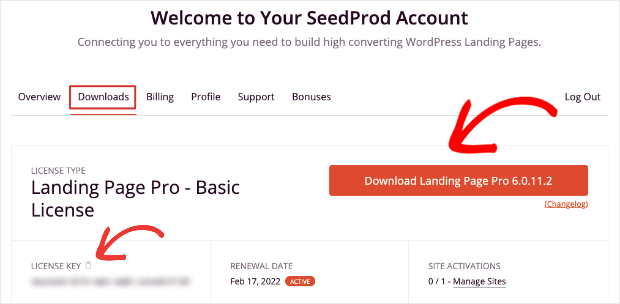
You can install and activate the plugin on your site. For more help, follow this guide to install a WordPress plugin.
Then, you can access the SeedProd » Settings page from your WordPress admin menu and enter your license key.
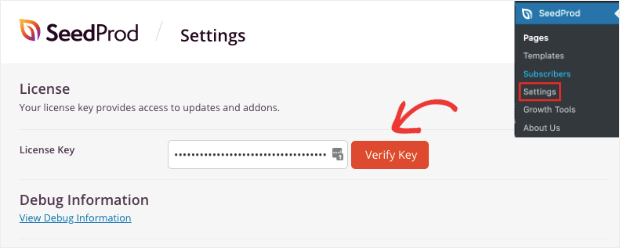
Once you verify your license key, you can create your first page.
Step 2: Creating a Lead Capture Page
To create a new page, go to the SeedProd homepage in your WordPress dashboard, and you’ll see 4 page modes available:
- Coming soon
- Maintenance
- 404
- Login
Below this, you’ll see an option to Add a New Landing Page. Click on this button to open up the templates page.
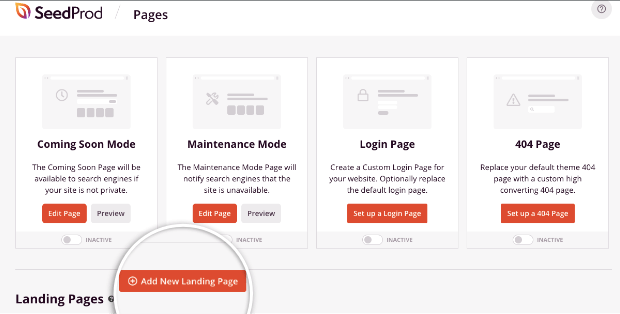
SeedProd displays all the templates available and you can browse through them by category. Today, we’ll select the Breakthrough template from the Lead Squeeze collection.

The Lead Squeeze templates come with optin forms and are optimized to capture leads. You can explore these templates by hovering over them and clicking on the magnifying glass icon to preview them.
Once you select your template, you’ll need to enter a name for your page. This will also auto-generate a URL that will serve as your landing page.
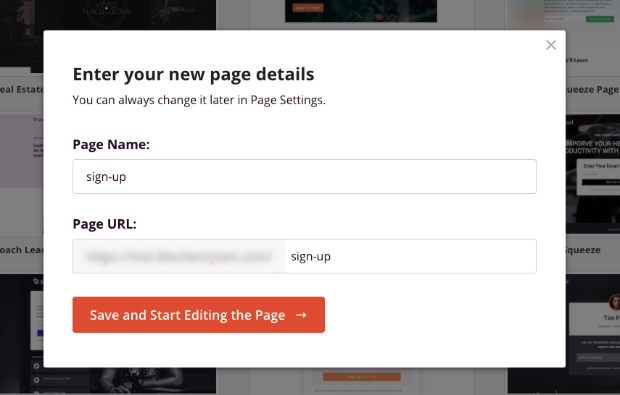
Then click on the ‘Save and Start Editing the Page’ button. The SeedProd builder will open where you can customize the page.
If you want to learn more about lead squeeze pages, read What is a Squeeze Page (+ 6 Examples of High-Converting Squeeze Pages).
Step 3: Customizing the Lead Capture Page
SeedProd has a drag and drop visual builder that’s extremely easy to use. You’ll see a preview of your page that you can edit directly.
To get started, we’ll first show you how to add new elements to the page. From the menu on the left, you simply need to drag and drop any element you want into your page.
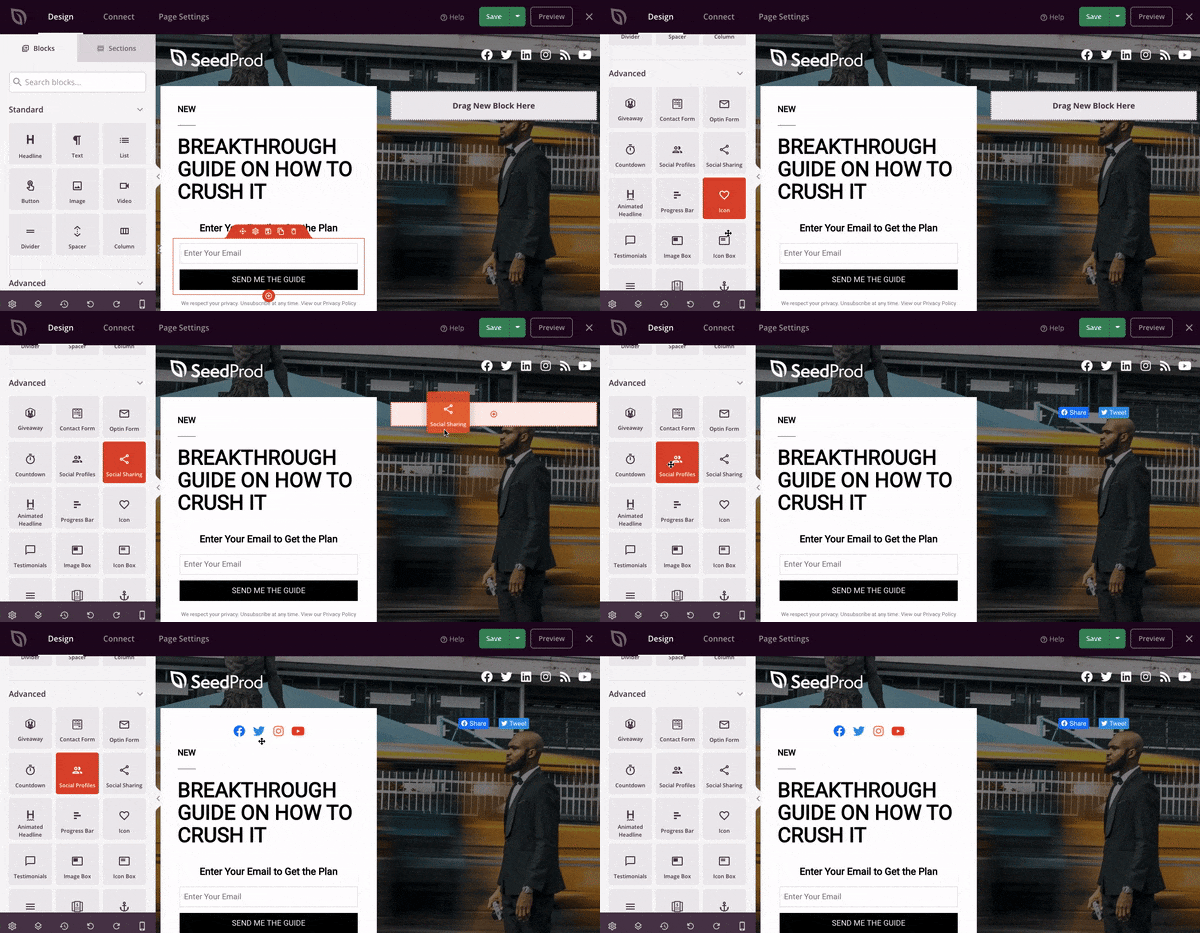
- Giveaway
- Animated headline
- Optin form
- Countdown timer
- Star rating
- Testimonials
- Social profiles
- Social sharing
- And more…
SeedProd has all the elements you need to make your lead capture page stand out.
And if you want to sell products, SeedProd also has WooCommerce-specific elements to add product grids, ‘Add to Cart’ and ‘Checkout’ buttons, and much more.
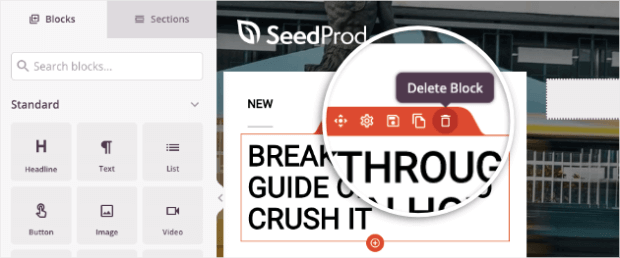
Next, to delete elements or sections, SeedProd displays a Delete option above every element when it’s selected.
If you want to change the background image to match your brand and message, open the Global Settings menu. In the Background tab, you can upload an image or select one from the media library.

SeedProd has tons of free stock images, so you won’t have to worry about copyright issues and paying for image licenses.
Next, to make changes to the copy, simply select any text field and enter your own message to connect with your target audience.


Finally, to add a list of items, select the ‘List’ block, then drag and drop it into your page.
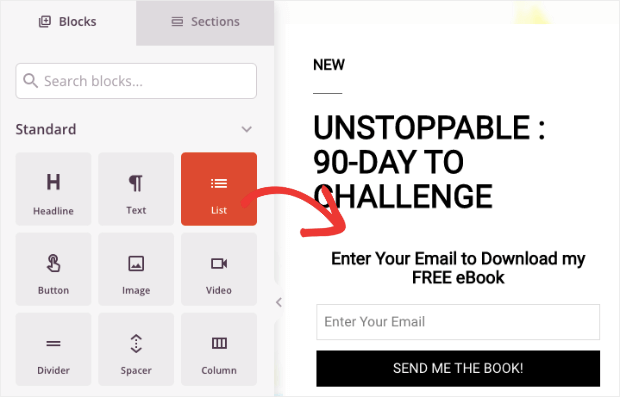
Now you can fill out the different items you want to include in your list in the left column and change the icon you want to display.
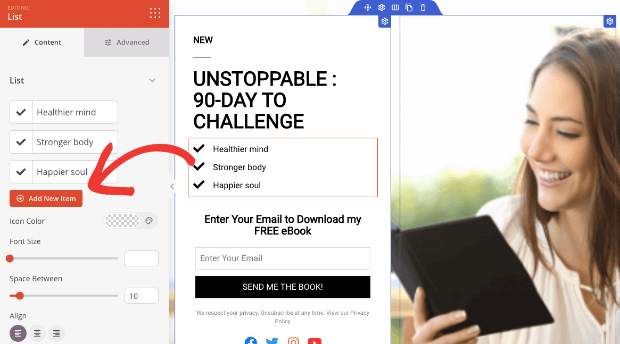
With that, your page design is ready. And now that you know how to use SeedProd’s builder, you can go ahead and create a unique page for your audience.
Next, we’ll show you how to connect the lead capture page to your email service provider.
Step 3: Integrating With Email Marketing
When you capture leads on your landing page, you’ll want to add them to your email list.
Instead of manually importing or copying them, you can integrate this page with your email service provider (ESP).
SeedProd integrates with all popular ESPs including Constant Contact, AWeber, Mailchimp, and Drip.
In the SeedProd builder, open the Connect tab.
You’ll see the email and marketing integrations available.
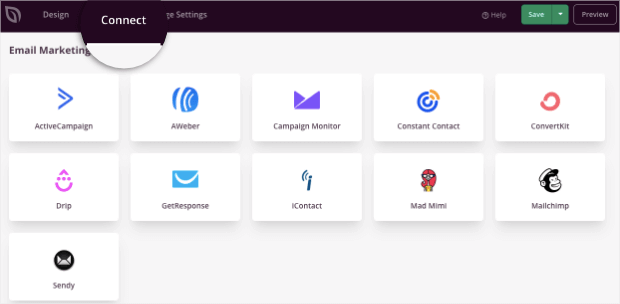
Select your email provider and follow the instructions to log in to your account. Now your email account and the lead capture page are successfully connected.
As soon as a user signs up, they’ll be added to your email contact list. You can also set up automatic email triggers with your ESP to deliver the lead magnet or discount promised on the lead capture page.
Step 4: Configuring Page Settings
The next step is to configure the page settings so your lead capture page works the way you want it to.
In the Page Settings tab, you’ll see options to set a page title and URL slug.
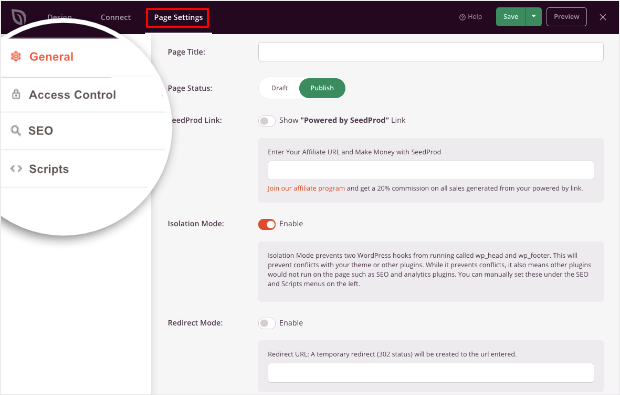
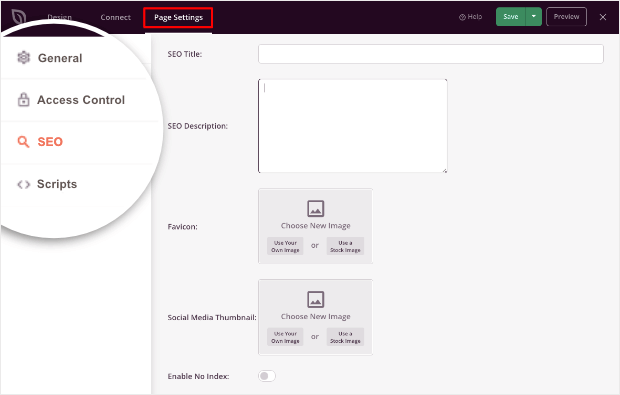
In the left taskbar, navigate to the SEO settings. You can add an SEO title, description, and favicon image.
If you want this page to be hidden on search engine results, use the toggle switch to Enable No Index option here. This will make sure the page isn’t available on Google, Bing, and other search engines.
Next, you can add your own header, body, and footer scripts as well.
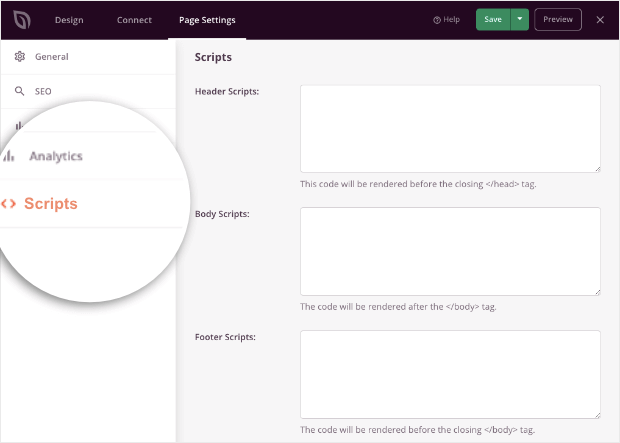
If you aren’t tech-savvy, we recommend leaving these empty as the out-of-the-box templates will have everything you need.
Now all that’s left to do is publish the lead capture page.
Step 5: Publishing the Lead Capture Page
SeedProd lets you see a preview of your page before you publish it. You’ll find the Preview button at the top right-hand corner of the page builder.
You can also see what your page looks like on mobile using the mobile preview option at the bottom-left of the page.
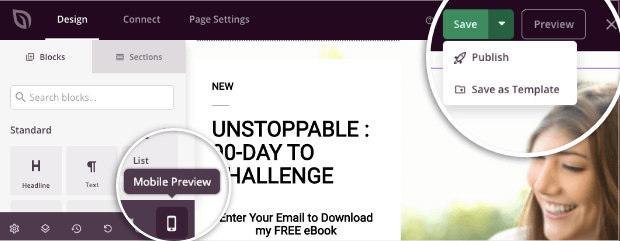
Then Save the page and use the drop-down menu here to Publish it.
Now your lead capture page is live on your WordPress site. You can copy the landing page URL and share it on social media ads, emails, and other platforms.

That’s all we have for today! We hope this post helped you create a stunning lead capture page for your website.
For your next steps, to boost sign-ups and grow your email list faster, we recommend using TrustPulse to create conversion-optimized recent activity popups.
And if you don’t have any signups yet, you could use visitor analytics campaigns to showcase how many people are interested in your newsletter.
Here’s an example of what that kind of campaign might look like:

If you liked this post, you may also want to check out more of our resources:
- What is a Splash Page (+ 7 Excellent Splash Page Examples)
- 19 Best Lead Generation Tools to Get More Targeted Leads
- 11 Conversion Rate Optimization Tools To Capture Leads
- 9 Best FOMO Plugins for WordPress To Boost Conversions
These posts are packed with info to help you find the right tools to boost signups and conversions on your WordPress site.

