
Do you want to know more about your site’s visitors?
Tracking visitors can help you get valuable insights to better understand your audience. This data is key to boosting sales and achieving long-term growth.
That’s why, in this post, we’ll show you how to set up and use visitor tracking in WordPress with 2 powerful tools.
But before we dive into the tutorial, let’s get clear on why you’d want to track your website visitors in the first place.
Why You Need To Track Your Website Visitors
Websites are created for visitors to come and explore your content, products, and services.
They help you build brand awareness and are effective sources of sales and revenue. That means tracking your website visitors is by far the most important indicator of your site’s performance and growth.
With visitor tracking, you can see where your traffic is coming from and how visitors interact with your website.

Using this data, you’ll be able to improve and optimize your site. Here’s how:
- Tailor your website content to cater to what your audience likes
- Find more ideas for blog posts that draw traffic
- Target visitors with marketing campaigns that they’ll be more likely to respond to
- Figure out which language to translate your website into
- Find out which traffic sources are performing the best such as search engine or social media
With valuable insights into your visitors, you can figure out where to invest your time and money.
Plus, as we’ll see a little later in this article, you can even use this data to instantly get more sales and revenue. By showcasing the number of visitors you have on your site (and what actions they’re taking), you can instill trust and confidence in new visitors.
To use visitor tracking in this way, you can showcase social proof popups on your website.
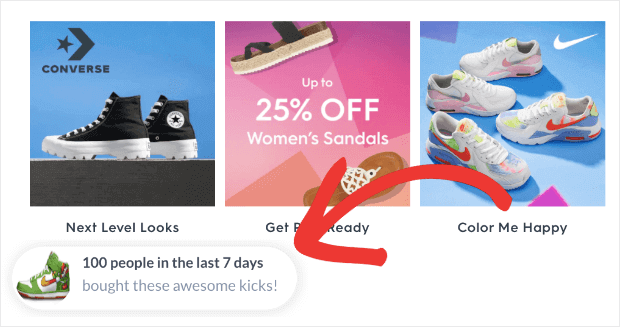
This shows visitors how popular your site is. You can showcase how many people bought a product, signed up, commented on a blog post, or took any action on your site.
These visitor tracking popups create a sense of FOMO (fear of missing out). This means that people will be more likely to take actions they see others already taking on your site.
Now that you know how visitor tracking can help you in different ways, let’s dive into the tutorial.
How to Set Up Visitor Tracking in WordPress
In this tutorial, we’re going to cover 2 methods to track visitors and use the data to optimize your site:
We’ll first show you how to track and display visitor analytics on your site to instantly boost conversions and revenue.
Method 1: Track and Display Visitor Analytics as Social Proof
Tracking visitors is super easy with TrustPulse:

TrustPulse is the #1 social proof app that instantly boosts sales and conversions on your site by up to 15%.
It lets you track all sorts of visitor activity like page views, purchases, signups, subscriptions, and more.
TrustPulse then helps you create non-intrusive popups to showcase this activity.
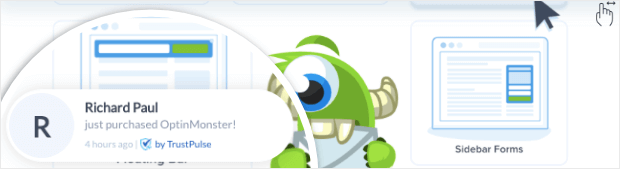
These small notifications are fully customizable, and you can choose where they appear on your site. Plus, here are a few other features that you’ll really love about TrustPulse:
- Easy to install and use
- Set up visitor tracking in minutes
- Customize notifications with a few clicks
- Choose from multiple campaign types, including live visitor counters, real-time activity, and static messages
- Boost sales by displaying social proof to the right people at the right time
- No coding required
We should also mention TrustPulse is affordable and comes at a fraction of the cost compared to other social proof tools.
To learn more about how TrustPulse stacks up to the competition, check out this post: FOMO vs UseProof vs TrustPulse: Which Is Best for Social Proof?
Finally, TrustPulse works on ANY website, including WordPress.
All these features make TrustPulse the best tool to track and display visitor analytics in a way that will boost your sales.
To show you how to use TrustPulse, we’ll create a visitor tracker for an online course called ‘CourseFalcon’. We’ll showcase how many people have booked a high-value Digital Marketing course.

When visitors see how many people bought the course, they’ll know it’s in demand and be prompted to check it out.
Let’s begin.
Step 1: Installing TrustPulse on WordPress
To get started, you’ll want to sign up for your 100% risk-free TrustPulse account.
Then, install and activate the TrustPulse plugin on your WordPress site.

Never installed a WordPress plugin before? No worries. Just check out this detailed tutorial: How to Install a WordPress Plugin: 3 Methods.
When you activate the plugin, you can access the TrustPulse dashboard from your WordPress admin area.
You’ll see two options here to get started for free or connect an existing account.
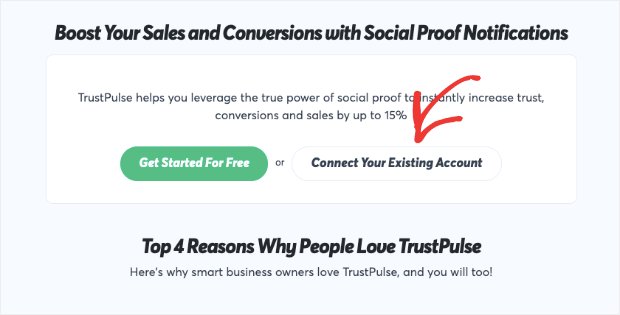
Make sure you’re signed in to your TrustPulse account in another tab. Then, in your WordPress dashboard, select the ‘Connect an Existing Account’ button, and TrustPulse will automatically detect your account.
For more details, see our guide on how to integrate TrustPulse with WordPress.
Now any campaign you create and launch with TrustPulse will go live on your WordPress site.
Not using WordPress? Follow along with this in-depth tutorial: How to Add TrustPulse to Any Website.
Once you’ve gotten TrustPulse set up on your site, it’s time to create your visitor tracking campaign.
Step 2: Creating Visitor Tracking Campaign
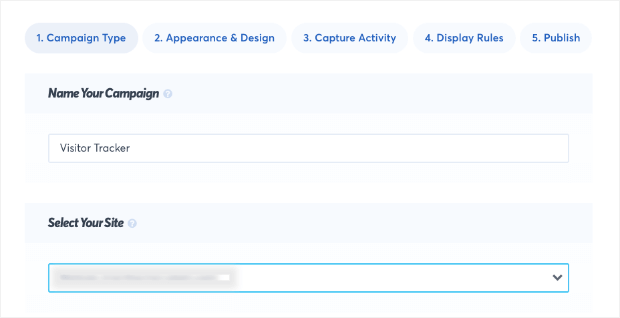
To create the visitor tracking campaign, open your TrustPulse account and select the ‘Create Campaign’ button.
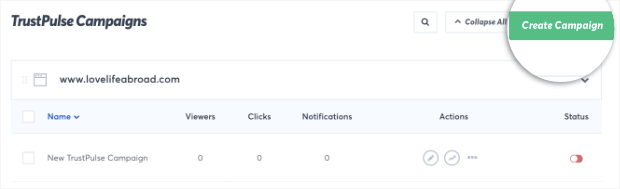
This will open up a campaign editor where you can give your campaign a name. For this campaign, we’ll name it ‘Visitor Tracker.’
Below this, there are 4 types of campaigns you can choose from:
- Recent Activity: Show a live stream of website activity like purchases, registrations, and more.
- On-Fire: Show the number of people taking action on your website in a given period.
- Visitor Analytics: Highlight active interest in your site by showing real page visits over time.
- Action Messages: Display a single static notification to help drive visitors to take action.
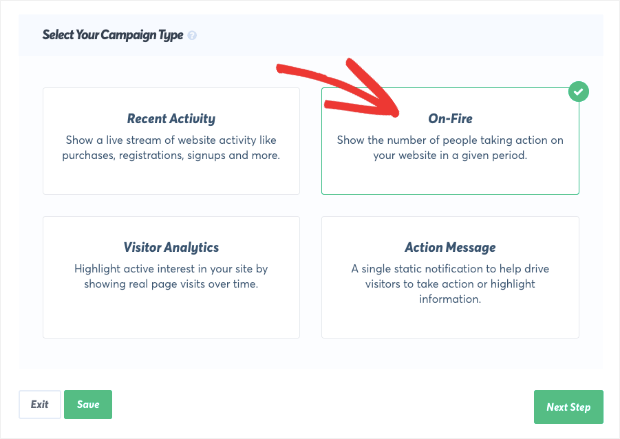
Today, we’ll focus on the On-Fire campaign type. This will track visitor activity and then create social proof popups to show how many people took action in a given period of time.
In case you’re just starting out and haven’t made any sales or conversions yet, the Visitor Analytics campaign would work better for you. This will show a page/product’s popularity by tracking the number of people that visit the page.
After you select the campaign type, click on the Next button to start building your campaign.
Step 3: Building the On-Fire Campaign
TrustPulse will open up a campaign builder to design your visitor tracker.
In the Design & Appearance tab, you’ll see options to customize the popup.
First, you can change what you would like to name the group. By default, the group name is ‘People.’ You can customize this to ‘Subscribers’ or any label you want to match your brand.
For this demo’s brand, ‘CourseFalcon,’ we want to create a sense of community. That’s why we use the label “falcon” to show people who signed up.
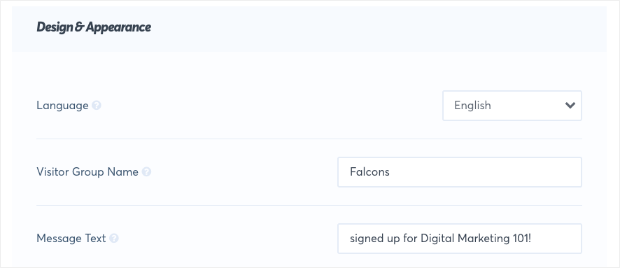
Next, you’ll need to enter the message text. By default, this is ‘visited this page.’ You can change this depending on the activity you want to track.
For instance, if you’re tracking how many people signed up for your webinar, you can change it to ‘signed up for my webinar!’ We’ll enter ‘signed up for Digital Marketing 101!’
In the next ‘message link’ field, you can add a link to the page you would like them to visit when they click on the popup.

We’d like to direct the user to the Digital Marketing 101 course page. With that in place, any visitor who shows interest in the popup by clicking on it will be taken to the course page where they can sign up.
This means they won’t have to spend time searching for the course page but, instead, can access it immediately.
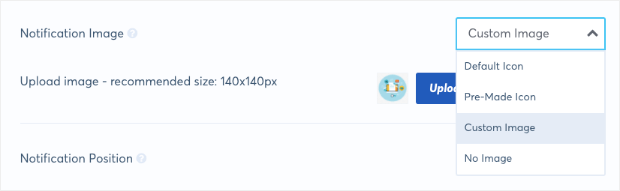
After this, you can select the image to be displayed in the popup. TrustPulse lets you pick one of the premade icons or upload a custom image.
For this tutorial, we simply created a bright image that depicts digital marketing and uploaded it here.
One of the best features of working with TrustPulse is that you can always see a live preview in the bottom right corner of your page.
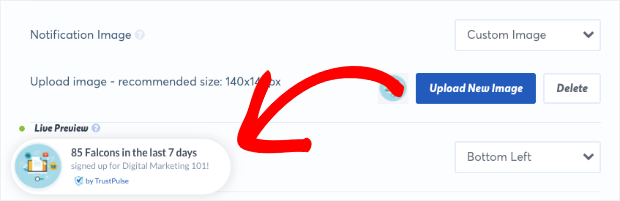
As you make changes, you’ll see it reflected here. So you know what the popup will look like as you build and customize it.
Below the image options, you’ll see more customization features. We’ll dive into those options next.
Step 4: Customizing Your On-Fire Campaign Design
TrustPulse lets you customize everything about the visitor tracking popup.
In the same ‘Appearance and Design’ tab, you can choose where you want the popup to appear on your site.
It can appear on the bottom left or right, or the top left or right.
You can also change the shape of the popup. You can make it rounded or square, compact or expanded.
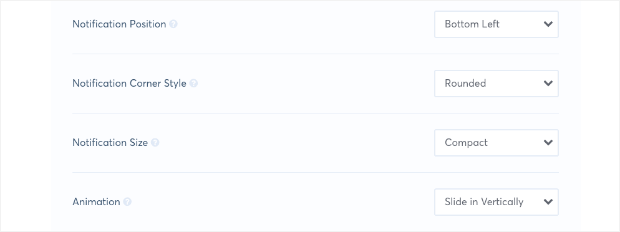
Lastly, you can adjust the animation to fade in or slide in.
TrustPulse also lets you change the color and font of the text in your notification. You can do this under the Advanced Settings menu.
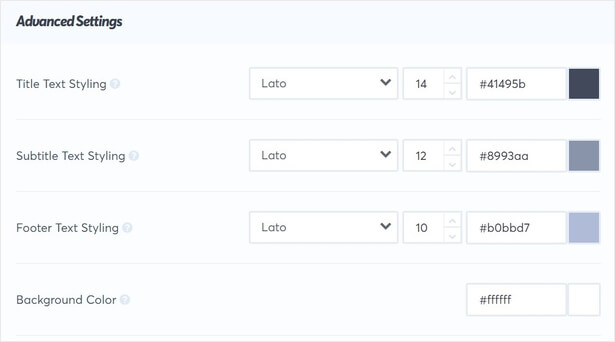
Using these customization options, you can match your campaign with your website theme and branding.
After you’ve customized the popup design, ‘Save’ this page.
Step 5: Capturing Site Activity
TrustPulse automatically looks for user activity and submissions on your site, but you can decide what kind of activity is captured.
Open the ‘Capture Activity’ tab, you’ll see that there’s ‘Auto Magic’ enabled. This means TrustPulse is already set up to track activity on your site.
You simply need to select where you want to capture the activity from.
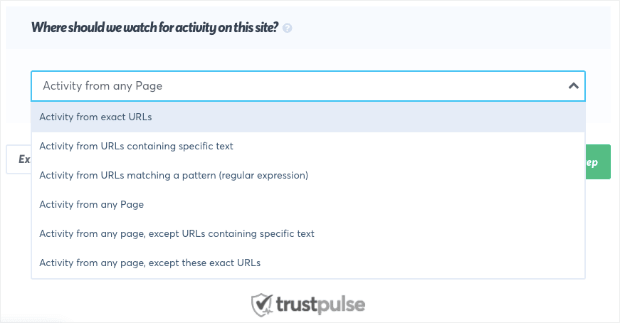
You can track activity from exact URLs or from any page on your site. Or you can filter by specific keywords or patterns.
We want to capture signups on our Digital Marketing Course. For that, we’ll select ‘activity from exact URLs’ and enter the URL for the course.
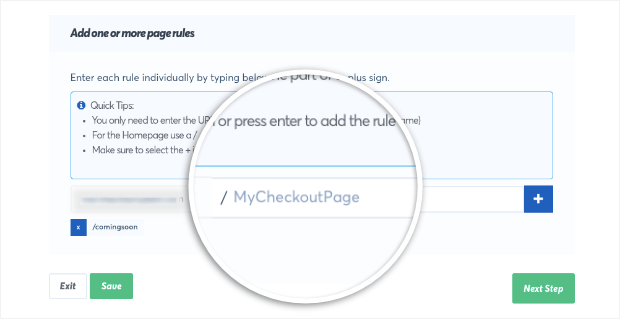
Now TrustPulse will capture signup activity from the Digital Marketing 101 course page.
Step 6: Setting Up Display Rules
Display rules will control where and when the On-Fire popup will appear.
To set up your own display rules, open the ‘Display Rules’ tab.
Here TrustPulse will ask you where it should display your notifications.
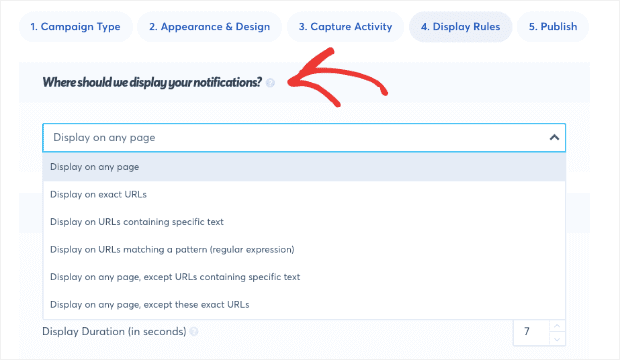
The popup can be displayed on any URL or specific URLs. Or you can filter by specific keywords or patterns.
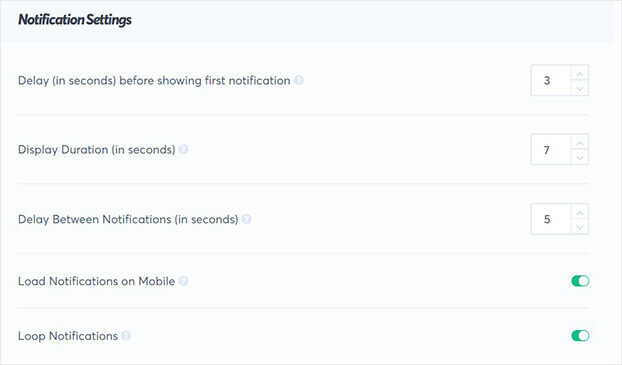
After you’ve made your choice, you can add a delay to the popup before it displays to a visitor. For example, you may want the user to browse your site for at least 10 seconds before the popup appears.
You can also choose how long the notification will remain visible.
If you’re setting up multiple campaigns, TrustPulse lets you set the order in which you want them to appear.
Simply open the ‘Advanced Settings’ menu and under ‘Order Priority,’ and you can set the order for the notification.
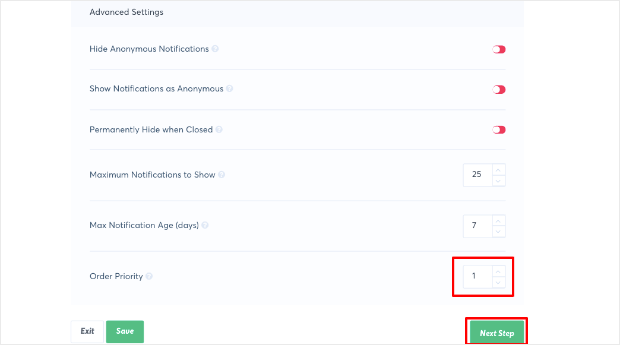
This tells TrustPulse which campaigns to give preference to.
Once you’ve created your display rules, you’re ready to publish the campaign.
Step 7: Publishing Your On-Fire Campaign
To launch your On-Fire campaign, open the ‘Publish’ tab. You’ll see a preview of your popup here.
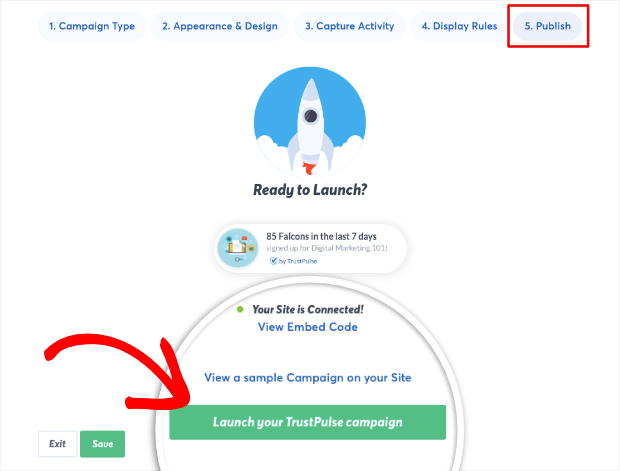
All you have to do is hit the ‘Launch your TrustPulse campaign’ button.
With that, your campaign will go live on your site. You can save and exit this page.
Step 8: Tracking the Success of Social Proof Popups
TrustPulse automatically tracks how many people view and engage with your campaign. This lets you see how well the campaign is performing.
To access this data, head over to your TrustPulse dashboard. Here, you’ll see a list of your campaigns.
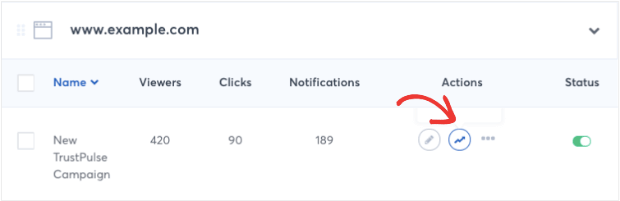
Simply click on the ‘analytics’ icon next to your campaign.
On the analytics page, you’ll see a list of all the people who viewed your campaign and where they came from. You’ll also see data and graphs of your campaign performance so you can know what your audience likes and responds to.
You can then make adjustments to your visitor tracker campaigns to get the best results.
And with that, you’ve successfully set up visitor tracker popups on your site to really boost conversions. You may also want to learn how to set up recent sales notifications on your site.
Up next, we’ll show you how to track website data and visitor analytics in WordPress.
Method 2: Tracking Website Visitor Data and Analytics
To track website visitors and data on your site, you need Google Analytics. It’s packed with valuable statistics and reports about your visitors.
That said, it’s a bit complicated to set up. And moreover, it gives you so much data that most people don’t know what to do with it.
They end up tracking random numbers that don’t actually do much for growth and conversions.
To solve this problem, we’ll be using MonsterInsights.

MonsterInsights is the best Google Analytics tool for WordPress.
It’s user-friendly and gives you insights that you can actually use to grow your business. It does this by turning complex data into reports that are easy to read and understand.
So you won’t need to navigate countless tabs or spend hours trying to figure out what your website data means. Instead, MonsterInsights organizes the data for you in different reports that are easily accessible.
Ready to learn the easiest way to track visitor analytics? Let’s dive in.
Step 1: Install MonsterInsights on WordPress
To get started, simply install the MonsterInsights plugin on your WordPress site.
There’s a free version available that gives you access to basic features and lets you connect to Google Analytics at the click of a button.
The paid version comes with several advanced tracking options that you’ll want to explore as your website grows.
After you’ve installed and activated MonsterInsights on your WordPress site, you can open it on your WordPress dashboard by navigating to the Insights tab.
Step 2: Connect to Google Analytics
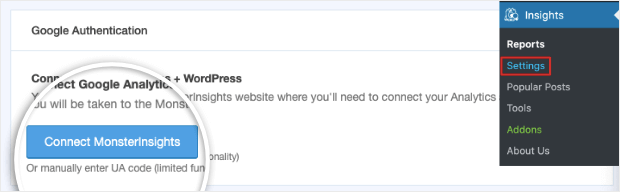
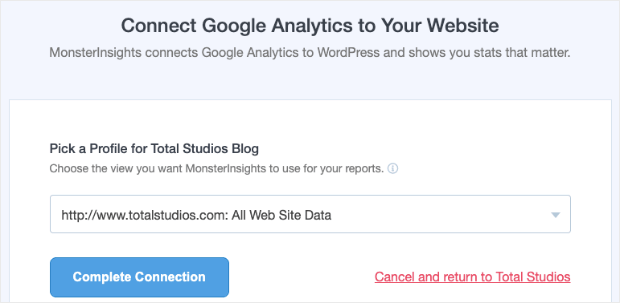
MonsterInsights lets you connect to Google Analytics with just a click of a button. Under Insights » Settings » General tab, click on the ‘Connect MonsterInsights’ button.
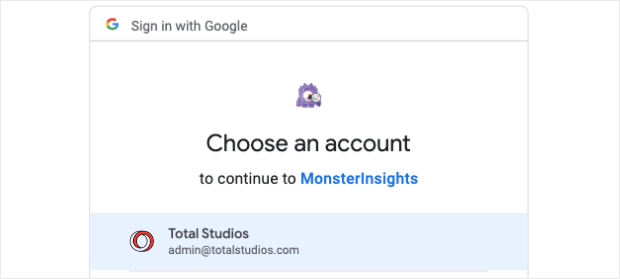
Next, you simply need to select your Google account and give permission to view and manage your analytics.
Then, select your website, and MonsterInsights will connect your website to Google Analytics for you.
For more detailed steps, you can follow this guide on how to connect to Google Analytics using MonsterInsights.
Once you’re done connecting to Google Analytics, you most likely won’t find data immediately after the setup process. It could take a few hours for the tool to gather site information and data.
Step 3: View Overview Visitor Reports
After your site has been connected to Google Analytics for a few hours, you can open the MonsterInsights dashboard from your WordPress admin area. Navigate to the Insights » Reports page from the left menu.
Here, you’ll see an overview of your website’s sessions, pageviews, average session duration, and bounce rate.
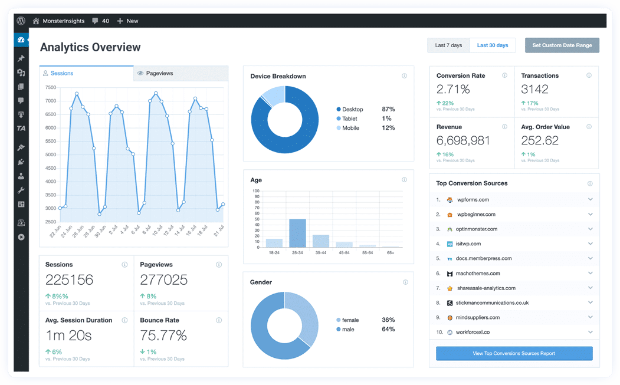
You’ll see New vs. Returning Visitors and which Device they’re using.
When you scroll down the page, you’ll see the Top 10 Countries where your visitors are located.
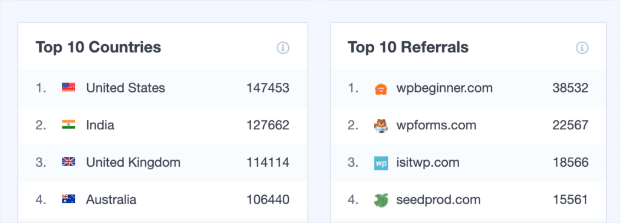
You can see where you get the most visits from and the actual number of visitors.
If you want to see a detailed report, you can click the View Full Report button at the bottom of each report.
Step 4: View Real-Time Visitor Reports
On the MonsterInsights dashboard, from the top menu, open the Real-Time tab, and you’ll see the number of active users on your site at any given moment, their geographic locations, the pages they’re viewing, and more.
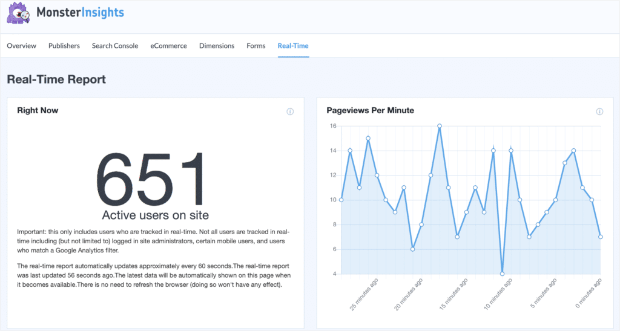
The real-time report automatically updates after approximately 60 seconds.
Using these stats, you can see how many visitors you have at any time of the day. You’ll know how many people are actively browsing your site, so you can make necessary adjustments to your marketing strategies.
Step 5: View Other Analytics Reports
MonsterInsights has tailored reports for different purposes. From the top menu, you’ll find:
- Publishers Report – See stats about your popular landing pages along with the number of visits they get, the average duration, and the bounce rate.
- Search Console Report – Find out which search terms people enter in Google to find your website, along with their number of clicks, impressions, CTR (click-through-rate), and average position.
- eCommerce Report – See conversion rate, number of transactions, revenue, and average order value of your online store.
- Dimensions Report – View custom trackers for popular categories, tags, post types, authors, focus keywords, and more.
- Forms Report – See which forms are performing the best and how many people are viewing and filling them out.
Using these reports, you can track your website visitors and find out more about them. That way, you can better focus your marketing efforts towards what your audience will respond to.
With that, you have everything you need to track visitor analytics on your site and use the data wisely.
Both TrustPulse and MonsterInsights are powerful and invaluable tools in tracking visitors to boost conversions and growth.
We hope you liked this post. If you’re looking for more ways to grow your traffic, leads, and customers, see our posts on:
- 15 Powerful Customer Acquisition Tools to Increase Profits
- 11 Conversion Rate Optimization Tools To Capture Leads
- 19 Best Lead Generation Tools to Get More Targeted Leads
Want to boost conversions on your site right away?
