Do you want to keep customers informed by letting them know when certain products are almost out of stock?
As your online store becomes more popular, inventory management can become more complex. And to keep user experience (UX) high, you want to make sure your customers never miss out on the products they want.
That’s why, in today’s post, we’re going to teach you how to add a low stock notification to WooCommerce stores.
But before we do, let’s take a look at what low stock notifications are and why they can be a smart addition to any eCommerce site.
The Benefits of a Low Stock Notification
Low stock notifications are small popup messages that let your site’s traffic know when a particular product will soon be out of stock.
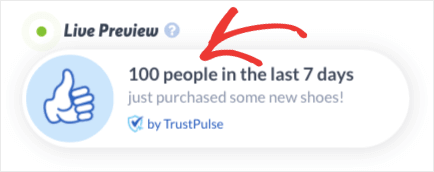
Here’s the low stock notification we built for today’s demo:
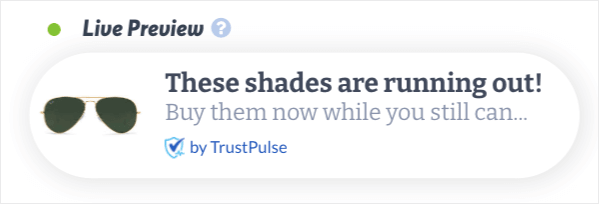
This took us less than 3 minutes to create and has some major benefits for your business. Here are the top 3 reasons why you should add a low stock notification to your WooCommerce store.
1) Improve User Experience: How often have you thought about purchasing a product, put it in your shopping cart, and came back at a later date to finalize the purchase? In the world of eCommerce, this happens all the time.
But if you came back to your cart to find that the product you wanted was now out of stock, you’d likely be disappointed. Adding a low stock notification gives customers the chance to make their purchase while you still have the product they want in your inventory.
2) Create a Sense of Urgency: Not only do low stock notifications ensure that users can get the products they want, but they can even boost sales for you. That’s because your low stock notification will build a sense of urgency in your customers, prompting them to act quickly.
Much like how marketers use a countdown timer to motivate customers to take action, your low stock notification can get you more sales faster.
3) Build Credibility With Future Customers: Finally, low stock notifications can serve as a form of social proof. They let your site’s visitors know that your brand’s products are popular, actively being purchased, and won’t be around for long.
This makes your business appear more credible and builds trust with your site’s traffic. And the more people who trust your brand, the more likely they are to buy your goods or services.
Now that we know why you should add a low stock notification to your WooCommerce site, let’s look at how you can make it happen.
Add a Low Stock Notification to WooCommerce
For today’s tutorial, we’ll be using TrustPulse to create our low stock notification:

TrustPulse is the world’s best and most accessible social proof software. Not only does it make creating social proof notifications incredibly easy, but it’s also a fraction of the cost when compared to our nearest competitors.
You can start TrustPulse totally free for up to 500 sessions. Then, when you’re ready, you can upgrade to a paid plan starting at just over $4/month.
That’s about the price of your morning cup of coffee.
For more information about how TrustPusle’s features and pricing compare to other social proof notification software, check out this article: FOMO vs. UseProof vs. TrustPulse.
Ready to get started? Sign up for your free TrustPulse account today!
Step 1: Choose Your Notification Type
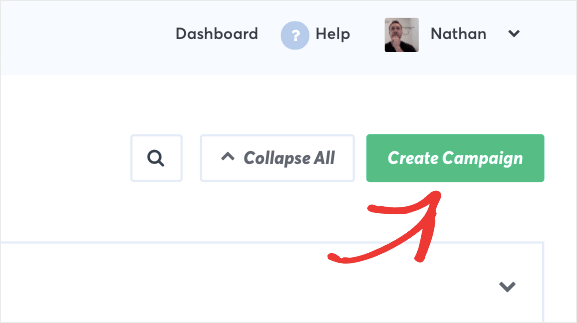
Once you’ve signed up for your TrustPulse account, head over to the upper right-hand corner of your dashboard. Click Create Campaign:
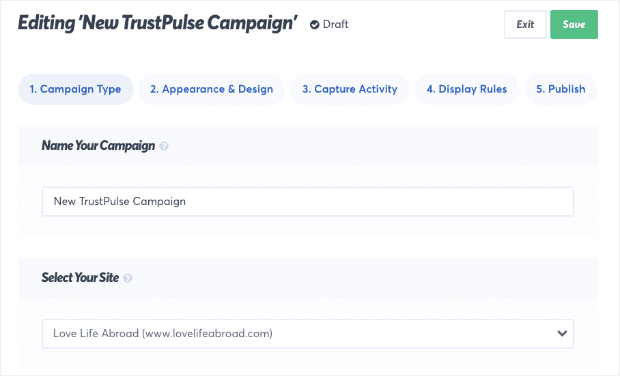
Next, you’ll need to name your campaign (to stay organized) and assign it to the website you used during the registration process:
If you haven’t connected TrustPulse with your website yet, don’t worry. All you need to do is install the TrustPulse plugin so you can connect it to your WooCommerce site.
We’ll cover this in more detail at the end of the post.
Then you’ll need to choose your campaign type. You have 4 options here:
- Recent Activity
- On-Fire
- Visitor Analytics
- Action Message
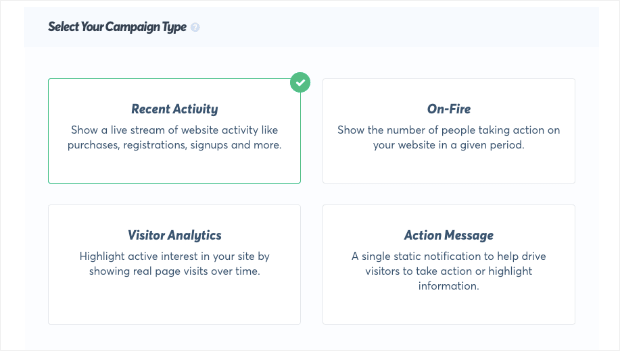
All of these campaign types are great, but you would use them in different contexts.
Recent Activity campaigns refer to an individual when you set up certain types of social proof notifications. Those looks something like this:

On-Fire campaigns refer to the total number of people who took a specific action on your site. Here’s an example of an On-Fire campaign:
Visitor Analytics campaigns count your page visits to use social proof even if you’re just getting started. It tracks how many people have gone to a specific page so you can show popular posts or offers:

Action Messages are static notifications that you can use across your site. This lets you create a simple message to keep your audience up-to-date.
And since we’re building a low stock notification, we aren’t capturing user-generated activity. Instead, we’ll be using a campaign that runs on a loop to remind users that your inventory is running low.
That means we’ll stick with Action Messages for this tutorial to build this campaign:
When you’ve selected this, click Next to design your notification.
Step 2: Design Your Notification
You’ll see a new menu open up that allows you to customize certain aspects of your default campaign, such as:
- Language
- Visitor reference
- Message text
- Message link
- And more…
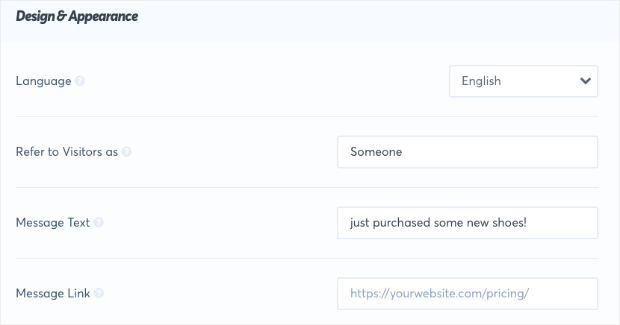
This is where you can write a text describing which product will be out of stock soon.
You can also create a link to the product page to give customers easier access to it.
Plus, you’ll be able to upload a picture of the product that’s running low on inventory. To do so, click the drop-down menu to the right side where it says Notification Image. Then select the option Custom Icon:
![]()
Then click Upload New Image:

Now you can select the image of the product that’s almost out of stock. This is important because it adds a visual element to your low stock notification that can create more excitement around your product.
You also have many other options for changing the look of your campaign. You can click Advanced Settings to change:
- Text colors
- Background colors
- Fonts
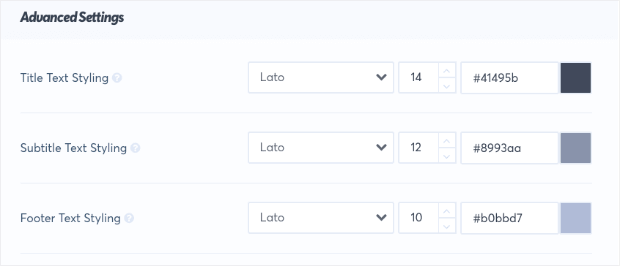
And more. These help you design your low inventory notification to match your brand’s style, while still making it stand out enough to grab your user’s attention.
Here’s the low stock notification we created for today’s tutorial:
This took us less than 3 minutes to build.
Now it’s time for the next step. In most cases, you’d need to set up the activity you want to capture.
But with Action Message campaigns, you can skip that step and dive right into your display rules.
That’s because your notification is a static message that isn’t triggered by any activity. Let’s see how you can determine where your campaign should appear across your site.
Step 3: Configure Display Rules
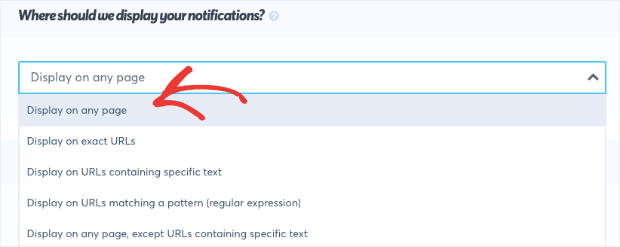
The first thing you’ll want to do is determine where you want your low stock notification to display. You’ll see the question Where should we display your notifications?.
You can choose to have your notification displayed on:
- Any page
- Exact URLs
- URL paths
And more! Select the option you want from the drop-down menu. For today, we’ll leave the default setting on any page:
Then you can determine how long you want to display your notifications, how much time you want before it shows again, whether or not you want your campaign to appear on mobile devices, and more:
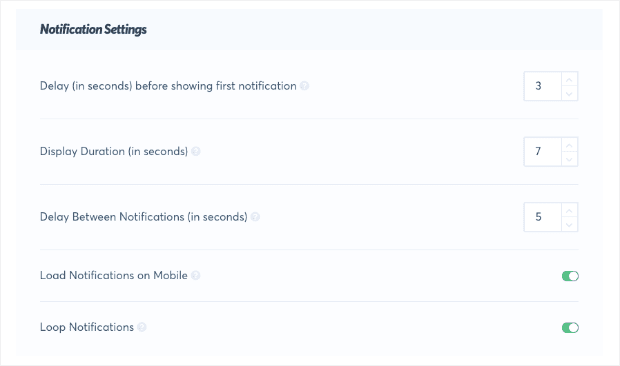
This lets you have complete control over where, when, and how long you want to display your low stock notification.
When you’ve configured your display rules, it’s time for the last step: launching your low stock notification. Click Next Step to continue:

Step 4: Integrate With WooCommerce and Launch
Once you’re satisfied with your low inventory notification, you’ll need to make sure TrustPulse is synced with your WooCommerce store.
Luckily, with the TrustPulse plugin, that part is easy. Simply install and activate the TrustPulse plugin on your WordPress site.
Then navigate to your WordPress dashboard and click TrustPulse in the left-hand side menu:
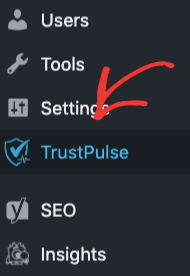
You can then click Connect Your Existing Account:
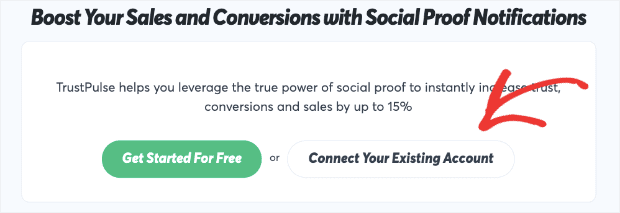
This will automatically integrate TrustPulse with your WooCommerce site.
Now you can go back to your TrustPulse dashboard and click Check Now to make sure your site is connected:

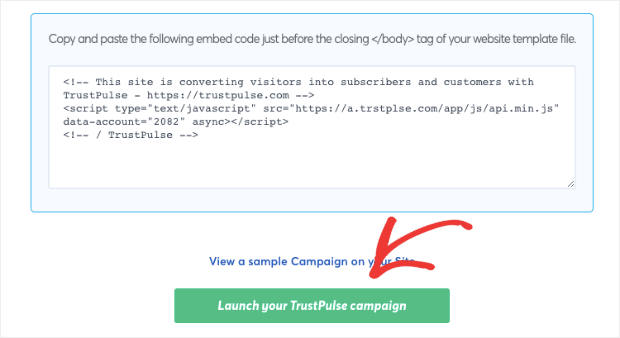
When you see that TrustPulse has integrated with your WooCommerce store, all you need to do is click Launch Your TrustPulse Campaign:
And that’s it!
You now have a low inventory notification running on your site. We hope that you found this article helpful.
If you need more help connecting TrustPulse to your WooCommerce store, or you simply want to learn how to improve your eCommerce sales, we recommend the following articles:
- How to Integrate TrustPulse With WordPress
- 7 Growth Hacking Strategies to Boost Your Business Now
- 7 Easy Product Recommendation Strategies You Need to Use Today
- How to Increase eCommerce Sales Today: 8 Ideas You Need to Try
These articles will have everything you need to improve your eCommerce sales with social proof notifications.
