
Do you want to add live Stripe payment notifications to your site, but you’re not sure where to get started?
Letting your site’s visitors know when someone has made a purchase via Stripe is a great way to boost sales. It leverages FOMO to inspire other visitors to make a purchase, and it shows people they can pay with one of the most popular payment gateways in the world.
But how do you show notifications when users make a payment on your site specifically from Stripe?
Today, we’re going to teach you just that. We’ll look at how you can create a notification whenever a customer pays with Stripe.
First, though, let’s take a deeper dive into what live Stripe payment notifications are and how they can help you increase your bottom line.
What Are Live Stripe Payment Notifications?
Live Stripe payment notifications are small messages displayed on your site anytime someone makes a purchase via Stripe’s payment gateway.
They look something like this:

And as we spoke about before, this can be a powerful method for increasing your sales. Live Stripe payment notifications work for 2 reasons:
- They function as live sales notifications that use FOMO to increase sales
- They show exactly how customers can pay when they decide to do so
In the past, we’ve written extensively on how lives sales notifications use FOMO to get more people to take action.
For more details on that, we recommend checking out the following post: FOMO Marketing: Everything You Need to Know About Fear of Missing Out.
But what we haven’t touched on is the importance of that second part: showing users how they can pay.
This small detail can nudge users toward payment. That’s because Stripe is a payment gateway with several known advantages for consumers, including:
- Frictionless checkout process
- Secure payment information
- Payments are made on the same site without annoying redirects (like PayPal)
- And much more
That means when your users see that they can pay for your products with Stripe, the process will be fast, easy, and secure.
In other words, you’ll be giving your audience more confidence in your products, your website, and your business, which will translate into more sales for you.
Now that we know how live Stripe payment notifications work (and why they’re important), let’s look at how you can set them up on your website.
Using Live Stripe Payment Notifications
In today’s tutorial, we’ll be creating our Stripe payment notifications with TrustPulse:

TrustPulse is hands down the best social proof software for creating Stripe payment notifications. It’s incredibly user-friendly, easy to set up, and requires zero coding skills to create stunning notifications to match your site.
Plus, it’s only a fraction of the cost of competing social proof software.
For more information on how TrustPulse stacks up to the competition, check out this post: FOMO vs. UseProof vs. TrustPulse: Which Is the Best for Social Proof?
Ready to try it out? Sign-up for your RISK-FREE TrustPulse account today!
Once you’ve signed up, we’re ready to create our live Stripe payment notifications.
Step 1: Select Your Campaign Type
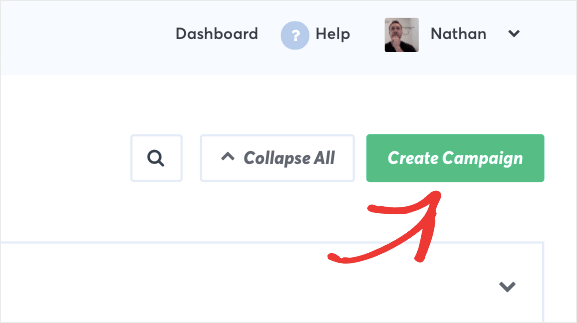
In your TrustPulse dashboard, start by clicking Create Campaign:
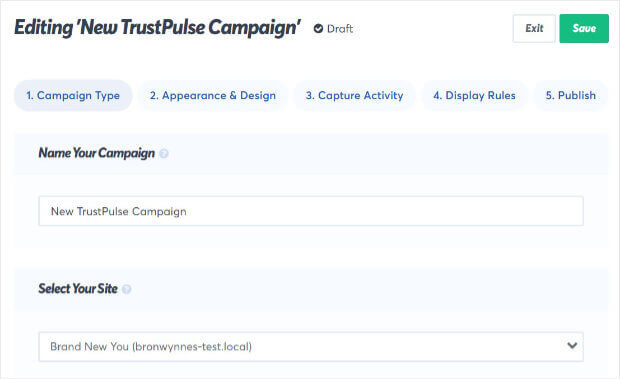
Now you’ll need to name your campaign and select the site you want to use it for:
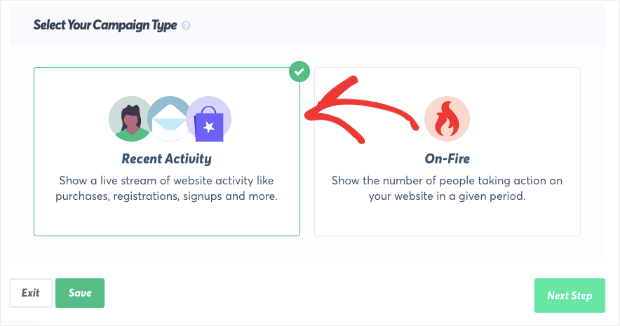
Then you need to choose your campaign type. With TrustPulse, you can select between 2 types of campaigns:
- Recent Activity
- On-Fire
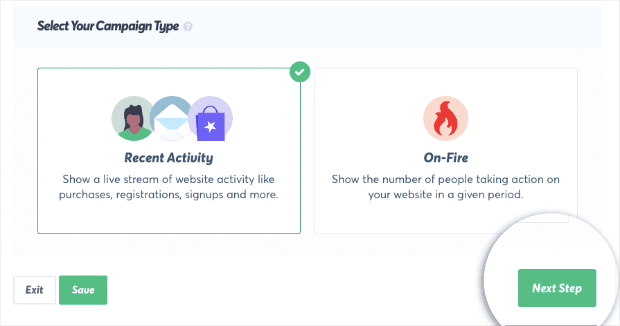
Both are incredibly effective, but they work a bit differently from one another.
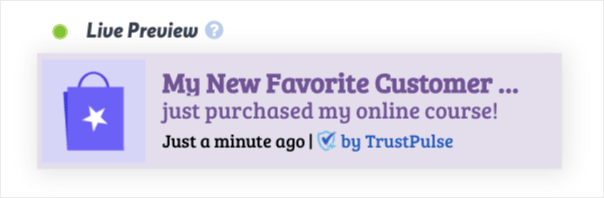
Recent Activity campaigns show when an individual makes a purchase on your site. They look something like this:
These types of campaigns are best for regular purchases made on your site.
On-Fire campaigns, however, show the collective number of customers who have made the purchase. These look like this:

On-Fire campaigns are great for popular promotions that have a high number of people taking the same action. This makes them ideal for big promotions, flash sales, or other deals where you can show a large number of people paying for a product with Stripe.
For today’s tutorial, we’ll select Recent Activity:
When you’ve selected the right campaign type for your Stripe notification, click Next Step:
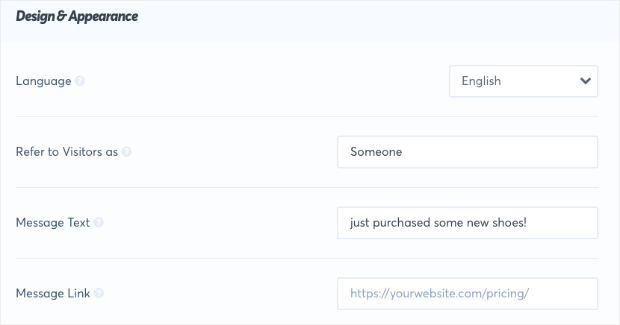
Now you’re ready to make your notification match your site’s brand.
Step 2: Design Your Stripe Notification
One of the biggest aspects of your Stripe notification’s success is that it looks nice. That’s because you need a notification that matches your site’s brand and style but still grabs your visitors’ attention.
You can change some of the more practical aspects of your notification’s design, including:
- Language
- Visitor reference
- Message text
- Message link
- Image
- And much more
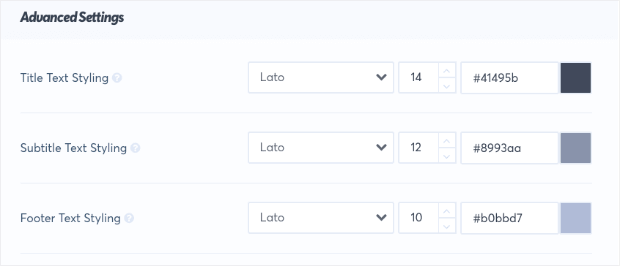
Then, under the advanced settings, you can change its physical appearance by modifying your message’s:
- Background color
- Text color
- Font
- And more
In the end, you can quickly make the perfect live Stripe payment notification for your website. Here’s the example we built for today’s tutorial:
For the next step, we’ll need to step away from our TrustPulse dashboard and head over to another website to build our Stripe connection.
Step 3: Create a “Zap” With Zapier
For today’s tutorial, we’ll be using Zapier to create our Stripe notification. Zapier is free to get started, so all you need to do is sign up.
And before we get started, you should also connect TrustPulse with your Zapier account.
We won’t have time to go in-depth on how to do that in this tutorial, but you should definitely check out this helpful resource: How to Connect Zapier With TrustPulse.
That article will have all the detailed instructions you need to get set up in minutes.
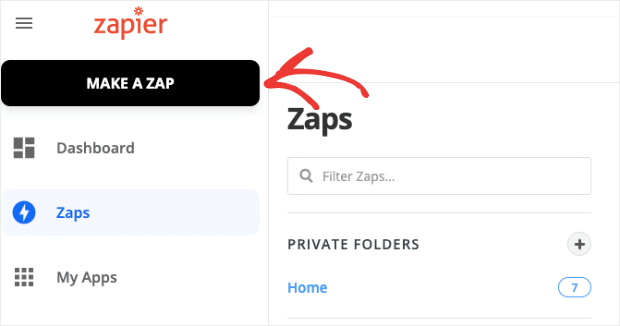
Once you’re in your free Zapier account’s dashboard, click Make a Zap in the upper left-hand corner:
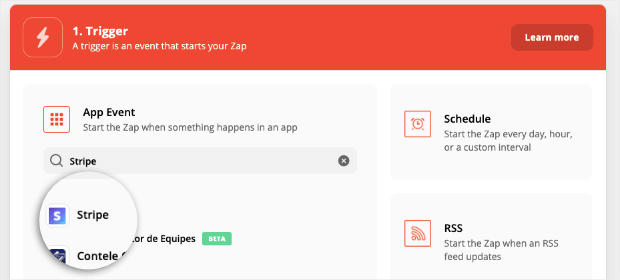
Now you need to select your trigger. Type Stripe into the search bar and select Stripe:
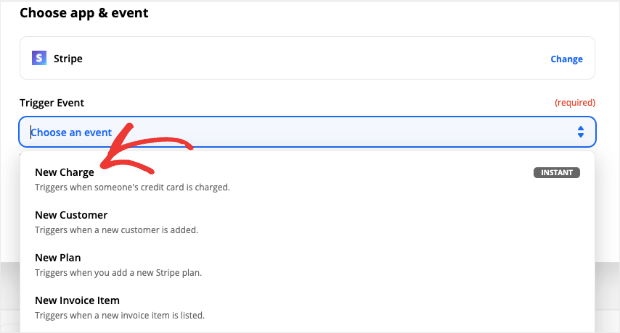
Next, select your trigger event from the drop-down menu. For today’s tutorial, select New Charge:
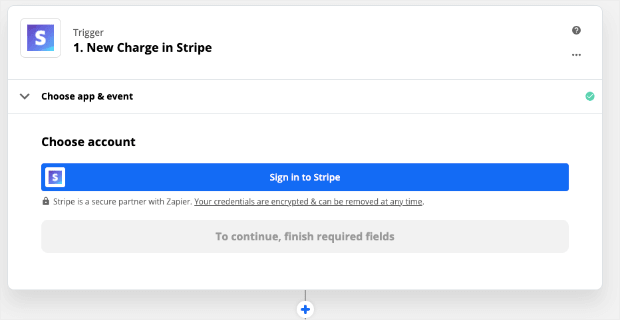
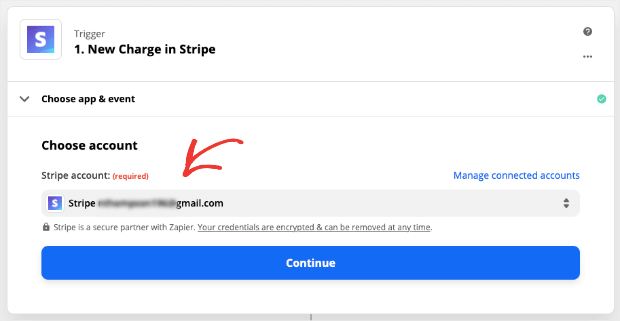
Then you’ll click Continue, and you’ll need to sign in to your Stripe account:
A separate window will open asking you to enter your Stripe account’s API Key:
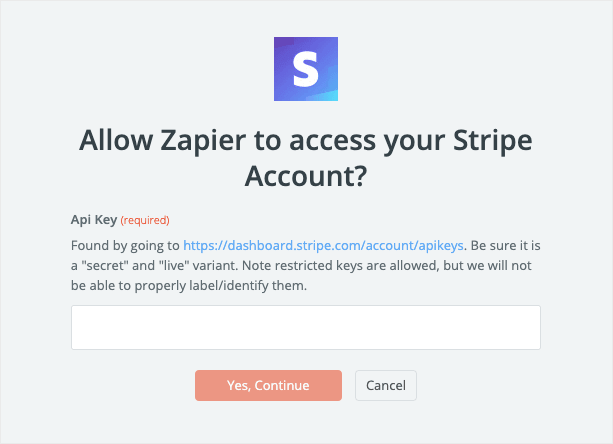
Once you’ve located and entered your API Key, click Yes, Continue. Then you’ll select the Stripe account you just verified from the drop-down menu (in the case that you have multiple Stripe accounts to choose from):
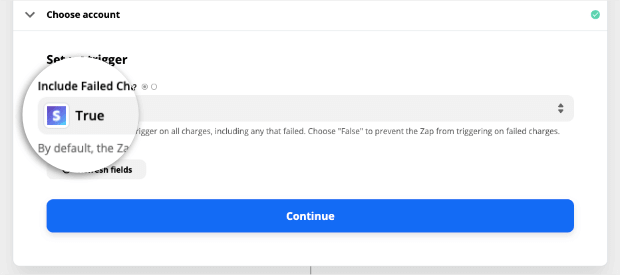
Then click Continue. Make sure the trigger rule is set to True:
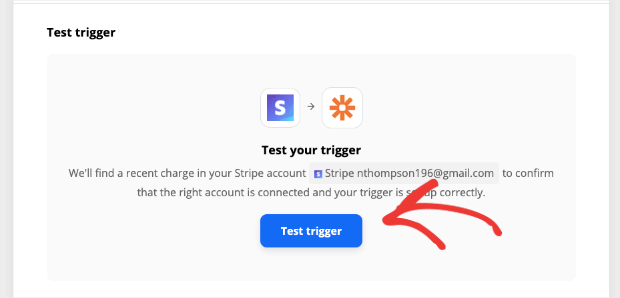
Finally, you can test your trigger to make sure Zapier is working with Stripe:
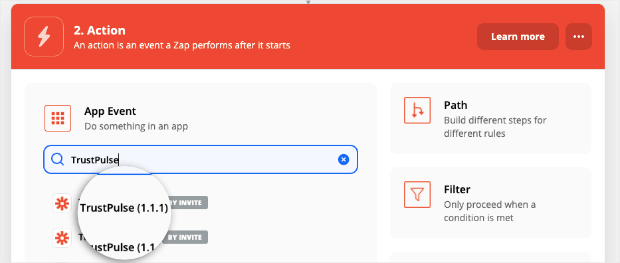
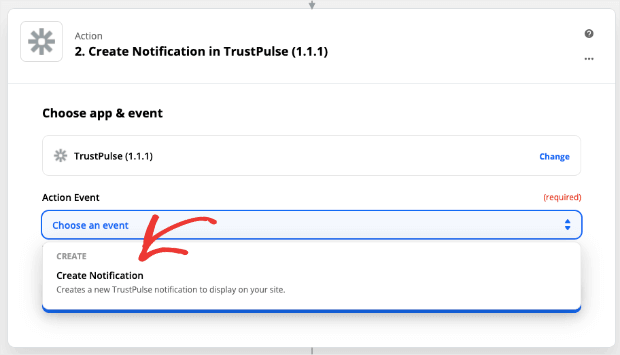
Now you need to set up the action that will set the trigger off. For that, type TrustPulse in the search bar and click on it from the options list:
Then choose an action from the drop-down menu. In this case, it will be your only option, Create Notification:
Then you’ll need to select the TrustPulse account that you’re creating a Zap for:
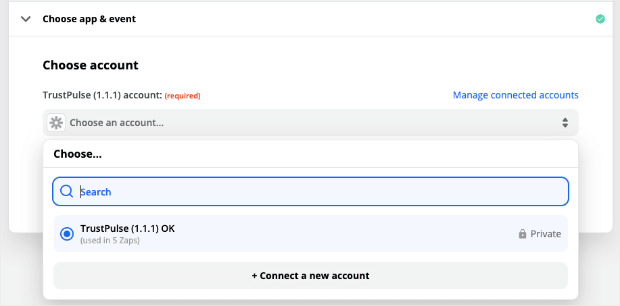
Note that you can also Connect a New Account if you didn’t set up TrustPulse with Zapier. Again, you can skip back to the start of this section for the article explaining how to connect the software.
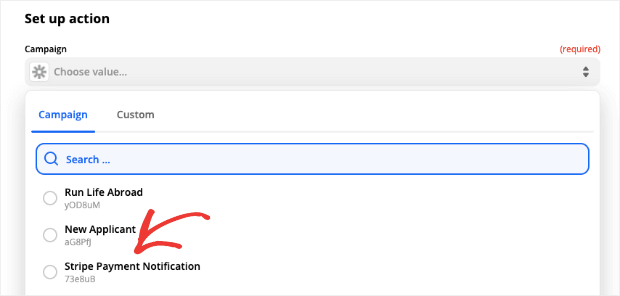
At this point, you need to select the TrustPulse campaign that you want to display when your campaign is triggered:
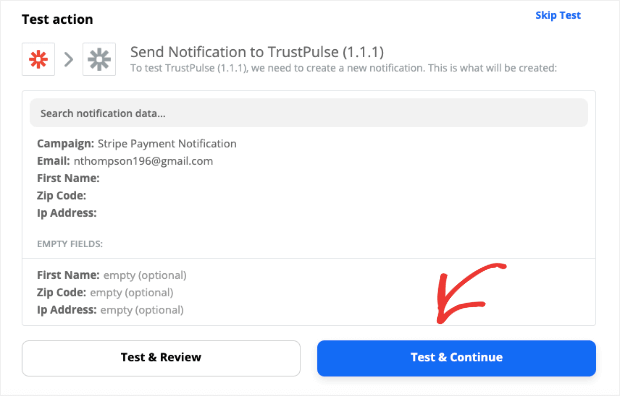
Then enter your email address in the next field box:
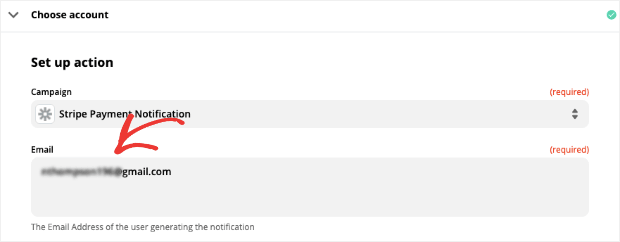
This is the email that will be used to generate the Stripe notification, but it won’t be seen by your site’s visitors.
Then you can scroll down, click Continue, and you’ll be ready to test your campaign. To do so, click Test & Continue:
From there, you’ll get a success confirmation that your Zap worked. Then, you can flip the toggle switch of your Zap from Off to On:
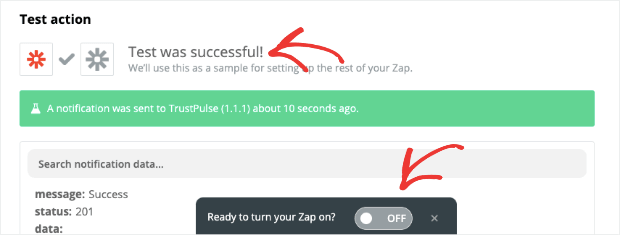
And you’re all set! From here, we’ll head back to our TrustPulse dashboard to select our Zap for the Stripe payment notification.
Step 4: Select Zapier as Your TrustPulse Integration
Now we should be in part 3 of the campaign building process, Capture Activity:
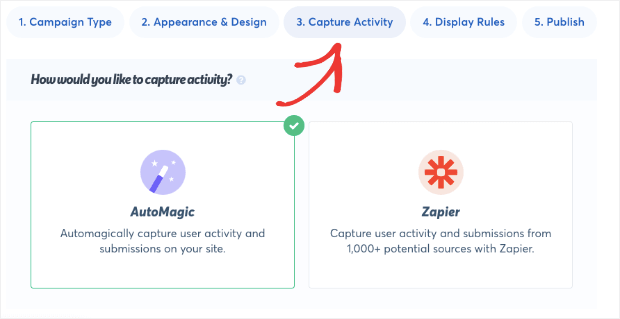
Here you have 2 options:
- AutoMagic
- Zapier
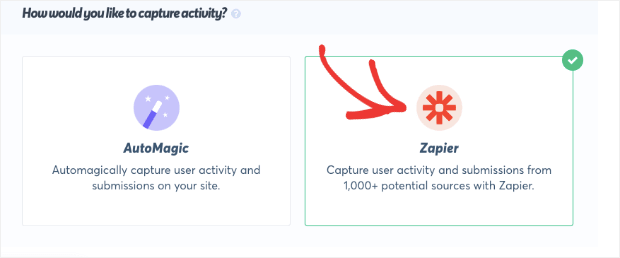
AutoMagic will capture activities taken exclusively on your site. This would be like when someone fills out a form or makes a general purchase.
But for today, we want to create a notification for when your customers specifically use Stripe as their payment gateway.
For that reason, we’ll select Zapier to capture the activity:
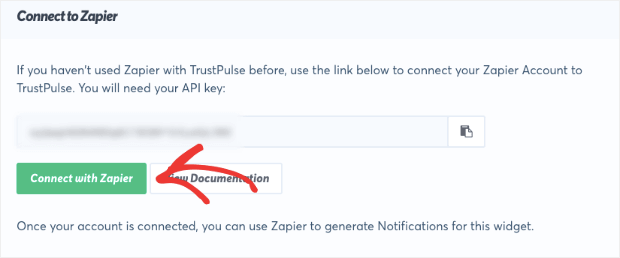
Below, you’ll see a message that lets you reconnect with Zapier if you haven’t already. You can insert your Zapier API Key and click Connect to Zapier:
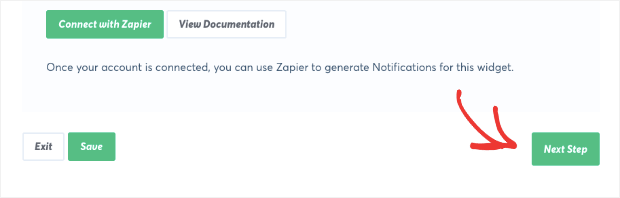
But since we’ve already done that, we can simply click Next Step after selecting Zapier to capture our site’s activity with Stripe:
Step 5: Configure Your Display Rules
The last step before publishing your campaign is configuring your display rules.
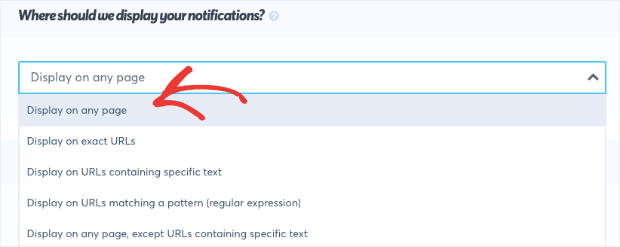
First, you can select which pages you would like to display your campaign. This can include displaying your Stripe payment notification on:
- Any page
- Exact URLs
- URLs containing specific text
- And more
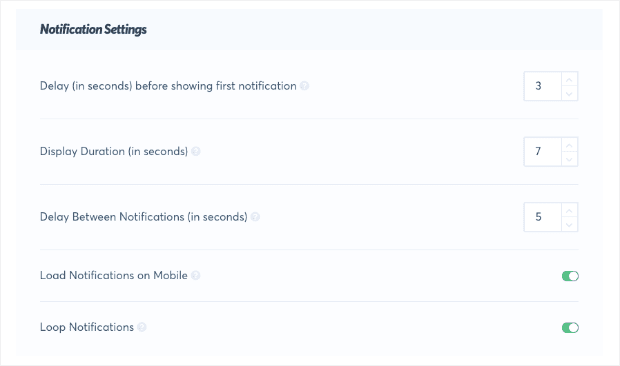
Then you can adjust your notification’s display settings, such as:
- How long to wait before displaying the first notification
- The duration that your notification will remain visible on your site
- The time in between notifications appearing on your site
- And much more
Once you’ve determined where and how your Stripe payment notifications will appear across your site, click Next Step:

And now you’re ready to publish your campaign.
Step 6: Publish Your Campaign
The last step is to review your live Stripe payment notification and publish your campaign:

If you haven’t connected your TrustPulse account with your website, you may see an error message:

For help connecting TrustPulse with your site, we recommend reading this document: How to Add TrustPulse to Any Site.
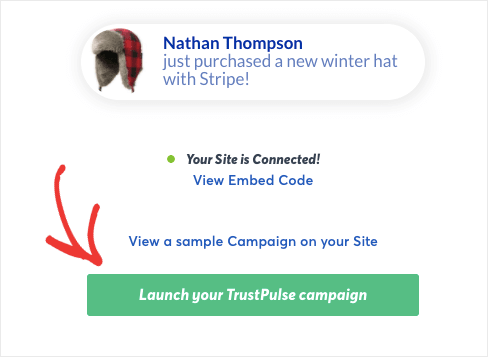
Then you’ll see that your site is connected, and you can publish your campaign by clicking Launch Your TrustPulse Campaign:
And that’s it! Your Stripe payment notifications are now live on your site.
We hope that you found this post helpful. If so, you may want to check out the following articles:
- 7 Types of Web Notifications to Increase UX and Boost Sales
- 11 Best FOMO Popup Examples to Boost Your Conversions
- Social Proof: What It Is & How to Get Started [+ Proven Examples]
These posts will have everything you need to help you use FOMO and social proof on your site to increase trust with your brand, drive conversions, and boost sales.
