
Do you want to learn how to create a webinar landing page, but worry it’ll take too much of your time?
Creating high-converting landing pages is a crucial part of any sales or marketing funnel. It gives you a dedicated place to send warm leads (or even cold traffic) and encourage your audience into action.
But how do you build a webinar landing page if you’re not a professional coder, and you’re already pressed for time?
Today, that’s exactly what we’ll cover. Because in this post, we’re going to teach you how to create a webinar landing page in under 5 minutes.
Then we’ll share a bonus tip on how you can optimize that page for even higher conversions.
Ready to get started? Let’s dive straight into the tutorial.
How to Create a Webinar Landing Page
For this tutorial, we’ll be using the WordPress plugin SeedProd:
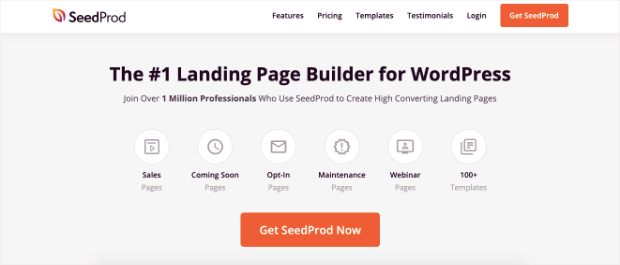
SeedProd is the best landing page builder for WordPress and allows anyone to build landing pages with just a few clicks.
These are pages like:
- Sales pages
- Optin pages
- Maintenance pages
- Webinar pages
- And much more…
Plus, SeedProd comes with 100+ templates are that ready to go. These save you time, energy, and headaches in the landing page creation process.
SeedProd also comes with a codeless drag and drop visual builder. This gives you total control over how your page looks and functions, but still gives you access to advanced integrations and tools.
In other words, you don’t sacrifice power for simplicity. Instead, you get both.
With that in mind, let’s take a look at how you can make a webinar landing page for WordPress.
Step 1: Install & Active SeedProd
The first thing you’ll need to do is install and active the SeedProd plugin.
You have 2 options for going about this.
1) Download the Plugin from the WP Repository
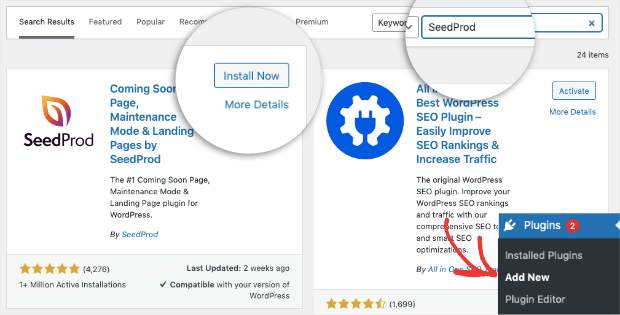
You can always search for SeedProd in the WordPress repository.
To do this, simply go to Plugins » Add New in your WordPress admin menu.
Then type “SeedProd” into the search bar. When you’ve located the plugin, click Install Now:
When that’s done, you can click Activate:
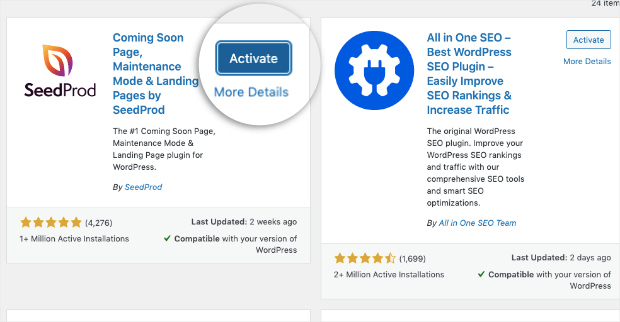
Now, you’ll be all set. You can start using SeedProd Lite for free, no credit card or email address is necessary.
But the Lite package may not have all the tools you need to build the landing page you want.
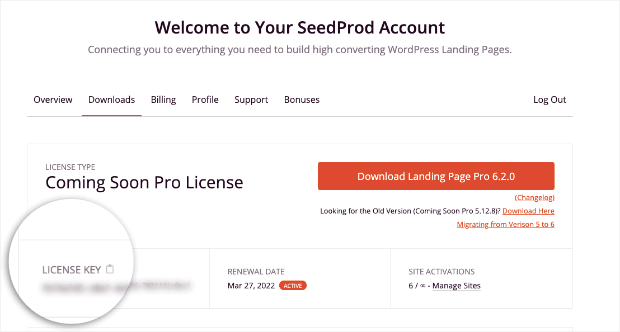
You can either upgrade your plan through the plugin or sign up for your account directly through the SeedProd website.
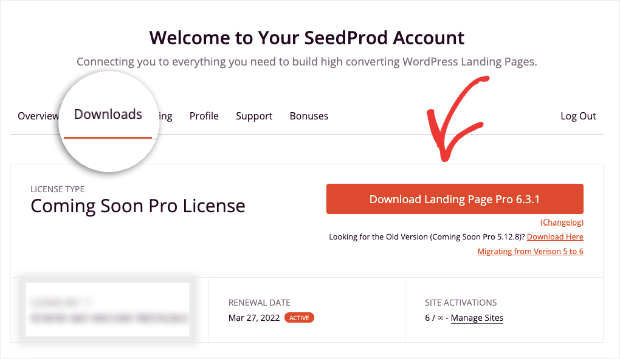
When that happens, you can use your license key (under Downloads in your SeedProd account) to upgrade the plugin:
This leads us to our second method for installing SeedProd.
2) Download the Plugin from Your SeedProd Account
You might want to sign up for an upgraded SeedProd account from the start.
We highly recommend doing this because it will unlock all the features you need to create excitement around your webinar.
These tools will also allow you to boost engagement and get more registrations to come.
More views on your webinar mean more leads in your sales funnel.
Once you purchase a SeedProd plan, you can download the plugin from your account:
Simply go to the Downloads tab in your SeedProd user dashboard and click Download Landing Page Pro (or whatever plan you purchased):
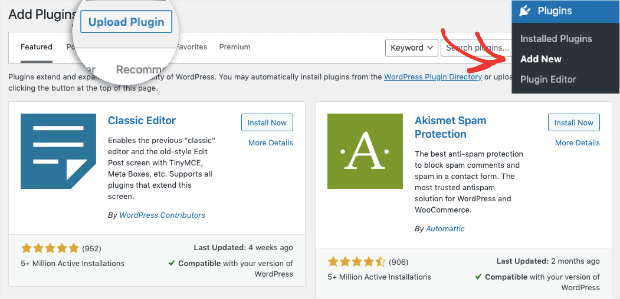
Then go back to your WordPress dashboard and go to Plugins » Add New. Then click Upload Plugin at the top:
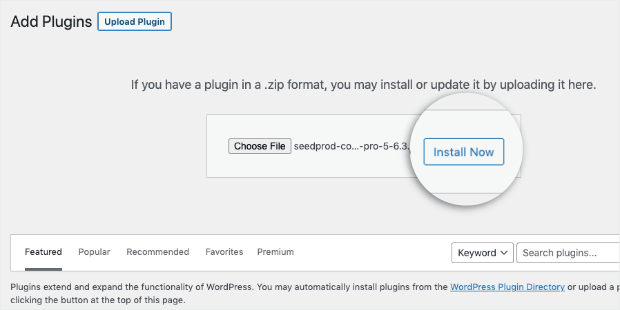
Then all you need to do is drag and drop your plugin file into place and click Install Now:
When the plugin is finished installing, click Activate Plugin:

This will redirect you to the section where we can start building the webinar landing page.
Click Create Your First Page to get started:

Step 2: Select Your Template
The next step is to choose your template.
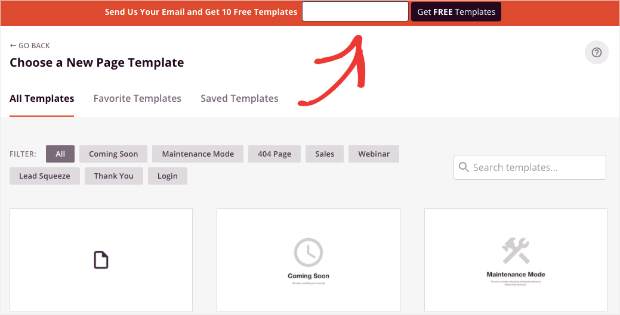
If you’re using SeedProd Lite (the free version), you’ll be very limited here. That said, you can always enter your email address in the top bar to unlock 10 new landing page templates:
If you’re on the paid plan, though, then you’ll have many more options.
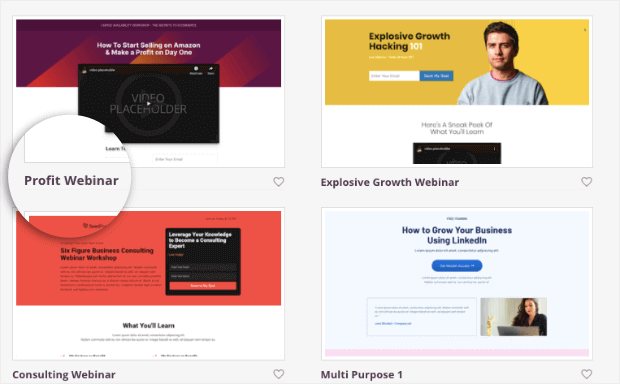
Plus, you can filter the template type based on the kind of landing page you want to build. For today’s tutorial, we’ll click Webinar to filter the template options:

Choose whichever template you think would fit your webinar best. There are several to choose from, many of which are nearly ready out-of-the-box.
We’ll select Profit Webinar as our template:
Just know that you can choose any template and still follow along with the rest of this tutorial.
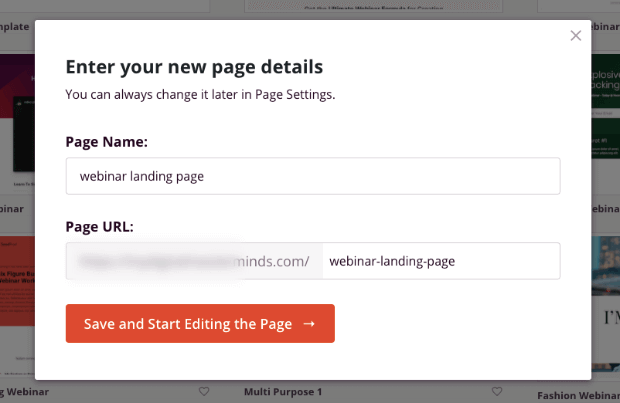
You’ll be prompted to give your webinar landing page a URL slug:
And from there, you can start designing the page.
Step 3: Customize Your Landing Page
As we mentioned earlier, SeedProd has the most user-friendly drag and drop builder on the market.
You can quickly and easily customize any aspect of your webinar landing page.
To start, you can click the gear wheel icon at the bottom to change your page’s global settings. These would be configurations like:
- Fonts
- Colors
- Background CSS
- And much more…
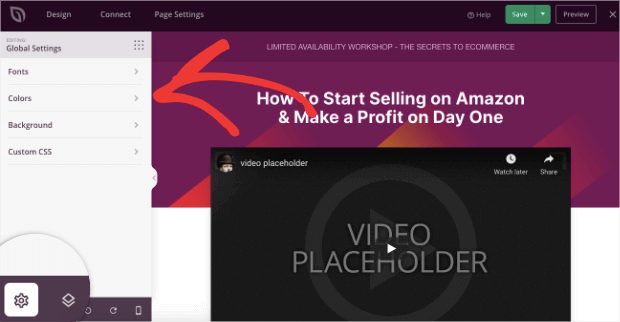
This allows you to add custom branding to your webinar landing page in just a few clicks.
So rather than change every color or element, you can modify these global settings to save yourself hours of time.
Plus, it’s so EASY to make changes on the page itself.
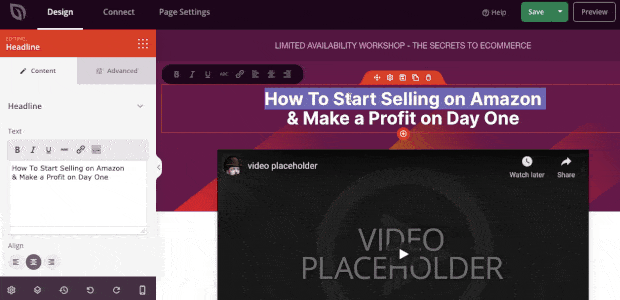
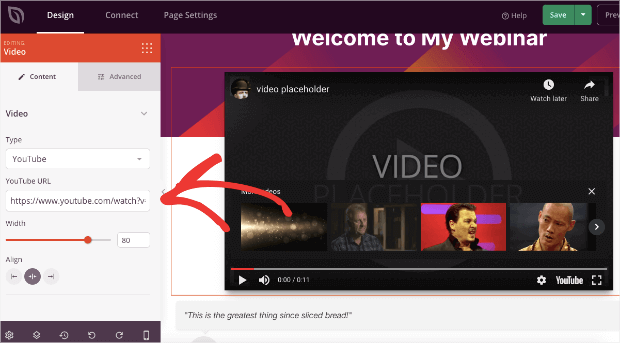
If you want to change the text, for example, you can use the inline text editor. Simply select the text you want to modify, and make those changes directly in the editor:
And if you want to change other blocks, you can do so just as quickly.
Click on any block you want to modify, and you can edit that block in the left-hand side menu:
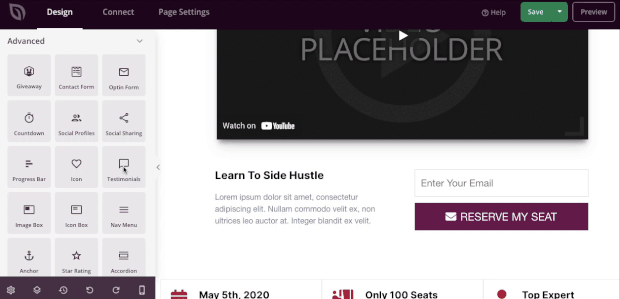
But what if you want to add new features to your webinar landing page?
Just search through the available blocks on the left-hand side menu:
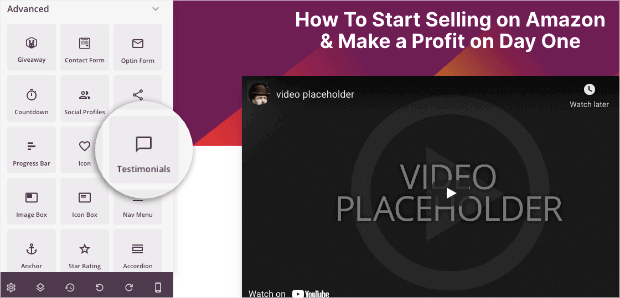
Then drag and drop them into place on the page:
Now that you know how to edit your page, there’s one last step before publishing.
Step 4) Integrate Your ESP
For most webinar pages, you’re likely trying to capture one thing: email addresses.
And once users register for your webinar, you probably have an automated sequence set up for reminders about the event.
That means you need a way to add new registrations to your email list.
SeedProd allows you to integrate with many of the top email service providers (ESPs) on the market.
Go to the Connect tab at the top of your SeedProd dashboard:
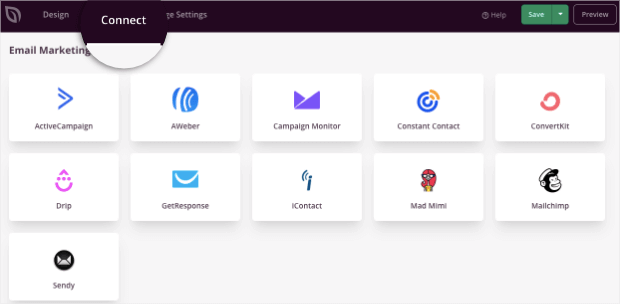
This gives you access to popular email providers, like:
- Constant Contact
- ConvertKit
- ActiveCampaign
- Mailchimp
- And many others…
Plus, you can use SeedProd’s Zapier integrations to connect with 1000+ third-party marketing tools.
It’s what makes SeedProd such a flexible and powerful landing page builder.
Because once you’ve connected your ESP with your webinar landing page, you’ll be able to set things on auto-pilot.
Whether you drive traffic to the page with paid ads, through social media, or internal links on your website, you now have an automated system for adding new leads to your webinar.
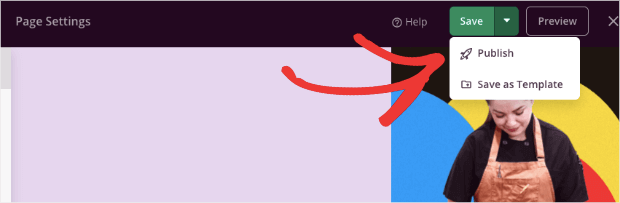
And that’s it! From there, all you need to do is Save and Publish your landing page:
Before wrapping up this article, though, we wanted to share a small tip that can have a BIG impact on your conversion rates.
Optimizing Your Webinar Landing Page
One problem many webinar creators face is getting people to join their events.
A great solution for that is using social proof to encourage more people to register. And the best plugin for that is hands down TrustPulse:

TrustPulse is the #1 social proof software and provides users with a powerful (but affordable) way to boost conversions.
That’s because TrustPulse lets anyone create social proof notifications. You’ve likely seen these before.
They look something like this:
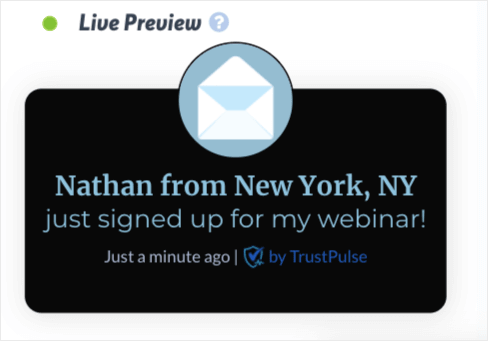
These non-intrusive messages can appear across your landing page to show new visitors how popular the event is.
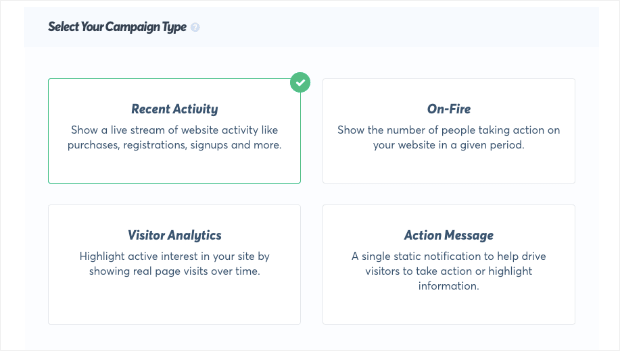
And you have several options for doing so. That’s because TrustPulse comes with 4 types of campaigns:
- Recent Activity: Show a live stream of website activity like purchases, registrations, signups, and more.
- On-Fire: Show the number of people taking action on your website in a given period.
- Visitor Analytics: Highlight active interest in your site by showing real page visits over time.
- Action Messages: Display a single static notification to help drive visitors to take action or highlight information.
These campaign types make social proof accessible to your regardless of what stage your business is in.
If you haven’t had a lot of webinar signups, for example, you can capture how many people have seen the page with a Visitor Analytics campaign.
Or if you’ve already had tons of interest, you can display the number of people who’ve actually joined your webinar with an On-Fire campaign.
The point is that whether you’re just starting out or you’re a seasoned webinar veteran, TrustPulse has the right campaign to get you MORE conversions.
Here are some of the things you’ll love about TrustPulse:
- Easy installation
- No coding required
- Customizable notifications (to match your brand)
- Linkable messages to redirect traffic to signup forms
- Powerful analytics dashboard
- And much more…
In fact, TrustPulse users have seen an INSTANT boost in sales by up to 15%.
Want to see it in action for yourself? Sign up for your 100% risk-free TrustPulse trial today to get started!
We hope you enjoyed this post. If you did, you’ll definitely want to check out the following resources:
- What is a Squeeze Page (+ 6 Examples of High-Converting Squeeze Pages)
- How to Create a Coming Soon Page That Drives Excitement
- What is a Splash Page (+ 7 Excellent Splash Page Examples)
- The Best Digital Marketing Plugins for 2021 (Compared)
- How To Create a Landing Page in WordPress (4 Easy Steps)
These articles have even more information and resources on how to increase engagement with your audience and increase your sitewide conversions.
