Are you looking for small, practical changes you can make to your website that will have a big impact on your overall sales?
Live sales notifications are a proven way of boosting sales across your online store. They’re easy to set up, simple to customize, and build instant credibility with potential customers.
That’s why, today, we’re going to teach you how to create a BigCommerce live sales notification to generate more revenue from your eCommerce website.
But before we do, let’s look at what a live sales notification is and why it can be such an effective tool for eCommerce.
What Is a Live Sales Notification?
A live sales notification is a small message that informs your visitors when someone makes a purchase on your site.
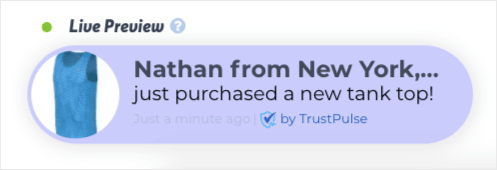
You’ve likely seen these before. Here’s an example of the live sales notification we built for today’s tutorial:
Live sales notifications have been shown to increase sales by up to 15%. But you’re probably wondering how such a small popup message could have such a large impact on sales.
So how do they work?
The answer is FOMO or “fear of missing out.” FOMO is something that affects most people, especially online shoppers.
The idea is that when we see other people getting benefits from a product we don’t have, our urge to get that product suddenly increases. It’s what drives a lot of consumer decision making all the way from influencer marketing to a friend recommending a restaurant we’ve never tried.
As the name suggests, we simply don’t want to miss out on any positive experience we see others having.
Smart marketers know how to use FOMO to get hesitant shoppers to make a purchase. And live sales notifications are one of the easiest tools to use that to effectively leverage FOMO.
Now, you can get great results with live sales notifications for your BigCommerce store.
When people are casually browsing your site’s products, they’ll see when a real-time purchase was made.
This will increase their desire for the product they were interested in, make your brand seem more trustworthy (because it’s popular), and motivate your hesitant shoppers to take action.
With that in mind, let’s turn out attention to creating your BigCommerce live sales notification in order to boost sales.
Create BigCommerce Live Sales Notifications
Getting your BigCommerce live sales notification is simple. You can do everything in just 5 steps.
But before we dive into the tutorial, you’ll need to sign up for a TrustPulse account.
With TrustPulse, you can show your live sales notification for up to 500 sessions without paying a thing. Then, if you choose to upgrade, you’ll still only pay a fraction of the cost compared to the nearest competitor.
While most other live sales notification software range from $15 – $30/month, paid plans with TrustPulse start as low as $4/month.
For more information on how TrustPulse’s pricing compares with similar software, check out this review of FOMO vs. UseProof vs. TrustPulse.
Otherwise, sign up for your TrustPulse account today!
Step 1: Select a Live Sales Notification Campaign
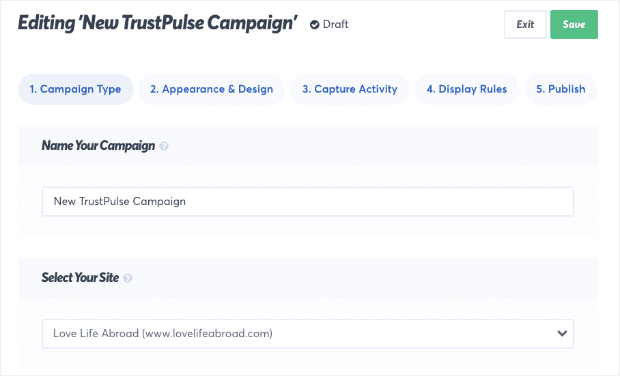
Once you’ve signed up for your TrustPulse account, you can head over to your dashboard to start building your live sales notification.
The first thing you’ll do is name your new campaign and connect it to your website:
If your BigCommerce site isn’t connected to TrustPulse yet, no worries. That part is super easy. Just follow this quick tutorial on how to connect TrustPulse with BigCommerce.
When you’ve integrated TrustPulse with BigCommerce, your website will appear in the drop-down menu.
Now you’ll need to decide which campaign you want to use for your BigCommerce live sales notification:
- Recent Activity
- OnFire
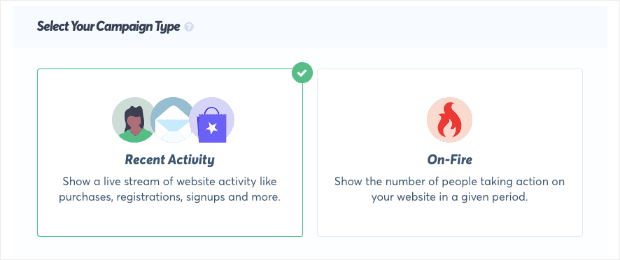
Both of the campaigns can help you boost sales, but they each work best in different contexts. Recent Activity will show a live sales notification when an individual makes a purchase on your site. These look something like this:
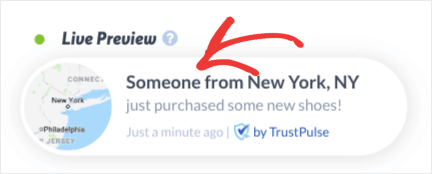
When available, the live sales notification will even include your customer’s name. This helps show your site’s visitors that real people around the world are purchasing your products.
As a result, your online store builds credibility, and your casual site browsers are more likely to turn into paying customers.
On-Fire is similar in the way it leverages FOMO but works best when you’re expecting many people to take the same action on your site. That’s because On-Fire campaigns display the number of people who’ve made a purchase:
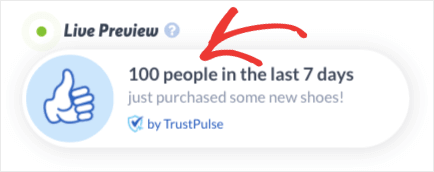
That makes On-Fire campaigns great for showing pre-orders, flash sales, or any other type of sale where you expect a high volume of customers.
Today, we’ll select a Recent Activity campaign:
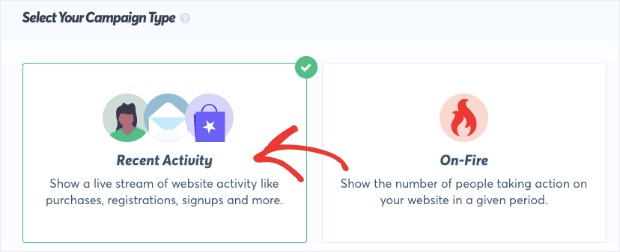
Again, these are great for common types of sales on your BigCommerce store. They’re perfect for building trust with your potential customers and leveraging FOMO to get people to take action.
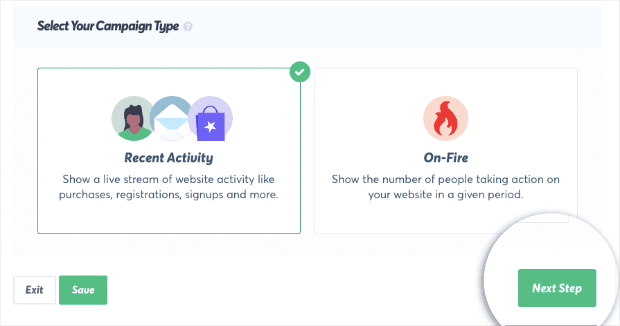
After you’ve selected Recent Activity, click Next Step:
Step 2: Modify Your BigCommerce Live Sales Notification
One of the biggest components of your live sales notifications will be the way it looks. Your message should match your brand’s style and voice. Fortunately, TrustPulse gives you complete control over these aspects of your campaign.
You can change your live sales notification’s:
- Language
- Visitor name
- Message text
- Message link
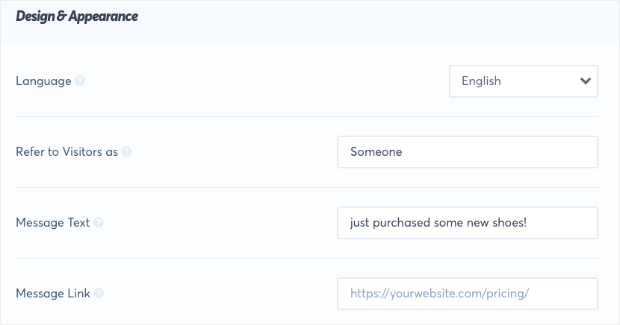
And much more. It’s really important to remember that last option (Message Link).
That’s because you want to make sure to keep your customer’s online experience as frictionless as possible. When you display a live sales notification, you want to give your potential clients quick and easy access to the same product.
Adding a message link will allow them to get to the product with a single click.
Interested in knowing more about how to improve user experience (UX) with personalization? Read this post on 15 smart eCommerce personalization examples that increase sales.
You’ll also want to add an image to your live sales notification. If you’re selling one product on your website, you can display a high-quality image of that product.
Uploading your images is easy and can be done with the click of a button:

Or, you can set up multiple campaigns with specific URL triggers so the right product image will appear if you sell multiple things from your store.
But if you don’t want to create lots of different campaigns (if you have many different products on your site), that’s no problem. You can use a map icon that shows where in the world someone made their purchase from:
![]()
Or simply use a pre-made icon:
![]()
These options add visual components to your live sales notifications while saving you tons of time and energy.
The bottom line is that TrustPulse allows you to personalize your live sales notifications in whichever way you think will lead to the biggest boost in conversions and sales.
Finally, there are the Advanced Settings where you can modify the text, font, or color of your campaign, among other options:
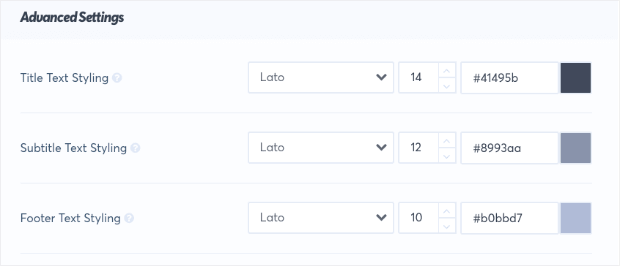
Here’s the live sales notification we built for today’s demo in less than 2 minutes:
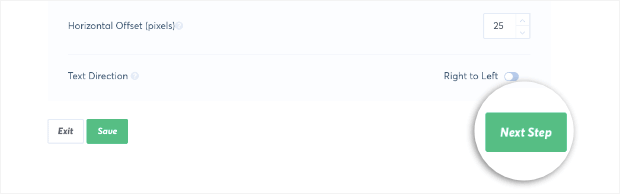
After you’ve built the perfect live sales notification for your BigCommerce store, click Next Step:
Step 3: Capture Live Sales from Your BigCommerce Store
Once you’ve designed your live sales notification, it’s time to set the trigger for your campaign. By that, we simply mean you need to configure which action will display the live sales notification on your BigCommerce site.
For this, you have 2 options:
- AutoMagic
- Zapier
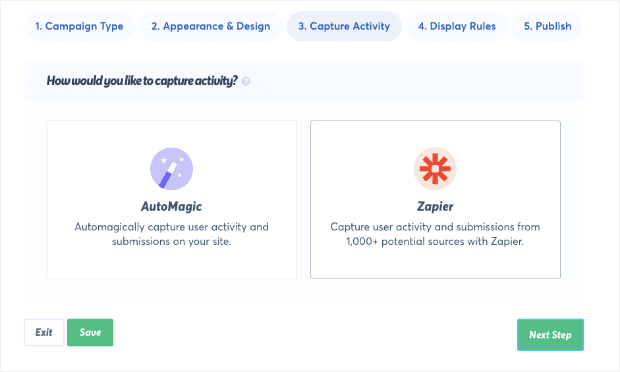
AutoMagic will let you create a display trigger for your live sales notification whenever someone takes an action on your site. This includes making a purchase.
Zapier, on the other hand, creates a trigger from actions that are taken off of your site. This would be like when someone leaves you a review on Google My Business, for example.
Even though the action didn’t take place on your website, you can still show a social proof notification.
The Zapier integration allows you to create triggers for when people interact with your brand from over 1,000 websites.
But, for today’s tutorial, we’re using TrustPulse to build a live sales notification. That means we’ll only be dealing with purchases made on your BigCommerce store.
For that, we’ll go with AutoMagic:

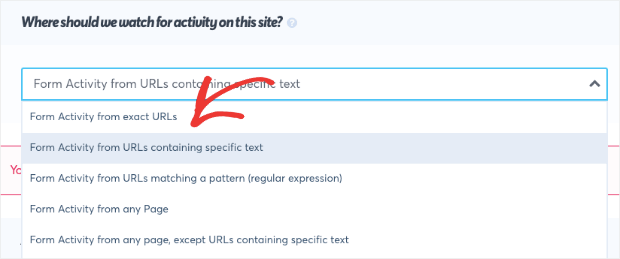
Now, you’ll see the question Where should we watch for activity from this site?. Underneath, there will be a drop-down menu. From the options that appear, select Form activity from URLs containing specific text:
Then you’ll need to create the rule that will trigger your live sales notification.
You’ll see the heading called Add one or more page rules. Underneath the drop-down menu, the first part of your domain will be on the left-hand side. On the right, you’ll need to enter the part of your URL slug that is connected with your BigCommerce checkout page:
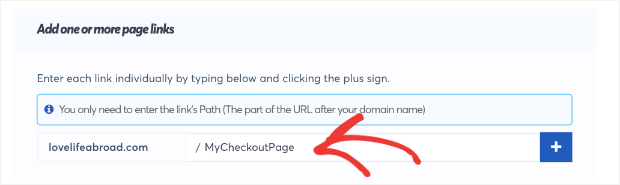
For BigCommerce stores, that usually means typing in the word “checkout.” Here’s an example of the checkout page for the popular BigCommerce store SkullCandy:
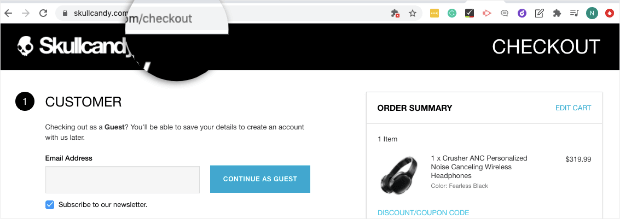
When users go through the checkout process, TrustPulse will capture the activity from your checkout page URL. Then, your BigCommerce live sales notification will appear to other users shopping in your store.
Now, you just need to configure where this notification will appear across your site.
To do so, click Next Step:

Step 4: Choose Where to Display Your Notification
At this point, you’ve created your live sales notification, designed it, and set up the appropriate trigger.
The only thing left before publishing your campaign is to determine where the notification will appear across your site.
By default, your live sales notification will display on every page of your BigCommerce store:
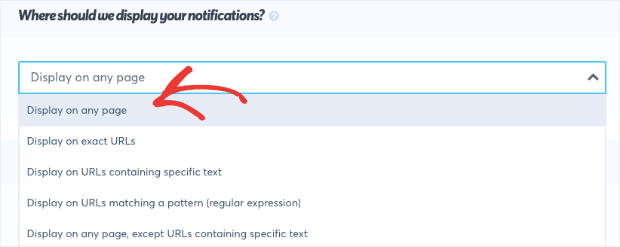
You can change that by selecting another option from the drop-down menu.
You can choose to show your notification on:
- Exact URLs
- URLs containing specific text
- URLs matching a pattern
And much more. For this tutorial, though, we’ll leave the default settings for our BigCommerce live sales notification.
That’s because this is the best chance for improving site-wide sales.
Next, you’re able to modify the Notification Settings, including:
- Delay between the sale and the notification (in seconds)
- How long your notification will appear on the screen
- Delay between separate notifications (in seconds)
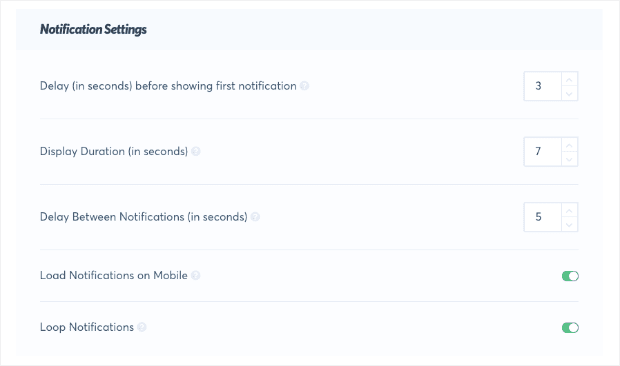
You also have Advanced Settings that let you:
- Hide anonymous notifications
- Show notifications as anonymous
- Permanently hide notifications when closed
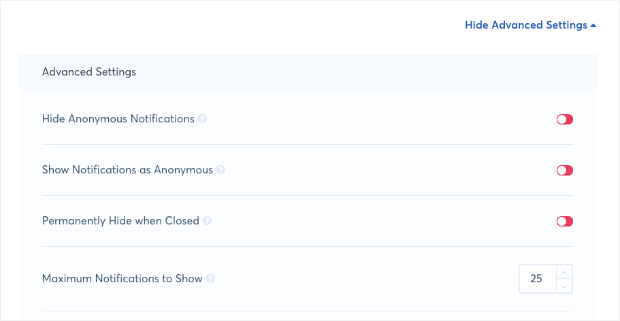
These rules help you specify when your live sales notification will appear on your BigCommerce store and for how long. This ensures that you’re showing your live sales notification not only to the right people but also at the right time in their customer journey.
Once you’ve configured your display rules, click Next Step:
Step 5: Launch Your Live Sales Notification
All that’s left is to publish your BigCommerce live sales notification.
First, though, review your campaign to make sure it looks and functions exactly how you want it to. When you’re happy with the result, click Launch Your TrustPulse Campaign:
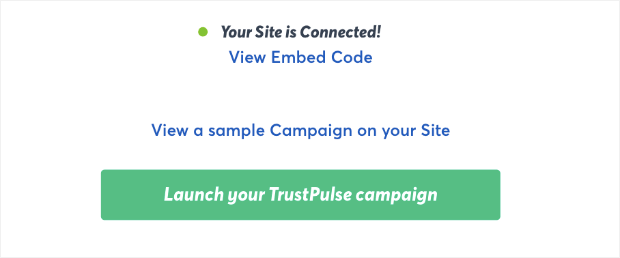
If you get a warning message that says your TrustPulse account isn’t connected to your site, no worries.
Simply refer back to the post that shows you how to integrate TrustPulse with BigCommerce.
And that’s it! Your live sales notification is ready to go.
We hope you enjoyed this tutorial. And if you did, you’re probably interested in learning more ways to boost trust and generate more profit. For that, we highly recommend you check out the following articles:
- How to Add Social Proof Notifications on Your Website
- How to Increase eCommerce Sales Now: 8 Ideas You Need to Try
- Ultimate Guide to Using Trust Badges to Boost Sales and Conversions
These articles have everything you need to improve sales on your site and increase profits.
